Blog

Aug 18, 2026

What Is Positive Pay and How Does It Protect Your Business Checks
Quick Answer: Positive pay is a bank fraud prevention service where you send your bank a list of checks you issued (check number, amount, and payee) after each check run. When those checks are presented for payment, the bank compares each one against your list. Checks that match clear automatically. Checks that do not match are flagged as exceptions, and you decide whether to pay or return them before the funds are released. It is one of the most effective protections against altered and counterfeited business checks.


What Is Positive Pay

Positive pay is a bank fraud prevention service that matches every check presented for payment against a list of checks your business actually issued. The bank only releases funds for checks that appear on your list with matching details. Every check that does not match is flagged for your review before any money moves.

The concept is simple: if you issued it, you can prove it. If you did not issue it, the bank stops it.

Positive pay addresses the most damaging types of check fraud directly. When a criminal alters the amount or payee name on a real check you wrote, positive pay catches the mismatch against your original issue record. When a criminal counterfeits a check using your routing and account number, positive pay flags it because the check number was never in your issue file. When a check appears that your business never wrote at all, positive pay rejects it automatically.

Most business banking accounts offer positive pay as a free or low-cost add-on service. The time cost is uploading a check issue file after each check run , a process that takes a few minutes for most businesses using accounting software like QuickBooks. For a complete overview of the security features that complement positive pay on the check stock itself, see the guide on what are the most important features of business checks.
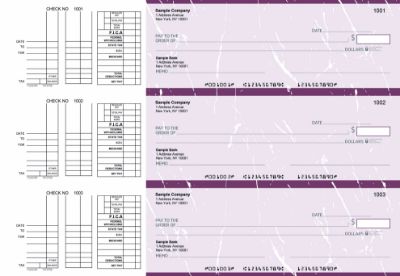
Burgundy


How Positive Pay Works Step by Step

Positive pay runs in the background of every check your business issues. Here is the complete process from issuance to clearance.


Step 1: Issue Checks From Your Business Account

You write checks or print them through your accounting software. Each check carries a unique sequential check number pre-printed on the stock. Your accounting software records the check number, payee name, and dollar amount for every check in the batch.


Step 2: Transmit Your Check Issue File to the Bank

After issuing checks, you upload a check issue file to your bank. This file contains one record per check: the check number, dollar amount, and payee name. Most banks accept this file through their online business banking portal. Some accept it via secure file transfer. Some accounting platforms including QuickBooks can generate and transmit this file directly. The issue file must be uploaded before the checks you issued can be presented for payment , typically by the end of the same business day you issue checks, or by the bank's stated cutoff time.


Step 3: Your Check Reaches the Payee

The payee receives your check by mail or in person, endorses it, and deposits it at their bank. This step is identical to a standard check transaction.


Step 4: The Check Is Presented to Your Bank

The payee's bank sends the check through the check clearing system. Your bank receives the presented check with the check number, dollar amount, and payee name from the MICR line and check face.


Step 5: Your Bank Matches the Check Against Your Issue File

This is where positive pay does its work. Your bank's automated system compares the presented check against your issue file. It checks three data points: the check number, the dollar amount, and (if your bank offers payee positive pay) the payee name. If all three match an entry in your file, the check clears automatically. If any field does not match, or if the check number does not appear in your file at all, the bank creates an exception.

Timing matters: Your issue file must reach your bank before the checks you issued are presented for payment. Most businesses upload the issue file the same day they issue checks. If you mail a batch of checks today, upload the issue file today. Checks typically take one to three business days to reach the payee and be deposited, giving you a comfortable window , but only if you upload promptly.


Three Types of Positive Pay

Not all positive pay services work the same way. Banks offer three variations, and understanding which your bank offers determines how you set it up and how much protection you get.


Standard Positive Pay

The most common form. You proactively transmit a check issue file to the bank after each check run. The bank compares presented checks against your file by check number and dollar amount. Any mismatch or unknown check number becomes an exception you must resolve. Standard positive pay is the most automated and lowest-maintenance form once set up, because the daily review only covers exceptions rather than every check.


Reverse Positive Pay

In reverse positive pay, the bank sends you a daily report of all checks presented for payment against your account. You review the list and flag any checks you did not issue or any amounts that are incorrect. The bank then returns flagged checks and pays the rest.

Reverse positive pay places more of the review burden on your team because you review every presented check rather than just exceptions. It is simpler to set up because you do not maintain an issue file. It is appropriate for smaller businesses with lower check volumes or for businesses whose banking setup does not support standard issue file transmission.


Payee Positive Pay

An enhanced version of standard positive pay that adds payee name matching to the check number and amount verification. In standard positive pay, a criminal who alters only the payee name on a real check while keeping the correct amount and check number may pass the match. Payee positive pay catches this scenario by comparing the payee name on the presented check against the payee name in your issue file.

Payee positive pay requires that your issue file include the payee name for every check and that the name on the check face matches your file exactly. This is more demanding to maintain , a payee name with a minor spelling difference between your records and the check face can generate false exceptions. It offers the highest level of protection against payee name fraud when maintained correctly.


What Fraud Positive Pay Prevents

Positive pay targets three specific fraud scenarios that cause significant financial losses for businesses every year.


Altered Checks

A criminal intercepts a legitimate check you issued, changes the payee name or dollar amount, and deposits the modified check. Standard positive pay catches amount alterations because the presented amount does not match your issue file. Payee positive pay also catches payee name alterations. Without positive pay, altered checks can clear before the fraud is discovered, and recovery depends on your bank's fraud investigation process and timing.

Check washing is a particularly common form of alteration fraud. A criminal uses chemical solvents to erase the ink on a real check and rewrites a new payee and amount. Positive pay catches this because the rewritten amount differs from your issue file record. For a full guide on how check washing works and how security-featured check stock resists it, see how QuickBooks checks prevent check washing.
Blue

Counterfeited Checks

A criminal creates a fake check using your business name, routing number, and account number , information visible on any check you write. The counterfeited check has a check number your business never assigned. Positive pay catches this because the check number does not appear in your issue file. The bank flags it as an exception immediately.


Checks Your Business Never Issued

A check appears for payment that your business simply never wrote. This can happen through account information theft, internal fraud, or mistaken routing. Any check number not in your issue file is automatically flagged as an exception regardless of whether the amount and payee look plausible.


How Positive Pay Handles Exceptions

An exception is any check presented for payment that does not match an entry in your issue file. When an exception occurs, your bank notifies you , typically by email or through a banking portal alert , and gives you a decision deadline.


The Exception Decision

You have two choices for each exception: pay or return. If you choose to pay, the bank releases the funds and the check clears. If you choose to return, the bank sends the check back unpaid. Most banks give you until a stated cutoff time on the same business day to make the decision , often 10 AM or 12 PM Eastern. If you do not respond by the cutoff, the bank applies its default decision, which is either pay or return depending on how you configured the service at setup.

Set your default decision carefully: When you enroll in positive pay, your bank will ask for your default exception decision: pay or return. Setting "pay" as your default means unresolved exceptions clear automatically, which defeats much of the protection. Setting "return" as your default means unresolved exceptions are rejected, which protects you but may return legitimate checks if your team misses a deadline. Most businesses with active accounts payable operations set "return" as default and establish a clear internal process for reviewing exceptions daily.


Legitimate Exceptions

Not every exception is fraud. Exceptions also happen when: you forgot to upload the issue file for a check batch, you issued a replacement check with a corrected amount but uploaded the original amount, you made a data entry error in the issue file, or the payee name in your file does not exactly match the name on the check face (in payee positive pay). A well-run positive pay process minimizes legitimate exceptions through consistent issue file uploads and accurate data entry.


How to Set Up Positive Pay With Your Bank

Setting up positive pay involves four steps. The exact process varies by bank, but the sequence is consistent.


Step 1: Contact Your Bank

Call or log into your business banking portal and ask about positive pay for your checking account. Confirm which type is available (standard, reverse, or payee), what the cost is (many banks offer it free), and what file format they require for issue file uploads.


Step 2: Confirm the Issue File Format

Your bank will specify the exact file format they accept for check issue data. Common formats include CSV, fixed-width text, or BAI2. Your accounting software must be able to export check issue data in that format. QuickBooks can export check data that most banks accept with minor formatting. If your software cannot generate the required format automatically, your bank's treasury management team can often provide a spreadsheet template you can fill in manually.


Step 3: Verify Your Check Number Sequence

Positive pay relies on sequential, unique check numbers. Before enrolling, confirm that your current check stock has a clear, consistent sequential numbering starting point, and that your accounting software and physical check supply are synchronized. Any gap or duplication in check numbers creates exceptions from the first day of enrollment. For help confirming your current check number sequence, see the guide on maintaining an accurate check register.


Step 4: Establish Your Internal Upload Process

Positive pay only works if someone uploads the issue file consistently and on time. Establish a clear internal process: who uploads the issue file, when (same day as check issuance), and what happens if that person is unavailable. A missed upload means legitimate checks become exceptions, creating unnecessary work and potential payment delays.


What Check Stock Positive Pay Requires

Positive pay works by reading the MICR line at the bottom of each presented check. The bank's automated system extracts the check number, routing number, and account number from this line and uses the check number to look up your issue file entry. For positive pay to work accurately, your check stock must meet these requirements.
Blue


ABA-Compliant MICR Encoding

The routing number in your MICR line must be ABA-compliant and verified against the Federal Reserve E-Payments Routing Directory. An incorrect routing number causes checks to misroute through the clearing system before they even reach your bank's positive pay matching step. Checkomatic verifies every routing number against the Federal Reserve directory before production begins on every order.


Correct Sequential Check Numbers

Every check in your positive pay issue file is identified by its check number. The check number pre-printed on each check must match the check number your accounting software assigns to that payment. Pre-printed check stock from Checkomatic ships with sequential check numbers that sync with QuickBooks and other accounting platforms so your software check number and physical check number stay aligned automatically.


Consistent MICR Line Positioning

Bank reader-sorter machines read MICR lines at a specific position on the check. Off-center or incorrectly positioned MICR fields create read errors that generate false exceptions in your positive pay system. All Checkomatic business checks are manufactured to ABA specification for MICR line position, ensuring reliable automated reading at every bank.


Security Features That Complement Positive Pay

Positive pay is a banking layer of protection. The check stock itself is a physical layer. Using security-featured check stock alongside positive pay gives you two independent lines of defense. If a criminal attempts to alter a check, the chemically sensitive paper resists washing, the microprinting degrades on photocopies, and the void pantograph appears if the check is scanned. If the altered check still reaches the bank, positive pay catches the data mismatch. Both layers working together significantly reduce the probability of a successful fraud attempt.

For all business check formats compatible with positive pay and accounting software, see business checks and QuickBooks checks at Checkomatic.


Who Needs Positive Pay

Positive pay is beneficial for any business that writes checks, but it is particularly important for businesses in these situations.


Businesses That Mail Checks Regularly

Every check that goes into outgoing mail is a potential target. Checks stolen from mailboxes are a primary source of altered check fraud. Positive pay catches alterations when the modified check is presented, providing a second line of defense after the check leaves your hands.


High-Value Accounts Payable Operations

A $50,000 vendor payment that gets altered to $500,000 is a catastrophic loss. High-value payments deserve the extra verification layer that positive pay provides. At larger payment amounts, the cost of a single fraud incident far exceeds years of positive pay maintenance time.


Construction, Property Management, and Nonprofits

These industries see elevated check fraud rates because they typically write large numbers of checks to a diverse set of payees, making it harder to spot an unauthorized check before it clears. Positive pay automates the verification that would otherwise require manual review of every cleared check.


Businesses That Have Experienced Check Fraud Before

A business that has experienced check fraud once is at higher risk of being targeted again. Positive pay removes the vulnerability by making every check traceable to a specific issued record.


Businesses Using Payroll Checks

Payroll checks are particularly attractive fraud targets because they are issued on a predictable schedule, often for similar amounts, and employees receive them directly , making it easier for a criminal to study the check format. Positive pay verifies every payroll check number and amount against your payroll issue file. For the complete guide to payroll check security, see business checks for payroll.


Common Positive Pay Mistakes

Mistake 1: Not Uploading the Issue File on the Same Day

If you issue checks on Monday but do not upload the issue file until Wednesday, checks mailed Monday may have already been deposited and presented for payment. The bank flags them as exceptions because they are not yet in your file. Legitimate checks get held up while you confirm them. Always upload the issue file the same day you issue checks.


Mistake 2: Setting the Default Exception Decision to "Pay"

If your team misses an exception deadline and your default is "pay," the exception clears automatically , including fraudulent checks. Set your default to "return" and establish a process to review exceptions every morning before your bank's cutoff time.


Mistake 3: Inconsistent Check Numbering

Reusing check numbers, skipping numbers, or allowing your software check number and physical check number to fall out of sync creates constant false exceptions. Every check in every batch must have a unique sequential number that matches between your issue file and the physical check. Maintain your check register carefully to track every check number used. See the full guide to check register maintenance.


Mistake 4: Not Enrolling in Payee Positive Pay

Standard positive pay matches check number and amount but not payee name. A criminal who alters only the payee name while keeping the correct amount and check number passes standard positive pay. If your bank offers payee positive pay, the additional protection is worth the extra effort of maintaining accurate payee names in your issue file.


Mistake 5: Using Check Stock With Non-Sequential Numbers

Ordering check stock that does not continue your existing sequential numbering creates immediate confusion in your positive pay system. Always order replacement check stock that picks up your sequential numbering exactly where your current supply ends. For guidance on maintaining check number continuity across reorders, see how to reorder business checks online.


What Customers Say About Checkomatic

All reviews below are published on checkomatic.com and reproduced verbatim. Source: checkomatic.com/quickbooks-starter-pack-product, 4.5 stars from 166 verified reviews.

"Been with them for 15 years. Always reliable, always good quality, good service. What more can you ask for?"

ATV Inc. | ★★★★★ 5/5 | April 5, 2024 | Source: checkomatic.com/quickbooks-starter-pack-product

"ASJ Wilson Construction has been a client of checkomatic for some years now and they've never disappointed this company. Thank you checkomatic for all that you do."

ASJ Wilson Construction | ★★★★★ 5/5 | June 6, 2024 | Source: checkomatic.com/quickbooks-starter-pack-product

"We use CheckoMatic for all of our check needs! They have great prices and we receive our products in a timely manner!"

CG's Tax Service | ★★★★★ 5/5 | September 18, 2024 | Source: checkomatic.com/quickbooks-starter-pack-product

"First time ordering and I am super impressed with the quality of the checks. No issues with delivery. I will be ordering again!"

TClinton | ★★★★★ 5/5 | April 9, 2025 | Source: checkomatic.com/quickbooks-starter-pack-product

"I got 500 checks for less than half of what the bank wanted for 200!"

VVA Voucher Checks (Vietnam Veterans of America) | ★★★★★ 5/5 | July 6, 2024 | Source: checkomatic.com/quickbooks-starter-pack-product

"Affordable and efficient. My go-to business check printer."

Doe | ★★★★★ 5/5 | January 24, 2025 | Source: checkomatic.com/quickbooks-starter-pack-product


Why Choose Checkomatic for Positive Pay Compatible Business Checks

ABA-Verified MICR on Every Order

Every routing number is verified against the Federal Reserve E-Payments Routing Directory before production begins. Correct MICR encoding is the foundation of positive pay accuracy. Incorrect routing numbers cause misrouting and failed matching before positive pay even runs. Checkomatic's manufacturing process eliminates this risk on every order.


Pre-Printed Sequential Check Numbers

Every Checkomatic business check ships with sequential check numbers pre-printed in the correct MICR field position. Your accounting software check number and physical check number stay synchronized, minimizing the legitimate exceptions that waste your team's time during positive pay reviews.


Formatted to Match Your Accounting Software

Checkomatic business checks are pre-calibrated to match QuickBooks, Sage, MYOB, Xero, and over 500 other accounting platforms. This matters for positive pay because your software generates both the physical check and the issue file data. When both use the same check number sequence and formatting, your positive pay data is accurate from the first batch. Browse all formats at computer checks for business.


Six Security Features Standard on Every Check

Positive pay catches data mismatches. Security-featured check stock resists physical tampering before mismatches occur. Checkomatic includes chemically sensitive paper, microprinting, void pantograph, UV fluorescent fibers, heat-sensitive ink, and genuine watermark on every business check order at the base price. No security upgrade fee. Two independent fraud defense layers on every check you issue.


In-House Manufacturing Since 1997

All checks manufactured at Checkomatic's own facility in Monroe, NY. No third-party printers. Consistent quality and specification compliance on every order. Standard production ships in 3 to 5 business days. For the complete range, see business checks and QuickBooks checks.
 

Aug 17, 2026

7-Ring Check Binders: What They Are and How to Use Them

What Is a 7-Ring Check Binder

7-ring check binder definition: a 7-ring check binder is a specialized ring binder designed to hold 3-on-a-page manual business checks, check stubs, and related business check accessories. It uses seven metal rings spaced to align with the 7-hole punch pattern on standard business check sheets. The binder is sized for check sheets rather than letter paper, and includes organizational features specific to check management: a customizable spine label, interior pockets for deposit slips, and often a zippered pouch for pens, stamps, and other check-writing supplies.

What is a check binder in practical terms: it is the desk-side organizer for manual business check operations. When a business writes checks by hand rather than printing from accounting software, the 7-ring check binder holds the active check book within reach, protects blank checks from physical damage and unauthorized access, and serves as the organized retention file for all check stubs after the checks are detached and issued.

Bank-a-Count's product description captures the function directly: "The 7-ring check binder is used for storing and using your Manual Checks. The check binder not only stores checks, but it keeps all the deposit stubs in one location. This helps with bookkeeping purposes."

For the complete range of manual business check formats that go into a 7-ring binder, see our types of checks guide and our check diagram guide.


Why Check Binders Use 7 Rings Not 3

The 7-ring vs 3-ring check binder question is the most fundamental technical point about check binders, and the most consistently overlooked by anyone who has never seen a business check sheet. The answer is rooted in the physical dimensions of a business check sheet versus a standard letter sheet.

A standard 3-ring binder is designed for 8.5 x 11-inch letter paper. The three rings are spaced 4.25 inches apart, with the paper's three holes punched on the 11-inch side. The 8.5-inch width of the paper is supported across the ring mechanism when the binder is closed. The spacing and weight of standard copy paper are well matched to the 3-ring mechanism.

Business check sheets measure 13 x 9 inches (three checks per page). The seven holes are punched on the 9-inch side of the sheet (the binding edge). When the binder is open, the check sheet extends 13 inches horizontally. The check sheet paper is also heavier than standard copy paper because it contains security paper with embedded features.

If a 13-inch check sheet were held by only 3 rings, the center span between rings would be approximately 4 inches of unsupported paper on each side of the center ring. Under the weight of 100-200 check sheets in a full binder, the unsupported center portion would sag and eventually tear at the hole punches. Seven rings spaced approximately 1.25-1.5 inches apart across the 9-inch punched edge distribute the load evenly, eliminating the unsupported sag and preventing tearing.

TechChecks confirms the compatibility requirement is specific: "7-ring , for 3-on-a-page checks that have 7 holes." The check hole pattern and the binder ring count must match exactly.


The 7-Hole Punch Pattern on Check Sheets

Check binder hole pattern: the 7-hole punch pattern on 3-on-a-page business check sheets is an industry standard that ensures compatibility with any standard 7-ring check binder. 3-on-a-page checks 7-hole punch: all check manufacturers punch seven holes on the 9-inch binding edge of the check sheet. TechChecks describes the standard: "Punched to fit a standard 7-ring binder (sold separately)."

The holes are positioned within the 9-inch binding edge, roughly evenly spaced. When the punched check sheet is placed in a 7-ring binder, each of the seven rings passes through one of the seven holes, securing the sheet across its full width. The punch pattern is set at manufacture: you do not need to hole-punch business check sheets yourself. They arrive pre-punched from the check manufacturer.

Checkomatic's manual 3-on-a-page business checks are pre-punched with the standard 7-hole pattern to fit any standard 7-ring check binder. See our manual business checks for the full manual check range.


Check Binder Dimensions

Check binder dimensions vary slightly by brand and spine width but are consistent in their check-sheet-specific sizing:

  • Bank-a-Count standard binder: 9-5/8" x 13-1/2" (closed), 1-inch spine
  • Cardinal 7-ring check binder (Staples): 1.75" x 9.75" x 14.5" (closed)
  • Bindertek deluxe 7-ring check binder: 14.3" W x 9.8" H x 1.75" D (closed)
  • SmartResolution 3-to-a-page stub binder: 6-3/4" x 9-3/4" x 1-7/8" (closed, stub-only format)

The closed dimensions reflect the check sheet size (approximately 9-10 inches in one direction and 13-14 inches in the other) because the binder must fully contain the 13 x 9-inch check sheets. This is significantly larger than a standard letter-size 3-ring binder, which typically measures 11.5" x 10" closed. When purchasing a 7-ring check binder, confirm the interior dimensions accommodate your check sheet size before ordering.

Stub-only binders (which hold only the detached check stubs for record-keeping rather than the full check sheets) are smaller because check stubs are narrower than the full check sheet. The SmartResolution 6-3/4" x 9-3/4" stub binder is sized for the detached stub portion only, not the full 13 x 9-inch check sheet.


Check Binder Sheet Capacity

Check binder how many checks it holds depends on the spine width and whether you are holding full check sheets or stubs only.


Full 3-on-a-Page Check Sheet Capacity

A 7-ring check binder with a 1-inch spine holds approximately 225 sheets of 3-on-a-page check format. Bindertek's specifications confirm: "Sheet capacity: approximately 225 sheets in three-per-page format." Cardinal's binder listed at Staples also holds up to 225 sheets. Since each sheet contains three checks, a full 1-inch spine binder holds approximately 675 individual manual checks before the check portions are detached.

As checks are written and detached from each sheet, the stubs remain in the binder. The binder therefore maintains its approximately 225-sheet capacity throughout use, since stubs remain even after checks are issued. Over time, completed stubs accumulate in the binder to build the check record file.


Stub-Only Binder Capacity

For businesses that retain stubs in a separate check stub binder (smaller format for completed stub archiving), capacity is higher per unit of spine width. SmartResolution's stub binder holds 650-700 stubs. DesignsnPrint's larger stub binder holds 1,200-1,500 stubs. These stub-only binders serve as the archive file after the full check sheets have been used up and stubs are transferred for long-term retention.


Which Check Formats Fit in a 7-Ring Binder

3-on-a-page check binder compatibility: the 7-ring check binder is designed specifically for 3-on-a-page manual business checks. The standard 3-on-a-page check sheet measures 13 x 9 inches, with three checks printed per page in a landscape orientation. Each check measures approximately 8-1/4 x 3 inches. The 9-inch edge of the sheet carries the 7-hole punch pattern that aligns with the binder's seven rings.

Other manual check formats and their binder compatibility:


  • Manual AP checks (3-on-a-page): fits standard 7-ring check binder , the primary format this binder is designed for


  • Manual payroll checks (3-on-a-page): same sheet dimensions, same hole pattern, fits standard 7-ring check binder


  • Manual multi-purpose checks (3-on-a-page): same compatibility


  • Executive deskbook (compact 3-per-page): check with a different closed format, may have a dedicated binder or cover rather than a ring binder


  • Pocket checks: wallet-format, not binder-compatible


  • Computer check formats (check on top, check in middle): not for a 7-ring binder; these are printed from software and do not have 7-hole punch patterns


Bank-a-Count confirms the deposit slip compatibility: "The 7-ring check binder also holds your Three Per Page Business Deposit Tickets." Deposit tickets (deposit slips) in the 3-on-a-page format use the same 7-hole punch pattern and fit in the same binder, allowing check stubs and deposit records to be co-located in one organized reference file.


D-Ring vs Straight Ring Mechanisms

Check binder D-ring vs straight ring: both ring types are available in 7-ring check binders, and each has practical differences.


D-Ring Check Binders

D-ring mechanisms have a D-shaped cross-section rather than a round cross-section. When the binder is open, sheets rest flat against the straight edge of the D, distributing the sheet weight more evenly. D-ring binders also hold approximately 25% more sheets than round-ring binders at the same spine width because the flat edge of the D lets sheets lie closer together. Cardinal's 7-ring check binder uses a slant D-ring design, which provides easy page-turning while keeping check sheets securely seated.


Straight Ring (Round Ring) Check Binders

Straight ring or round ring mechanisms have a circular cross-section. They are the traditional ring binder design. Bindertek's deluxe 7-ring check binder uses a straight D-ring mechanism with zig-zag ring closure for secure sheet retention. Round-ring binders may cause more page curl than D-ring binders in heavy use because the round ring lifts the inner edge of each sheet slightly away from the binder face.

For a business check binder that will be actively used daily with frequent page-turning, a D-ring mechanism is the better practical choice. For a binder used primarily for archival storage of completed check stubs with infrequent page access, either mechanism is adequate.


Check Stub IRS Retention Rules

Check stub IRS 4 years retention: the IRS specifies different retention periods for different types of records. For employment tax records (payroll), the IRS requires records to be kept for at least four years from the due date of the return or the date the tax was paid, whichever is later. Check stubs from payroll check runs fall under this employment tax records category.

Check stub record keeping for general business expense records falls under the general IRS 3-year rule for most returns: keep records for at least three years from the filing date of the return or the due date, whichever is later. However, there are exceptions: the IRS can audit returns up to six years back if it suspects underreported income of more than 25%, and there is no statute of limitations for fraudulent returns. The IRS's own publication confirms the baseline: "Keep all records of employment taxes for at least four years."

Check stub audit trail value: the check stub is the primary source document supporting an AP or payroll deduction on a business tax return. It shows the payee, the amount, the check number, and the date. Without the stub, a business claiming a deduction for a payment must reconstruct the record from bank statements, which is possible but more laborious and less authoritative during an audit.

Practical retention recommendation: keep check stubs in the 7-ring check binder for at least four years from the relevant tax year, clearly labeled on the binder spine with the year range and account number. After four years, stubs can be shredded unless there is a pending audit, dispute, or other reason to retain them longer.


How to Label the Binder Spine

Check binder spine label: the spine of a 7-ring check binder typically includes a label holder or a clear window where a printed or handwritten label can be inserted. SmartResolution's stub binder specifically notes: "Spine displays year, account and check numbers, allowing for quick and easy access to your former financial information."

Check binder spine year account number: a properly labeled binder spine includes three pieces of information:

  1. Year or year range: the calendar year(s) during which the checks in this binder were written. Example: "2024" or "2024-2025"
  2. Account number (last 4 digits): the checking account used for these checks. Using only the last 4 digits protects the full account number if the binder is briefly visible to unauthorized individuals.
  3. Check number range: the first and last check number contained in this binder. Example: "1001-1675"

A complete spine label example: "2024 / Acct ...4321 / CK 1001-1675." With this label, any staff member retrieving a specific check stub can scan the shelf for the correct binder within seconds without opening each one.

For businesses that maintain multiple checking accounts with separate check binders, color-coding the binder covers (one color per account) in addition to spine labeling creates an immediate visual identifier. Many check binder manufacturers offer black, burgundy, or navy cover options to support this practice.


Storing Deposit Slips in the Check Binder

Check binder deposit slip storage: bank-a-Count confirms that 7-ring check binders are designed to hold both manual checks and matching deposit slips: "The 7-ring check binder also holds your Three Per Page Business Deposit Tickets."

When manual business deposit slips are ordered in the 3-on-a-page format with the same 7-hole punch pattern as the checks, they can be stored in the same 7-ring binder. This co-location serves a practical purpose: the person writing checks and the person preparing deposits work from the same binder, keeping the complete payment and deposit record in one physical location.

A common organization approach is to keep the current check section at the front of the binder, with deposit slips stored in a separate tabbed section at the back. As deposits are made, the used deposit slip stubs accumulate alongside the check stubs, creating a complete chronological record of both outgoing payments (checks) and incoming deposits in one indexed file.

For matching Checkomatic deposit slips in the 3-on-a-page format compatible with your check binder, see our business deposit slips.


The Zippered Pouch and Internal Pockets

Most 7-ring check binders include one or more interior organizational features beyond the ring mechanism itself. These features serve the practical needs of the check-writing workstation.


Zippered Pouch

Check binder zippered pouch: TechChecks' binder description confirms "Convenient zippered vinyl pouch for easy storage and access for stubs, envelopes, business cards, pens and more." The zippered pouch is typically attached to the inside front or back cover and holds small items that need to remain with the check binder: a pen or two (blue or black permanent ink for check writing), extra check envelopes, a small calculator, business cards of frequent payees, and a checkbook register or payment log.

Cardinal's description at Staples adds: "Three interior removable pockets for added organization. Included removable zipper pouch helps you organize your check-writing needs." The removable design allows the pouch to be detached and replaced if it wears out, without replacing the entire binder.


Clear Plastic Interior Pockets

Bindertek's deluxe binder includes "two internal front-cover clear plastic pockets" and a "hole-punched clear plastic folder pocket with top flap." The clear pockets typically hold items that need quick visual access without opening the pocket: a printed voided check for reference, account information, or the check endorsement stamp for depositing incoming checks.

For Checkomatic's self-inking endorsement stamp, the interior pocket of the check binder is a practical storage location: the stamp is always at the workstation where checks are written, ready for use when incoming checks need to be endorsed and deposited.


Check Binder vs Check Register

A check binder and a check register serve different but complementary functions in a manual check system. Understanding the difference prevents confusion about what each document does.

The check binder holds the physical check sheets and stubs in organized binder form. It is the physical custody system for blank and partially completed checks and for stub records after checks are issued. It is a storage and organization tool.

The check register is a running transaction record listing every check written: check number, date, payee, and amount. It also records deposits, and the running balance after each transaction. It is an accounting tool. For personal checks, the check register is typically included inside a checkbook cover. For business checks in a 7-ring binder, the check register may be a separate booklet, a section of the binder, or maintained entirely within accounting software.

For businesses using accounting software like QuickBooks, the software maintains the electronic check register and all check transaction detail, making a physical check register booklet redundant. For businesses operating fully manually without accounting software, a physical check register maintained alongside the 7-ring binder is necessary for AP and payroll tracking. For more on check register setup and use, see our check register guide and our checkbook management guide.


Check Binder as a Physical Security Control

Check binder security physical access: the 7-ring check binder serves as more than an organizational tool. In a complete business check security framework, the check binder is a physical access control device for blank check sheets.

Blank check sheets stored in a 7-ring check binder are negotiable instruments from the moment they are issued: they already carry the account's MICR line with routing and account numbers. If blank check sheets are removed from the binder without authorization, they can be completed and presented for payment, triggering a fraud loss. The check binder's physical presence at a specific workstation limits who can access blank checks.

Check binder blank check security: the binder should live in a locked desk drawer or filing cabinet when not in active use. Access to the binder is limited to the account holder, the designated check writer, and authorized AP staff. This physical access control is a basic but effective segregation of duties control: only authorized personnel can access blank checks, reducing the risk of unauthorized check issuance.

For businesses that apply formal internal controls (SOC 2, accounting firm-recommended controls, or bank-suggested AP procedures), the check binder's location, access log, and inventory of blank check sheets may be subject to periodic reconciliation. The starting check number and ending check number in the binder, compared to the check register, should account for every check sheet in the batch. Unexplained missing check sheets indicate potential unauthorized check issuance and warrant immediate investigation.

For more on check fraud prevention methods including how physical access controls fit the broader fraud prevention framework, see our check fraud prevention guide.


Locking Check Binders for Dual-Control Environments

Locking check binder: for businesses that require formal dual-control over blank check access (two authorized persons must both be present for blank check issuance, a control common in nonprofit organizations, government agencies, and businesses with audit requirements), a locking check binder provides a physical enforcement mechanism.

Check binder locking mechanism: a locking binder uses a hasp or latch secured with a padlock or combination lock. The binder cannot be opened without the key or combination. In a dual-control system, two keys or combination halves are held by two separate authorized individuals, neither of whom can open the binder alone. This is a physical implementation of the segregation of duties control that prevents any single person from having unchecked access to blank checks.

Locking check binders are also appropriate for businesses that store the binder in a shared office space where other staff members have physical proximity to the binder but should not have access to blank check sheets. The lock provides a tamper-evident physical barrier that a standard cover does not.


Setting Up a Complete Manual Check System

Manual check system setup: manual check binder setup: a complete manual business check system has four components that work together. Understanding how they fit together helps businesses that are transitioning from software-printed checks to manual checks, or setting up a new account with manual check operations.


Component 1: Manual Business Checks

The manual business check workflow starts here: checks are written by hand, stubs remain in the binder, completed checks go to payees.

The core of the manual check system is the check sheet itself. Checkomatic's manual business checks range covers accounts payable (manual AP checks), payroll, multi-purpose, and executive deskbook formats. Each format is available in 3-on-a-page layout with the standard 7-hole punch pattern for binder compatibility. All manual checks include pre-printed payee, amount, and stub fields for manual handwriting. CPSA certified (CPSA certified) security paper ships on every order.


Component 2: The 7-Ring Check Binder

The binder holds the active check sheets at the workstation, organizes completed stubs, and stores deposit slips. Checkomatic's 7-ring check binder is sized for standard 3-on-a-page business check sheets and includes internal pockets and spine labeling capability. Start a new binder at the beginning of each calendar year or when the current binder reaches capacity, labeled with the year and check number range.


Component 3: Business Deposit Slips

Matching business deposit slips in 3-on-a-page format store in the same binder as the checks, keeping the complete payment and deposit record in one location. Ordering deposit slips matched to your Checkomatic check account ensures the pre-printed account information is consistent across both documents.


Component 4: Check Envelopes

For mailed checks, check envelopes complete the mailing step. Manual business checks are inserted into envelopes without the window-alignment requirement of computer-printed checks, since the payee address is written on the envelope directly for manual operations, or the check format includes a window-visible address field. Standard No.9 envelopes are the common pairing for manual checks.


Who Needs a 7-Ring Check Binder

Check binder who needs one: a 7-ring check binder is specifically needed by businesses and organizations that use manual (handwritten) business checks in the 3-on-a-page format.

Check binder small business: small businesses that write fewer than 20-50 checks per month and prefer manual AP and payroll processes over software-printed checks are the primary users. A restaurant, retail shop, or service business paying a small number of regular vendors by check is a typical manual check operation.

Nonprofit organizations frequently use manual checks because their governance structures (requiring two signatures, dual-control board oversight) are naturally accommodated by the manual check workflow. The locking check binder is particularly appropriate for nonprofit AP operations where financial controls are a governance priority.

Sole proprietors and small contractors often prefer manual checks for simplicity. Writing a check by hand takes less time than setting up accounting software printing for small volumes, and the check stub provides an adequate expense record for simple tax filings.

Manual payroll check binder: businesses that write payroll checks by hand (rather than using ADP, Paychex, or software payroll printing) use the binder to organize payroll check stubs chronologically by pay date, creating the employment tax record set that the IRS requires to be retained for four years.

Check binder for AP: accounts payable operations at businesses with multiple payment approvers frequently use manual check binders because the physical signature requirement (checks must be signed by hand) is a natural control that software-printed checks can bypass with unauthorized printing. In a manual check binder system, every issued check requires physical presence at the binder.

Businesses that do not need a 7-ring check binder: businesses that print all checks from accounting software (QuickBooks, Sage, Dynamics) and retain their payment records entirely in software have no use for a 7-ring check binder. Their check stubs are either digital or maintained in the software's transaction history. For these businesses, the check box stores flat until loaded into the printer.


Checkomatic Check Binders and Manual Checks

Checkomatic is an in-house check manufacturer (in-house check manufacturer) that produces ABA compliant check stock (ABA compliant) in Monroe, NY (Monroe NY) since 1997. The manual check and binder system at Checkomatic is designed as an integrated package: the manual checks, binders, deposit slips, and check envelopes are all sized and formatted to work together.


7-Ring Check Binder

Checkomatic's 7-ring check binder is sized for standard 3-on-a-page business check sheets with the standard 7-hole punch pattern. The binder includes spine labeling capability for year and check number range identification, internal pockets for deposit slips and accessories, and a professional black cover suitable for desk and filing cabinet storage.


Manual Business Checks

The manual business checks are produced with the standard 7-hole punch pattern pre-punched at the time of manufacture, ready for immediate binder insertion upon delivery. ABA-compliant security paper with six fraud deterrent features ships at base price on every order. Free logo printing is included on every business check order.


Manual Payroll Checks

For payroll-specific manual check operations, Checkomatic's manual payroll checks include pre-printed payroll stub fields for gross pay, deductions, and net pay alongside the standard 7-hole punch pattern for binder compatibility. The payroll check and its stub remain in the binder until the check is signed and issued; the stub remains in the binder thereafter as the payroll record.


Complete System

Order manual checks, binders, deposit slips, envelopes, and an endorsement stamp for incoming check deposits all from the same in-house manufacturer. Standard turnaround is 3 to 5 business days from digital proof approval. Free logo printing (free logo printing) on every check order. No pre-selected add-ons at checkout. Start at checkomatic.com.


The Short Version on 7-Ring Check Binders

A 7-ring check binder holds 3-on-a-page manual business checks using seven rings that match the 7-hole punch pattern on check sheets. Checks cannot be used in a standard 3-ring binder because check sheets (13 x 9 inches) are wider than letter paper and would tear at the ring holes without the seven-ring distribution of load. A 1-inch spine binder holds approximately 225 check sheets (675 individual checks). The IRS requires check stubs to be retained at least four years for employment tax purposes and three years for general business expense records. Label the binder spine with year, account number (last four digits), and check number range. Keep the binder in a locked desk or cabinet when not in active use to restrict blank check access. Pair with Checkomatic manual business checks, deposit slips, and check envelopes for a complete manual check system.


Frequently Asked Questions


What is a 7-ring check binder?

7-ring check binder definition: a 7-ring check binder is a specialized ring binder designed to hold 3-on-a-page manual business checks and their stubs. It uses seven metal rings sized and spaced to align with the standard 7-hole punch pattern on business check sheets (approximately 13 x 9 inches). Unlike a standard 3-ring binder sized for 8.5 x 11-inch letter paper, a 7-ring check binder accommodates the larger, heavier check sheet dimensions. The seven rings distribute load across the full width of the check sheet to prevent tearing. A standard 1-inch spine 7-ring check binder holds approximately 225 sheets of 3-on-a-page checks, representing 675 individual checks. It typically includes organizational pockets, a zippered accessory pouch, and a customizable spine label holder for year and check number range identification.


Why do check binders use 7 rings instead of 3?

7-ring vs 3-ring check binder: standard 3-ring binders are sized for 8.5 x 11-inch letter paper with three rings spaced 4.25 inches apart. Business check sheets measure 13 x 9 inches and are punched with seven holes on the 9-inch binding edge. Check binder hole pattern: the check hole pattern must match the binder ring count. If a 13-inch check sheet were held by only 3 rings, the 4-inch unsupported span between rings would cause the heavy check paper to sag and eventually tear. Why checks use 7 rings: seven rings spaced approximately 1.25-1.5 inches apart across the 9-inch check edge distribute the sheet weight evenly, preventing sagging and tearing. TechChecks confirms the compatibility requirement: 7-ring binders are specifically "for 3-on-a-page checks that have 7 holes."


How many checks does a 7-ring check binder hold?

Check binder sheet capacity: a 7-ring check binder with a 1-inch spine holds approximately 225 sheets of 3-on-a-page check format, representing approximately 675 individual checks (3 per sheet). As checks are detached and issued, their stubs remain in the binder, maintaining the approximately 225-sheet capacity throughout the year. Stub-only binders (smaller format holding only detached stubs for archival retention) hold significantly more: 650-1,500 stubs depending on binder size. Check binder how many checks: at 675 individual checks per 1-inch binder, a business writing 20 checks per week fills one binder every approximately 34 weeks, or roughly 1.5 binders per year.


How long should I keep check stubs in a binder?

Check stub IRS 4 years: the IRS requires businesses to keep employment tax records (payroll check stubs) for at least four years from the due date or payment date of the related tax, whichever is later. Check stub record keeping for general business expense records follows the IRS three-year rule for most tax returns. The check stub audit trail is the primary source document for AP and payroll deductions on business tax returns. Check stub retention IRS recommendation: most accountants advise keeping check stubs for seven years to cover state statute of limitations for audits, which may extend beyond the federal minimums. Label each binder clearly with the year and account number for retrieval, and maintain binders in a secure, accessible location until the retention period expires.


Can I use a standard 3-ring binder for my business checks?

No. Check binder vs 3-ring binder: a standard 3-ring binder is incompatible with 3-on-a-page business check sheets. The hole pattern difference: standard 3-ring binders have three holes spaced 4.25 inches apart on the 11-inch side of letter paper. Business check sheets are pre-punched with 7 holes on the 9-inch edge at approximately 1.25-1.5-inch spacing. A 3-ring binder cannot accommodate the 7-hole punch pattern, and its ring spacing would leave most of the check sheet unsupported, causing tearing under the weight of a full binder. TechChecks confirms: 7-ring binders are for "3-on-a-page checks that have 7 holes." A standard 3-ring binder also lacks the physical dimensions to contain a 13 x 9-inch check sheet, which is larger than the 11-inch letter-paper maximum. A dedicated 7-ring check binder is required.

Aug 14, 2026

How to Order Business Checks: Complete Buying Guide

Bank vs Direct Manufacturer: Where to Order Business Checks

How to order business checks online or through a bank: most businesses have two options, each with very different pricing and flexibility. Understanding the difference changes the cost and flexibility of every check order.

When you order through your bank, the bank places the order with a wholesale check manufacturer (typically Deluxe or Harland Clarke) and adds a retail markup before reselling to you. The bank does not manufacture checks. The bank check markup over the wholesale manufacturing cost is typically 50-100%, and turnaround runs 7-14 business days from order placement.

When you order from a direct manufacturer, you bypass the bank intermediary entirely. A direct manufacturer like Checkomatic produces the checks themselves, ships directly to you, and passes the markup savings to you as lower pricing. Bank vs direct manufacturer business checks pricing: Bankrate's research found standard bank account holders pay 40-66 cents per check; direct manufacturer pricing for business checks typically runs 20-35 cents per check at comparable quality and security levels.

Beyond price, direct manufacturers offer more format options, faster turnaround (3-5 business days at Checkomatic), free logo printing, and the ability to order exactly the quantity and format that fits your workflow rather than whatever options the bank happens to offer.

CarouselChecks' ordering guide summarizes the case: "Banks are excellent at banking, but check printing is not their main focus. Dedicated check printing companies specialize in producing secure, compliant checks at scale. Better pricing, more format and layout options, faster turnaround times, better support for reordering and customization, and more advanced built-in security features."

For the full comparison between bank-ordered and direct-ordered checks including total cost examples, see our bank checks ordering guide.


What Information You Need to Order Business Checks

Information needed to order business checks: six pieces of information are required before any check order can be produced. Missing or incorrect any of these causes reprinting delays or, worse, checks that clear from the wrong account.

  1. Business legal name (explained in detail below)
  2. Business mailing address: street address, city, state, and zip code as they appear on your bank account documentation
  3. Bank name: the name of the financial institution holding the account, as it appears on existing checks or your bank statement header
  4. ABA routing number: the 9-digit routing number from the MICR line on an existing check (explained below)
  5. Account number: your checking account number, from the MICR line on an existing check
  6. Starting check number: the first check number for this order

Have all six pieces ready before beginning the ordering process. Pulling from an existing voided check for items 3-5 is the most reliable method since the MICR line on an existing check is the authoritative source for all three numbers. For more on how to read these numbers off an existing check, see our check diagram and layouts guide.


Business check company name legal ordering: the business name on your check must match your bank account name exactly. Not your DBA (doing business as) name unless that is what your bank account is registered under. Not an abbreviated version. Not a common-use name if your account uses the full legal name.

Checkomatic's switching guide confirms: "You'll need your routing number and account number, both of which are on any existing check or in your online banking portal, and your business legal name and address exactly as they appear on the account."

Why this matters: when a check is deposited or cashed, banks can compare the account holder name on the check against the account name in their system. A significant mismatch (different company name entirely) may trigger manual review or be returned. For businesses with names like "Smith Contracting LLC" operating as "Smith Services," the check should use the bank account name, which may be the legal LLC name even if the business operates under the trade name.

Additionally, for accounts payable, vendors and contractors may compare the company name on the check to the name on their invoices or contracts. Consistency across both reduces payment disputes and return check inquiries.

Verify your exact account name by logging into your online banking portal and reading the account name field, or by looking at the top line of your bank statement.


Getting the Routing Number Right

Business check routing number ordering: use the routing number from the MICR line on an existing check, not from a deposit slip. This is the same warning made in our deposit slips guide, but it is equally important for ordering new checks: some banks print a different routing number on deposit slips (used for internal deposit processing) than the ABA routing number on checks (used for ACH and electronic transfers).

Your ABA routing number is the 9-digit number at the far left of the MICR line, bracketed by two transit symbols on an existing check. It is always exactly 9 digits. If you do not have an existing check from this account (for example, a new account), your bank can provide the routing number directly from your account details in online banking or by calling customer service.

Reputable check manufacturers verify your submitted routing number against the Federal Reserve's routing directory before printing. Checkomatic's switching guide confirms this practice: "We verify your routing and account number against the Federal Reserve directory and confirm the bank name matches before anything prints, which catches the typos that wreck a first order." This pre-print verification step protects you against a routing number entry error that would result in checks that cannot clear.

For a full explanation of routing numbers, how they are structured, and what the digits mean, see our ABA routing numbers guide.


Choosing a Starting Check Number

When you place your business check account number ordering, confirm the account number digit-by-digit from your existing check MICR line. A single wrong digit sends funds to the wrong account.

The starting check number for a business check order is the check number that will be printed on the first check in the batch, with all subsequent checks numbered sequentially. For a business ordering checks for the first time, the starting check number is typically 1001 or 101 (banks often start at 1001 for business accounts to distinguish from personal accounts).

For reorders, the starting check number must be one higher than the last check number you have used. Finding your last used check number: Checkomatic's switching guide explains the process for QuickBooks users. "In QuickBooks Desktop, that's Banking > Use Register, then sort by check number descending. In QuickBooks Online, run the Check Detail report and sort by number."

Using duplicate check numbers (accidentally ordering a new batch starting at 1001 when you have already written checks up to 1500) creates reconciliation problems in your accounting software and may confuse your bank if the same check number appears twice on your account in the same period. A 6-month gap between using check number 1001 the first time and issuing a new check 1001 from a different print batch is unlikely to cause banking problems in practice, but it creates records ambiguity in your system.


Business Check Format Selection by Software

The business check format selection by software is the most operationally important decision in the ordering process. The wrong format prints your check layout in the wrong position on the paper, requiring either manual reconfiguration of your software or a reorder.


QuickBooks Business Check Format

A check on top order is the correct choice for QuickBooks and most major US accounting platforms. The check prints in the top third of the page with two stubs below.

QuickBooks business check format: QuickBooks Desktop (all editions) and QuickBooks Online both default to check on top (voucher) format. The check prints in the top third of the 8.5 x 11 sheet. Two perforated stubs print below: the upper stub goes to the payee as a remittance detail; the lower stub is retained by the payer for records. This is the most widely ordered business check format in the US.

Checkomatic's software-compatible checks page confirms: "Our QuickBooks compatible checks cover all versions of QuickBooks Desktop and QuickBooks Online. Voucher check on top, 3-on-a-page, and wallet formats available. The check on top is the default for most QuickBooks AP and payroll workflows."

Order Checkomatic's QuickBooks checks in check on top format for QuickBooks Desktop and QuickBooks Online AP and payroll operations.


Sage 50 Business Check Format

A check in middle order is the standard for Sage 50 installations. The check prints in the center of the page with one stub above and one below.

Sage 50 business check format: Sage 50 (formerly Peachtree Accounting) defaults to check in middle format, where the check prints in the center of the 8.5 x 11 sheet with one stub above and one below. Checkomatic's software page notes this: "Check in Middle: Check centered on the page with one stub above and one below. Standard for Deltek and some Sage 50 configurations."

Order Checkomatic's check in middle format for Sage 50 operations. For Sage Intacct, which supports both blank stock and preprinted check printing, verify the specific template in your Sage Intacct configuration before ordering.


Microsoft Dynamics Check Format

Microsoft Dynamics check format: Microsoft Dynamics GP and Dynamics 365 Business Central both default to check on top (voucher) format. The same check on top format used for QuickBooks is compatible with Dynamics GP AP and payroll check printing. Order check on top format and configure your Dynamics print template to match.

For Microsoft Dynamics installations using third-party payment hubs like Mekorma, the format is still check on top by default. Verify with your Dynamics consultant if your organization uses a modified template, as custom Dynamics configurations may use check in middle or check on bottom formats.


Other Software and Manual Checks

Checkomatic's software compatibility page lists over 500 supported platforms, including Xero, MYOB, Wave, FreshBooks, NetSuite, Zoho Books, Yardi, Deltek, and Quicken. "If your software is not listed, contact us. We custom format check stock to match your template at no extra charge."

For businesses that write checks by hand rather than printing from software, manual business checks are the right format. The manual business checks range covers accounts payable, payroll, multi-purpose, and executive deskbook formats. Manual checks are filled in by hand at the time of writing, making software compatibility irrelevant.

For high-volume AP operations where the stub detail is tracked in software and physical stubs are not needed, 3-on-a-page checks print three checks per sheet with no stub sections, reducing per-check cost. This format is appropriate when the accounting software maintains the complete payment record and printed stubs are redundant.

For the full format comparison guide covering all check positions and use cases, see our check diagram guide.


CPSA Padlock Verification Before Ordering

Business check CPSA padlock verification: before placing any business check order with any supplier, verify that the supplier's check stock carries CPSA certification. The CPSA padlock icon (from the Check Payment Systems Association) confirms that the security paper and printing process meet the industry's minimum fraud-deterrence standards, including chemically reactive paper that resists check washing, void pantograph that appears on photocopies, and microprinting that blurs when copied.

The CPSA padlock appears on the face of the check stock near the bottom, often with the text "This document includes security features" or similar. It is printed on the check paper by the manufacturer. Any check supplier that cannot confirm CPSA certification on their paper should not be trusted with your business's check orders.

Taylor Corporation's ordering guide confirms the importance: "The best check printing services comply with ANSI (American National Standards Institute) and Check Payment Systems Association (CPSA) standards governing check layout, security features and fraud prevention."

Checkomatic's checks ship on CPSA certified (CPSA certified) security paper with six fraud deterrent features on every order at base price. No security upgrade tier is required to get CPSA-compliant checks from Checkomatic. For more on why each security feature matters, see our safe and security checks guide.


The 8-Point Digital Proof Checklist

Business check digital proof checklist: most direct check manufacturers provide a digital proof (a PDF or image preview of what your checks will look like) before printing. The digital proof is your last chance before production. Business check proof approval: review every proof against these eight points before approving.


8-Point Business Check Proof Checklist

  1. Business name spelling: Is the company name spelled exactly as it appears on your bank account? Check every letter, including punctuation (commas, periods, LLC, Inc.).
  2. Business address: Street address, suite number if applicable, city, state, and zip code , all correct?
  3. Bank name: Is the bank name spelled correctly and matching your bank's official name?
  4. Routing number digit count: Count the digits in the routing number shown on the proof. It must be exactly 9 digits. A routing number with 8 or 10 digits is wrong. Verify the digits match your source check.
  5. Account number verification: Compare the account number on the proof digit-by-digit against your source check's MICR line. A single transposed digit sends every check to the wrong account.
  6. Starting check number: Is the first check number correct? Does it sequence correctly from your last used check number?
  7. Logo appearance: If you submitted a logo, does it appear correctly sized, positioned, and in the specified color (black and white for most standard checks)?
  8. Format match to your software: Does the proof show the check in the position (top, middle, bottom) that matches your software's print template? Does the stub layout match what your software produces?

What to check on business check proof: pay particular attention to the routing number and account number. These are the two fields most commonly entered with errors, and they are the two fields that determine whether your checks clear or return as invalid. A reversed digit pair in either number results in an order of checks that cannot be used.

If your manufacturer charges extra for digital proofs, factor that cost into the ordering decision. At Checkomatic, a digital proof is available and all eight items are confirmed by the in-house team before production begins at the Monroe, NY facility.


Business check logo printing order: adding your company logo to your business checks creates a professional appearance and reduces the risk of check fraud (logo-printed checks are harder to counterfeit than plain checks because the logo must be replicated). Most direct manufacturers offer logo printing as an add-on for a fee.

Free logo printing check: Checkomatic includes free black-and-white logo printing on every business check order at no extra charge. This is one of the most valuable included features in Checkomatic's standard order, since logo printing at most check suppliers costs $10-30 per order.

Logo requirements for check printing: most check manufacturers accept logos in black and white only for standard laser check printing (the printing equipment uses black MICR toner, not color ink). If your logo has fine detail, lines thinner than 0.5 points, or gradients, it may not reproduce well at check print resolution. For best results, submit a vector format logo (AI, EPS, SVG) or a high-resolution black-and-white PNG at 600 DPI or higher. The proof review step allows you to verify logo appearance before the order prints.


Business Check Security Features to Look For

Business check security features to look for when evaluating any check supplier:

  • Chemically reactive paper: produces visible staining when check-washing solvents contact the paper, the primary defense against mailed-check alteration


  • Genuine watermark: embedded in the paper fibers, visible when held up to light, impossible to replicate on a copier


  • Microprinting: tiny text along the signature line or borders that blurs when photocopied , the blurring reveals the copy attempt


  • Void pantograph: a latent background pattern that causes "VOID" to appear on any photocopy of the check


  • Thermochromic ink: a heat-sensitive feature that changes color or disappears when touched or warmed, serving as an authenticity indicator


  • UV fluorescent fibers or features: visible only under ultraviolet light, used by banks for authentication verification


Taylor Corporation's ordering guide lists the same categories: "Chemical-reactive paper that stains when exposed to bleach or solvent, void pantograph that shows VOID on any copy, true watermark visible from both sides when held to light." These six features together make up the ABA-compliant (ABA compliant) standard security suite that all CPSA-certified business checks carry.

Avoid any check supplier that cannot confirm these specific security features on their paper. A check that lacks chemical reactivity is particularly dangerous for any check mailed through the postal system, because an intercepted check can be washed and rewritten with no visible evidence of tampering.


First Order Quantity Guidance

Business check first order quantity: for a first order from any new check supplier, order conservatively. Checkomatic's switching guide recommends a smaller first order: "Resist the urge to move your whole annual volume on the first order. Put in a smaller test batch, say 250 checks, and use it to confirm four things: the print quality is what you expected, the turnaround matched the quote, the support team is responsive, and the MICR line reads cleanly at your bank on the first deposit."

Ordering 250-500 checks on a first order serves multiple purposes. It limits the downside if print quality or alignment is not right. It keeps your total committed cost low while you verify the supplier relationship. It ensures you can run out of the test batch and place a larger order before fully committing your annual check supply to one manufacturer.

Checksforless's ordering guide notes: "We have a fast standard production time of 3-5 days, not including shipping time, it's important to reorder business checks a couple weeks before you need them." A smaller first order with a faster reorder cycle gets you into a comfortable reorder rhythm with the new supplier before committing to a large annual quantity.


MICR Verification Test on First Batch

Business check MICR verification first order: after receiving your first batch from any check supplier, run a MICR quality test before using the full batch in production.

The business check MICR test deposit is the definitive verification. Checkomatic's switching guide explains the process and expected outcome: "First, deposit one into an account you control and watch how fast it clears. A properly encoded check clears in one to three business days on a normal bank deposit. If yours drags noticeably longer, the MICR encoding is probably off, and you want to know that before it's on 50 checks."

A check with correctly encoded MICR clears through automated processing within the standard Regulation CC schedule: the first $275 available next business day, remainder by the second business day for local checks. A check with MICR encoding problems routes to manual processing, which takes longer and may generate a processing fee. If your first deposited check from a new supplier takes noticeably longer to clear than expected, contact the supplier immediately before printing and issuing any more checks from that batch.

Additionally, run a print alignment test before printing production checks. Load the check stock, open your accounting software's check print function, and print one check on plain paper first to verify alignment. If the fields land in the right positions, print one check on actual check stock and hold it against a source check to confirm the MICR line is in the same position. Checkomatic's guide confirms: "Run the alignment test the first time through, since every printer's stock sits slightly differently in the tray and you may need a 0.1-inch nudge even if your old checks were perfect."


How to Switch From Bank-Ordered Checks Mid-Year

Switch bank-ordered checks direct manufacturer: switching from bank-ordered to direct-manufacturer checks does not require notifying your bank, getting bank approval, or any account changes. Banks process checks based on the MICR encoding, not on who manufactured the check paper. Checkomatic's guide is clear: "No. Banks don't track which printer made a check. They read the MICR line and process it. Any printer using ANSI-certified MICR ink produces checks that clear like any other."


Switch check supplier mid year procedure:

  1. Find your last check number and add 1 to determine your new starting check number
  2. Gather your six order details from an existing check or bank records
  3. Place a test order (250-500 checks) before ordering a full year's supply
  4. Update your accounting software if the format changes (voucher to wallet or vice versa), update the check style setting in your printer setup
  5. Run the alignment test with one test print on plain paper before committing check stock
  6. Run the MICR deposit test with one check before printing production payments

The most common error when switching: using an incorrect starting check number. Your new checks must continue sequentially from where your previous batch ended, not restart from 1001. This prevents duplicate check numbers in your accounting records.


Business Check Reorder Timing Formula

When to reorder business checks: the business check reorder formula is simple. Take your current remaining check count, divide by your average weekly check volume, and compare the result to your supplier's production and shipping time plus a buffer.

Business check reorder timing formula:

Remaining checks / Weekly check volume = Weeks of supply remaining

Then: Weeks of supply remaining should be greater than (Supplier lead time in weeks + 2 weeks buffer)

Example: you have 200 checks left and write 25 checks per week. 200 / 25 = 8 weeks supply. Supplier delivers in 1 week (5 business days). 8 weeks remaining minus 1 week lead time = 7 weeks of buffer. You have comfortable time to reorder.

Second example: 75 checks remaining at 25 checks per week = 3 weeks supply. Lead time 1 week. Buffer = 2 weeks. This is the minimum acceptable buffer. Place the reorder now.

Checksforless's reorder guide recommends: "Reorder business checks a couple weeks before you need them to ensure you don't run out." Two weeks buffer is the minimum; three to four weeks is preferable for operations where running out of checks disrupts payroll or vendor payment cycles.

Most check suppliers save your order details in your account profile, making reorders fast. At Checkomatic, reorders use your saved profile information so you only need to confirm the starting check number and quantity, not re-enter all six details.


Business Check Pricing: Bank vs Direct Manufacturer

Business check pricing per check at a bank versus direct manufacturer:

Through a standard bank account: Bankrate's research found 40-66 cents per single check and 43-75 cents per duplicate check. Banks that offer free check-with-account-opening promotions typically resume at these rates on the first reorder.

Through a direct manufacturer (Checkomatic-tier pricing): approximately 20-35 cents per check for standard business formats at comparable security levels. Blank check stock printing (if you have a MICR printer) reduces this further to 8-15 cents per check for the paper cost alone.

On a box of 250 business checks: bank ordering at 50 cents per check = $125. Direct manufacturer at 25 cents per check = $62.50. Savings: $62.50 per order. For a business ordering 3 boxes per year, that is $187.50 annually in check supply savings before accounting for free logo printing (worth $10-30 per order at suppliers who charge for it).

For a full breakdown of check ordering cost savings across all ordering channels, see our check promotions and savings guide.


Ordering From Checkomatic

Checkomatic is an in-house check manufacturer (in-house check manufacturer) producing ABA compliant check stock (ABA compliant) in Monroe, NY (Monroe NY) since 1997. Every business check order is manufactured at the Monroe NY facility with direct quality control over MICR encoding, security paper quality, and format alignment.


Complete Business Check Range

All major business check formats are available:


Matching Accessories

Complete your check management system with check envelopes sized for your check format, business deposit slips matched to your account, 7-ring check binders for manual check organization, and self-inking endorsement stamps for high-volume check depositing.


What Every Checkomatic Order Includes

CPSA certified security paper with six fraud deterrent features at base price. Free logo printing (free logo printing) on every business check order. Routing number verified against the Federal Reserve directory before printing. Digital proof available before production. Standard turnaround 3 to 5 business days from proof approval. No pre-selected add-on programs at checkout. Start your order at checkomatic.com.


The Short Version on How to Order Business Checks

Six pieces of information required: business legal name (exact), business address, bank name, 9-digit ABA routing number from an existing check, account number, and starting check number. Pick the format that matches your software: check on top for QuickBooks and Dynamics, check in middle for Sage 50, 3-on-a-page for high-volume AP, manual for handwritten. Verify CPSA padlock certification before ordering from any supplier. Review the digital proof against all 8 checklist points before approving. Start with 250-500 checks, run an alignment test print, then run a MICR deposit test. Reorder when remaining supply equals 3-4 weeks of check volume plus supplier lead time. Direct manufacturers cost 40-60% less per check than standard bank ordering with the same or better security features.


Frequently Asked Questions


What information do I need to order business checks?

Information needed to order business checks: six pieces required. (1) Business legal name exactly as on your bank account. (2) Business mailing address. (3) Bank name as it appears on existing checks. (4) 9-digit ABA routing number from the MICR line on an existing check, not from a deposit slip (some banks use different routing numbers on deposit slips). (5) Account number from the MICR line on an existing check. (6) Starting check number, one higher than your last used check number. Have all six ready before ordering. Using an existing voided check as the source for items 3-5 is the most reliable method. Business check routing number ordering: always use the MICR routing number from a check, not a deposit slip.


Which business check format should I order for QuickBooks?

QuickBooks business check format: QuickBooks Desktop and QuickBooks Online both default to check on top (voucher) format, where the check prints in the top third of the 8.5 x 11 sheet with two stubs below. This is the standard format for both AP and payroll check printing in QuickBooks. Sage 50 business check format: check in middle, with the check centered and stubs above and below. Microsoft Dynamics check format: check on top, same as QuickBooks. For high-volume AP where stubs are not required: 3-on-a-page check order format. For handwritten check operations: manual format. Business check format selection by software is the most operationally critical order decision , the wrong format requires a reorder or software reconfiguration.


Is it safe to order business checks online from a direct manufacturer?

Yes, with the right verification. Business check CPSA padlock verification: confirm the supplier's stock carries CPSA certification from the Check Payment Systems Association before ordering. This confirms the security paper meets the industry's minimum fraud-deterrence standards. Business check security features to look for: chemically reactive paper (check washing detection), void pantograph (copy detection), genuine watermark, microprinting, thermochromic ink, and UV fluorescent features. Reputable direct manufacturers also verify your routing number against the Federal Reserve directory before printing. A CPSA-certified direct manufacturer like Checkomatic delivers the same or better ABA compliant check quality as bank-ordered checks at 40-60% lower cost. Business check bank markup: banks order wholesale and resell at 50-100% markup; direct manufacturers pass those savings to you.


How do I switch from bank-ordered to direct-manufacturer business checks?

Switch bank-ordered checks direct manufacturer: no bank notification or approval is required. Banks process checks based on the MICR encoding, not the check manufacturer. To switch check supplier mid year: (1) Find your highest used check number and start your new order one number higher. (2) Gather your six order details from an existing check. (3) Place a first order of 250-500 checks. (4) Update your accounting software's check style setting if the format changes. (5) Run an alignment test print before production. (6) Run the business check MICR test deposit: deposit one check and verify it clears in 1-3 business days. If it clears on schedule, the MICR encoding is correct and the rest of the batch is ready for production use.


When should I reorder business checks?

Business check reorder timing formula: Remaining checks / Weekly check volume = Weeks of supply. When to reorder business checks: place a reorder when weeks of supply remaining equals the supplier's lead time (production + shipping, typically 1-2 weeks for standard orders) plus a 2-week buffer. Minimum buffer: 3 weeks before running out. Preferred: 4 weeks. Business check reorder formula example: 150 checks remaining at 30 checks per week = 5 weeks supply. Lead time 1 week + 2-week buffer = need 3 weeks minimum. 5 weeks remaining minus 3 weeks needed = 2 weeks before you should be placing the order now. Most suppliers save your order details; Checkomatic reorders require only the starting check number and quantity confirmation.

Aug 14, 2026

How to Fill Out a Deposit Slip: Step-by-Step Guide
Quick Answer: To fill out a deposit slip, write the date and your account number at the top. Enter your total cash in the cash field. List each check on a separate line with its amount. Add everything to get your subtotal. If you want cash back, write that amount in "less cash received" and subtract it from the subtotal to get your net deposit. Sign only if you are taking cash back. Hand the completed slip with your cash and checks to the teller.


What a Deposit Slip Is and Why You Need One

A deposit slip is a small paper form you complete to deposit money , cash, checks, or both , into your checking or savings account. The slip tells the bank your account number, how much you are depositing, and how the deposit is broken down between cash and individual checks.

Without a completed deposit slip, a bank teller cannot process your deposit. The slip becomes the bank's official record of the transaction. When you fill one out correctly, your deposit posts to the right account for the right amount without delays.

Most banks give you a few deposit slips when you open an account. Businesses that make daily or weekly deposits quickly run through those starter slips. That is where pre-printed deposit slips ordered in advance become important , they have your account information already on them and keep your deposit process fast and error-free.


Every Field on a Deposit Slip Explained

Standard deposit slips have the same fields regardless of which bank issues them. Here is what each one means and what to write.


Date

Write today's date in month/day/year format. Use the date you are making the deposit, not the date the checks were written. This matters for bank reconciliation and for tracking when funds become available under Regulation CC.


Name

Your name or business name as registered with the bank. On pre-printed deposit slips, this is already printed for you. On blank slips, write it in the name field. The name must match the account exactly as the bank has it on file.


Account Number

Your checking or savings account number. On pre-printed slips, this is pre-printed and you skip this step. On blank slips, copy the account number exactly from an existing check or your bank statement. A single wrong digit sends your deposit to the wrong account. Double-check every digit before handing the slip to the teller.


Cash

The total dollar value of all bills and coins you are depositing. Count your cash before you arrive at the bank. Write the total in the cash field, not each bill denomination separately. If you have both bills and coins, count them together and write one combined cash total. If you are not depositing any cash, leave this field blank or write zero.


Checks (Individual Lines)

Each check gets its own line on the deposit slip. Write the dollar amount of each check in the amount column on the right side. Most deposit slips have two to five check lines on the front. If the slip has a check identification column on the left, write the fractional routing number from the upper right corner of each check , a number that looks like 12-3456/7890. This helps the bank identify which check belongs to which entry if there is a question later.


Subtotal

The sum of all your cash and check amounts combined. Add every line on the deposit slip and write the total in the subtotal field. This is not your final deposit amount , it is the total before any cash back is subtracted.


Less Cash Received

The amount of cash you want back from the deposit. If you want none, leave this blank. If you want $50 back, write $50 here. This amount is subtracted from your subtotal to give you the net deposit. When you take cash back, you must sign the deposit slip.


Net Deposit (Total)

The actual amount going into your account. This equals your subtotal minus any cash back. If you are not taking cash back, your net deposit equals your subtotal. Write this amount in the net deposit or total field. This is the number that will appear in your account as the deposit amount.


Signature

Sign only when you are taking cash back from the deposit. Your signature authorizes the bank to give you cash while depositing the remainder. If you are not taking cash back, do not sign the deposit slip. The teller will remind you if you forget.

Single deposit slip book


How to Fill Out a Deposit Slip Step by Step

Follow these steps in order. Do not skip ahead or fill fields out of sequence , the math builds from top to bottom.


Step 1: Write the Date

Write today's date in the date field at the top of the slip. Use the format MM/DD/YYYY. If you are at the bank on August 14, 2026, write 08/14/2026. Banks use this date to timestamp the transaction and apply the correct fund availability schedule under Regulation CC.


Step 2: Confirm or Write Your Account Number

If you are using a pre-printed deposit slip from Checkomatic, your account number is already on the slip. Skip this step. If you are using a blank slip from the bank, copy your account number from the bottom of one of your checks. The account number is the middle number in the MICR line at the very bottom of your check. Write it exactly , no spaces, no dashes, no approximations.


Step 3: Count and Enter Your Cash

Count your bills and coins before stepping up to the teller window. Enter the combined total in the cash field. If you have no cash to deposit, write 0.00 or leave the field blank depending on the slip's format. Tellers count cash again after you hand it over, but having your count ready speeds up the process.


Step 4: List Each Check Separately

Take each check you are depositing and write its amount on a separate line on the deposit slip. Write the dollar amount in the right column. If there is an identification column, write the fractional routing number from the upper right corner of each check. Keep checks in the same order as you listed them on the slip , this helps the teller verify amounts quickly.


Step 5: Calculate the Subtotal

Add your cash amount and all individual check amounts together. Write that total in the subtotal field. Check your math twice before moving on. A wrong subtotal produces a wrong net deposit, which creates a discrepancy the bank will catch and you will have to resolve.


Step 6: Fill in Less Cash Received (Only If Needed)

If you want cash back from the deposit, write that amount in the less cash received field. If you are depositing everything with no cash back, leave this field blank or write 0.00. Do not guess , decide exactly how much cash you want before you write it here.


Step 7: Calculate and Write the Net Deposit

Subtract your less cash amount from your subtotal. Write the result in the net deposit or total field. If you are taking no cash back, your net deposit equals your subtotal exactly. This final number is what your bank will post to your account.


Step 8: Sign the Slip (Only If Taking Cash Back)

Sign the deposit slip in the signature field only if you entered an amount in the less cash received field. Your signature authorizes the bank to give you cash while depositing the balance. If you are not taking cash back, do not sign.


Step 9: Hand the Slip to the Teller With Your Deposit

Give the completed deposit slip, your cash (organized by denomination), and your endorsed checks to the teller. The teller verifies everything, processes the deposit, and gives you a receipt. Keep the receipt until the deposit appears on your bank statement and you have confirmed the amount is correct.


How to Fill Out a Deposit Slip With Multiple Checks

Most deposit slips have two to five check lines on the front. If you are depositing more checks than there are lines, here is how to handle it.


Using the Back of the Deposit Slip

Most deposit slips have additional check lines printed on the back for overflow. List your remaining checks on the back, writing the amount of each check on a separate line. Add all the check amounts on the back together and write the subtotal at the bottom of the back side.


Transferring the Back Total to the Front

On the front of the slip, find the field labeled "checks from back," "total from reverse," or similar. Write the back subtotal in this field. Now add the front cash, any front check lines, and the back total together to get your overall subtotal. Continue with steps 6 through 9 as normal.

High-volume tip: If your business deposits more than five or six checks per visit regularly, look for deposit slips that record up to 18 entries per slip. Checkomatic's QuickBooks-compatible deposit slips record up to 18 entries per slip, which covers most daily deposit volumes for businesses without needing the back side at all. See QuickBooks deposit slips for details.


What the Less Cash Received Section Means

The "less cash received" field (also printed as "less cash," "cash back," or "less cash back" depending on the bank) is the most misunderstood section on a deposit slip. Many people skip it or fill it in incorrectly.


When to Use It

Use the less cash received field when you want to receive some cash back from your deposit at the same time. For example, if you are depositing $800 worth of checks and want $100 in cash for petty cash, you write $100 in the less cash received field and $700 in the net deposit field. The bank gives you $100 in cash and deposits $700 into your account.


When to Leave It Blank

Leave the less cash received field completely blank when you are depositing everything with no cash back. Some people write $0.00 here thinking they need to fill every field. That is not necessary. A blank field means no cash back requested.


Why You Must Sign When Taking Cash Back

When you enter an amount in the less cash received field, you are authorizing a simultaneous deposit and cash withdrawal. Your signature in the signature field confirms that authorization. The bank keeps your signed slip as proof. If you do not sign when taking cash back, the teller will ask before processing.


Blank vs Pre-Printed Deposit Slips

Banks give you blank deposit slips at the counter. They work, but they require you to handwrite your full account number and name on every single slip before you can use it. For occasional personal deposits, that is manageable. For business deposits, it is slow and creates room for errors.


Blank Deposit Slips

Available at any bank counter. You fill in every field including your name and account number each time. Useful in an emergency or when you run out of pre-printed slips. The risk is account number errors , one transposed digit sends the deposit to the wrong account.


Pre-Printed Deposit Slips

Come with your name, bank name, routing number, and account number already printed on every slip. You fill in only the transaction-specific fields: date, cash, individual checks, and totals. Faster to complete. Less risk of account number errors. Available in padded book format (approximately 60 slips per book) or loose sheet format for businesses that process deposits through a printer or machine.

Business best practice: Order pre-printed deposit slips in advance and keep at least two books in reserve. Running out of pre-printed slips forces you to use blank counter slips, which slows down your deposit process and increases the chance of account number errors. Order when you have one book remaining. Checkomatic ships pre-printed deposit slips in 3 to 5 business days from Monroe, NY. Browse the full range at business deposit slips.

Quickbooks Deposit Slips

Common Deposit Slip Mistakes and How to Avoid Them

Mistake 1: Wrong Account Number

Writing one digit of your account number incorrectly on a blank deposit slip can deposit your money into someone else's account. The bank catches this during processing but correcting it takes time and documentation. Solution: use pre-printed deposit slips where the account number is already on the slip, or copy your account number directly from the bottom of an existing check rather than from memory.


Mistake 2: Adding Cash and Check Lines Incorrectly

Math errors in the subtotal field create discrepancies the teller catches during verification. This delays your deposit and requires you to re-complete the slip. Solution: add your cash and check amounts on a separate piece of paper or a calculator before writing the subtotal, then transfer the verified total.


Mistake 3: Forgetting to List Checks on Separate Lines

Combining multiple checks into one line entry makes it impossible for the bank to match individual checks to individual entries if a question arises later. Always list each check on its own line with its specific amount.


Mistake 4: Signing When Not Taking Cash Back

Signing a deposit slip when you are not taking cash back does not invalidate the deposit, but it can cause confusion. The teller may ask whether you meant to request cash. Leave the signature line blank on straight deposits with no cash back.


Mistake 5: Not Endorsing Checks Before Depositing

Handing an unendorsed check to a teller creates a delay while you endorse it at the window. Banks require endorsement before accepting a check for deposit. Endorse all checks before you leave your office or car. Write "For Deposit Only" and your account number in the endorsement area on the back of each check.


Mistake 6: Leaving the Net Deposit Field Blank

Some people fill in the subtotal but forget to complete the net deposit field. The teller can calculate it, but leaving it blank slows down processing. Always complete the net deposit field before handing the slip over.


What to Do After Filling Out a Deposit Slip

Get Your Receipt and Verify It

The bank gives you a printed receipt when your deposit is processed. Before you leave, check that the account number, deposit date, and net deposit amount on the receipt match what you wrote on the slip. If anything looks wrong, address it at the teller window immediately , not two days later when the statement posts.


Record the Deposit in Your Check Register

Enter the deposit in your check register the same day. Write the date, the description (such as "deposit , checks from XYZ and ABC clients"), and the net deposit amount in the deposit column. Update your running balance. Waiting to record deposits creates the same balance accuracy problem as waiting to record checks. For the complete guide to maintaining an accurate check register, see check register: how to set up and use a checkbook ledger.


File Your Deposit Copy

If you used a 2-part or 3-part deposit slip, keep your carbon copy in a deposit file for the current month. Match it against your bank statement during monthly reconciliation. If a deposit amount on your statement does not match your copy, you have documentation to resolve the discrepancy. For the monthly reconciliation process, see checkbook management: how to balance and reconcile your account every month.


What Customers Say About Checkomatic

All reviews below are published on checkomatic.com and reproduced verbatim. Source: checkomatic.com/quickbooks-starter-pack-product, 4.5 stars from 166 verified reviews.

"Been with them for 15 years. Always reliable, always good quality, good service. What more can you ask for?"

ATV Inc. | ★★★★★ 5/5 | April 5, 2024 | Source: checkomatic.com/quickbooks-starter-pack-product

"We use CheckoMatic for all of our check needs! They have great prices and we receive our products in a timely manner!"

CG's Tax Service | ★★★★★ 5/5 | September 18, 2024 | Source: checkomatic.com/quickbooks-starter-pack-product

"I got 500 checks for less than half of what the bank wanted for 200!"

VVA Voucher Checks (Vietnam Veterans of America) | ★★★★★ 5/5 | July 6, 2024 | Source: checkomatic.com/quickbooks-starter-pack-product

"ASJ Wilson Construction has been a client of checkomatic for some years now and they've never disappointed this company. Thank you checkomatic for all that you do."

ASJ Wilson Construction | ★★★★★ 5/5 | June 6, 2024 | Source: checkomatic.com/quickbooks-starter-pack-product

"First time ordering and I am super impressed with the quality of the checks. No issues with delivery. I will be ordering again!"

TClinton | ★★★★★ 5/5 | April 9, 2025 | Source: checkomatic.com/quickbooks-starter-pack-product

"Affordable and efficient. My go-to business check printer."

Doe | ★★★★★ 5/5 | January 24, 2025 | Source: checkomatic.com/quickbooks-starter-pack-product


Why Choose Checkomatic for Pre-Printed Deposit Slips

Account Information Pre-Printed , No Manual Entry Needed

Every Checkomatic deposit slip ships with your business name, bank name, ABA routing number, and account number already printed on every slip. You fill in only the transaction-specific amounts: date, cash, checks, and totals. No handwriting your account number on every slip. No risk of transposing a digit and sending your deposit to the wrong account.


Three Formats for Every Business Need

1-part slips for simple deposits where the bank receipt is your only record. 2-part (duplicate) slips where you keep a carbon copy for your accounts receivable file. 3-part (triplicate) slips for businesses that track deposits across multiple departments or properties. All three formats are available at business deposit slips.


Book and Loose Sheet Options

Padded book format (approximately 60 slips per book) keeps your deposit supply organized and protected. Loose sheet format works for businesses that run deposit slips through a printer or processing machine. Both formats include your pre-printed account information on every slip.


QuickBooks-Compatible Deposit Slips

For businesses using QuickBooks for accounts receivable, Checkomatic's QuickBooks-compatible deposit slips record up to 18 entries per slip and are formatted to match QuickBooks deposit templates. No alignment adjustments needed. See QuickBooks deposit slips for full details.


In-House Manufacturing Since 1997

All deposit slips are manufactured at Checkomatic's own facility in Monroe, NY. Standard production ships in 3 to 5 business days. To bundle deposit slips with business checks, envelopes, and an endorsement stamp in a single order, see the business check starter kit.


Aug 13, 2026

Check Envelopes: Types, Sizes, and How to Choose

Check Envelope Definition

A check envelope is a mailing envelope specifically sized and configured to hold a business or personal check securely for mailing. Check envelopes differ from standard letter envelopes in three ways: they are sized to match standard check dimensions rather than 8.5 x 11 letter sheets; the better-quality formats include security tint on the interior to prevent check content from being viewed through the envelope body; and the business formats include one or two transparent windows positioned to align with address fields already printed on the check, eliminating the need to print or label the envelope separately.

Check envelopes are used in two primary contexts. The first is business AP and payroll operations, where computer-printed checks are folded and mailed to vendors, employees, or contractors in volume. The second is personal check mailing, where individual checks are sent for rent, charitable donations, or contractor payments and need to arrive securely without revealing the check amount or account details to anyone handling the mail.

For a complete overview of the check formats that ship in these envelopes, see our types of checks guide and our check diagram and layouts guide.


The Three Check Envelope Types

Check envelope types fall into three categories based on the window configuration. The right type depends on whether you are mailing manually written checks or computer-printed checks, and whether your check format pre-prints both address fields.


No-Window (Plain) Envelopes for Manual Checks

The no-window check envelope is a plain envelope with no transparent window opening. The recipient address is handwritten or printed on the envelope face directly, just like a standard letter. There is no window to show the check content through the envelope.

Check envelope for manual checks no window: no-window envelopes are the standard for manual business checks, which are handwritten checks that do not include preprinted payee address fields aligned for window viewing. TechChecks' check and envelope guide confirms: "Check envelope No 9 recommendation: for manual checks, the No.9 imprinted envelope is the standard choice. This envelope does not contain any windows and is designed to include your company's name and logo."

Personal checks mailed by individuals (rent checks, contractor payments, charitable donations) also typically use plain envelopes unless the check format specifically includes an address field visible through a window. For most personal check mailers, a plain No.6-3/4 or No.10 envelope is appropriate.

No-window envelopes are the safest option from a USPS compliance standpoint because there is no window alignment to verify. The only USPS requirements are the standard letter-size dimensions and weight. The address can be handwritten, printed on a label, or printed directly on the envelope face.


Single Window Check Envelope

A single window check envelope has one transparent window opening in the lower-left area of the envelope face. The recipient's delivery address, printed on the document inside the envelope, shows through this window to the outside. No address printing on the envelope face is required.

BusinessEnvelopes.com explains the standard window position: "The standard window patch on a commercial business envelope measures 1-1/8 inches by 4-1/2 inches, positioned 7/8 inch from the left edge and 1/2 inch from the bottom. This is the industry specification that QuickBooks, Microsoft Word mail merge, Sage, Wave, and most other US accounting and billing platforms are already formatted around."

Single window envelopes are appropriate when only the payee's address needs to show through the window. The sender's return address is either printed directly on the envelope (as pre-printed custom envelopes) or applied via a return address label on the upper left. This type is more common for invoices and correspondence than for check mailing, where double window is the standard.


Double Window Check Envelope

A double window check envelope has two transparent window openings: a lower window showing the payee's delivery address, and an upper window showing the payer's return address. Both addresses come directly from the check form printed inside the envelope. Nothing is written, printed, or labeled on the envelope itself.

BusinessEnvelopes.com's window envelope guide defines it: "Double window envelopes were designed specifically for check mailing and accounts payable operations. If your accounting software prints checks with both the payer and payee addresses on the check face, a double window removes the addressing step entirely. Slide the check in, both addresses sit in their windows, seal and mail."

Check envelope for computer checks: the double window format is the standard for business computer check mailing. All major accounting software platforms (QuickBooks, Sage 50, Microsoft Dynamics, MYOB) print check forms with the payer return address and payee delivery address in the positions that align with double window envelope windows when the check sheet is tri-folded. Deluxe's check envelope guide confirms: "This is our most popular size of check envelope. Checks fit perfectly so destination and return addresses don't slide out of view."


How a Double Window Envelope Works With a Printed Check

The double window envelope address position design: the lower window shows the payee delivery address; the upper window shows the payer return address , both reading directly from the printed check form inside with no envelope labeling needed.

Understanding how double window alignment works requires understanding the check form layout. A standard business computer check sheet (8.5 x 11 inches) has three sections when printed in check-on-top format:

  1. The check section (top third): contains the check face, the payer company name and address in the upper left, and the payee name and address below the payee line
  2. The first stub (middle third): payment detail for the payee
  3. The second stub (bottom third): retained copy for the payer

When this sheet is tri-folded (first fold: bottom stub folded up behind the middle section; second fold: middle section folded up in front of the check section), the folded document positions the check face outward. The payer's return address (printed in the upper left of the check face) lands in the upper window position. The payee's delivery address (printed below the Pay to the order of line) lands in the lower window position. Both addresses are visible through their respective envelope windows with no additional printing or labeling on the envelope at all.

This is why double window envelopes are specifically designed for check mailing and accounts payable workflows. The check form itself carries both addresses in the exact positions the envelope windows are designed to show.

For more on check-on-top and check-in-middle formats and their stub layouts, see our business checks for payroll guide.


Double Window Check Envelope Size

The double window check envelope size is standardized: 8-5/8 x 3-5/8 inches. TechChecks' envelope specification guide confirms this: "The standard size for these envelopes is 8-5/8" x 3-5/8"." This fits a standard 8.5-inch-wide check sheet folded into thirds, where each third measures approximately 3-5/8 inches in height. The envelope width of 8-5/8 inches accommodates the 8.5-inch check width with a small clearance margin on each side.

The two window positions within the 8-5/8 x 3-5/8 envelope are not universal across all manufacturers. Window position varies by software. TechChecks notes: "Window alignment varies based on your accounting software. Be sure to select the appropriate software when ordering to ensure accurate alignment." When ordering double window check envelopes from any supplier, specify which accounting software generates your checks (QuickBooks, Sage, Dynamics, etc.) to get the envelope with windows positioned to match your check layout.

Manual checks in the smaller 8.25 x 3-inch format (detached from the stub) fit a No.9 envelope measuring 3-7/8 x 8-7/8 inches. Wallet-size personal checks fit a No.6-3/4 envelope measuring 3-5/8 x 6-1/2 inches.


Security Tint Interior: What It Is and Why It Matters

Check envelope security tint interior: a security tint check envelope has a blue or grey printed pattern on the interior surface of the envelope paper. This tinted pattern prevents the check's printed content (check amount, payee name, payer account information) from being visible through the envelope body when held against a light source.

Check envelope security tint why: without interior tint, most standard white envelope paper is translucent enough under strong light that someone handling the mail can read portions of the check inside. Holding a plain envelope against a window or overhead light makes printed text on the enclosed document visible through the paper. For a check containing account numbers, the payer's name and address, the payee's name, and the dollar amount, this translucency represents a genuine fraud and privacy risk in transit.

Deluxe's check envelope guide explains the security purpose: "Check envelopes are designed to securely hold checks or payroll documentation and help ensure safe and discreet delivery. With opaque materials and secure closures, they protect sensitive financial information from being viewed during transit."

Security tint applies only to the envelope body, not to the window film. USPS regulations prohibit tinted window film (covered in the section below). The tint pattern on the interior of the paper body is compatible with USPS requirements because it does not affect the window area where the address must remain clearly readable.

For high-value check mailings and payroll distributions, security tint is a standard expectation. For casual personal check mailing, plain envelopes may be acceptable for low-risk payments. The cost difference between security tint and plain envelopes is minimal, so most business check operations default to security tint as a baseline.


USPS OCR Window Alignment Rules

USPS requirements for check envelopes with windows are governed by USPS Domestic Mail Manual (DMM) Section 601.6.3 and DMM Section 201 (letter-size mail design standards). These rules determine whether a window envelope qualifies for automated processing (standard First-Class letter rate) or triggers a non-machinable surcharge (currently $0.41 above the base letter rate).

Check envelope USPS OCR window alignment requirements:

  • Every character in the delivery address must be completely visible through the window throughout the full range of movement of the insert inside the envelope
  • The bottom edge of the address window must be at least 1/2 inch from the bottom edge of the envelope (5/8 inch preferred per USPS Publication 25)
  • The window must be parallel with the longest edge of the envelope for letter-size mail
  • The address must be printed on white or very light-colored paper (not visible through tinted paper)
  • The window film must be non-tinted, clear, and transparent (see non-tinted window film section)
  • All edges of the window cover material must be glued securely to the envelope

The USPS OCR read zone check envelope requirement: for automation pricing (the lowest First-Class Mail rate for letter-size pieces), the delivery address must fall within the USPS OCR read zone: between 1/2 inch and 2-3/4 inches from the bottom of the envelope, and between 1 inch and 5-1/2 inches from the right edge. The standard 1-1/8 x 4-1/2 inch window positioned 7/8 inch from the left and 1/2 inch from the bottom sits within this zone when used with standard tri-folded check sheets.

BusinessEnvelopes.com's addressing guide confirms the practical implication: "USPS automation standards require the address to fall within the OCR read zone: between 1/2 inch and 2-3/4 inches from the bottom of the envelope, and between 1 inch and 5-1/2 inches from the right edge."


The Non-Tinted Window Film Requirement

Check envelope window film nontinted USPS: USPS DMM 601.6.3 explicitly requires that the transparent film covering the window opening be non-tinted and clear. The DMM language: "Window cover material, if used over the address window, must be made of a nontinted clear or transparent material (e.g., cellophane or polystyrene) and must permit the address, as viewed through the window material, to meet the print contrast ratio (PCR) standards in 204.1.4."

This requirement creates an important distinction in check envelopes. The security tint (the blue or grey printed pattern) is applied to the interior surface of the envelope paper body. The window opening is covered with a separate, clear, non-tinted film. The tint protects the non-window areas of the envelope from light-through visibility. The clear window film allows USPS OCR equipment to read the address through the window.

An envelope with tinted window film would cause the address to fail the USPS print contrast ratio requirements, making it unreadable by OCR equipment and triggering either manual processing (causing delays) or return to sender. No compliant check envelope uses tinted window film. The security feature and the postal requirement work in combination: security tint on the body, clear film on the window.


The Insert Movement Clearance Rule

The window envelope 1/8 inch clearance USPS rule is one of the most operationally important USPS requirements for check envelopes, and it is one of the most commonly violated. USPS DMM 601.6.3 requires a minimum clear space of at least 1/8 inch between the address text and all four edges of the window opening. Critically, this clearance must be maintained when the insert is moved to its full limits in each direction within the envelope.

What this means in practice: the check sheet inside the envelope can shift during handling and transit. If the document shifts toward the right, the left side of the address may get clipped by the window edge. If it shifts down, the top of the address may be cut off. USPS requires that even at the extreme limits of insert movement, the address remains fully visible with 1/8-inch clearance on all sides.

Check envelope insert movement 1/8 clearance failure: when an envelope fails this requirement, the address may be partially obscured by the window edge during OCR processing. USPS automated sorting equipment reads partial addresses as unreadable and routes the piece to manual processing or rejects it. The sender receives a non-machinable surcharge or the piece is returned.

This is why envelope and check format compatibility matters: using a double window envelope designed for a different software template than the one printing your checks can result in the address sitting too close to the window edge. The insert movement clearance requirement catches alignment problems that look fine when the check is initially inserted but fail when the document shifts.


Checking for Sensitive Information Visibility

Check envelope sensitive information visible: before any check mailing batch, confirm that no sensitive information is visible through the envelope in ways not intended. The USPS and security guidelines from BusinessEnvelopes.com both recommend the same verification: after folding and inserting one check into the envelope (sealed or not), hold the envelope up to a bright light source.

Check for these conditions:

  • Check envelope address visible test: is the full delivery address visible through the lower window, with no characters cut off at any edge?
  • Is the return address visible through the upper window (if double window format)?
  • Is there at least 1/8-inch clear space on all four sides of each window?
  • Is the envelope body opaque enough that check amounts, account numbers, or other sensitive information are not readable through the paper body?
  • Does the security tint (if present) prevent light-through reading of the check content through the non-window areas?

BusinessEnvelopes.com's addressing guide specifies the test: "Hold the sealed envelope up to a bright light. Full address visible? Clearance on all four sides? No sensitive information, such as account numbers, financial figures, visible through the envelope body around the window? All yes means the batch is ready."


How to Run an Alignment Test Before a Large Batch

Check envelope alignment test procedure before any large AP or payroll mailing:

  1. Print one test check. Print a single check from your accounting software exactly as it will print in the production run, using the same check stock and printer settings.
  2. Fold the check sheet. Fold the sheet into thirds exactly as it will be folded in production (first fold the bottom third up behind the middle section, then fold the middle section up in front of the check).
  3. Insert into the envelope. Slide the folded check into the check envelope. Do not seal yet.
  4. Verify address visibility. Confirm the payee delivery address is fully visible through the lower window with clearance on all four sides. For double window envelopes, confirm the return address is visible through the upper window.
  5. Shift test. Gently slide the insert toward each corner within the envelope to simulate handling movement. Verify the address remains fully visible and clears the window edges at all four extreme positions.
  6. Light test. Hold the sealed envelope against a bright light and confirm no sensitive information (check amount, account numbers) is visible through the envelope body around the windows.

If any step fails, correct either the check template address position in your software or order envelopes with windows positioned to match your check layout. Never run a full payroll or AP check batch without first passing all six steps of this alignment test.


Check Envelope Sizes: No.9 and No.10

Check envelope No.9 vs No.10 comparison:

No.9 Envelope (3-7/8 x 8-7/8 inches)

The No.9 envelope is slightly narrower than a No.10 and is used as a reply envelope that fits inside a No.10. In check mailing, TechChecks recommends the No.9 for manual business checks: it fits the detached manual check (approximately 8.25 x 3 inches) without a window since manual checks are not formatted with payee address fields aligned for window viewing.

No.9 reply envelope with check: many businesses mail a No.9 reply envelope inside a No.10 outer envelope when requesting payment by check. The recipient uses the enclosed No.9 to mail their check response back. This is the check-return pairing that makes No.9 envelopes common in invoicing and billing operations.


No.10 Envelope (4-1/8 x 9-1/2 inches)

Check envelope No 10: the No.10 is the most common business envelope size. In check mailing, No.10 envelopes are used for personal check mailing where the check does not fold into the standard 8-5/8 x 3-5/8 business check envelope format, or for mailing checks with accompanying letters. A tri-folded 8.5 x 11 sheet with a check fits in a No.10 envelope, but the No.10 is not specifically sized for check stock the way the 8-5/8 x 3-5/8 format is.


8-5/8 x 3-5/8 Business Check Envelope

Check envelope 8 5/8 x 3 5/8: this format is not a standard US letter envelope size designation (No.9, No.10, etc.); it is a check-specific format sized precisely for tri-folded 8.5 x 11 business computer check sheets. This is the standard double window check envelope size used in all AP and payroll computer check mailing operations. When purchasing check envelopes for business computer checks, specify 8-5/8 x 3-5/8 rather than a No. designation.


Peel-and-Seal vs Gummed Check Envelopes

The check envelope peel-and-seal vs gummed comparison comes down to how the envelopes are sealed and in what volume.


Peel-and-Seal Check Envelopes

Gummed vs peel-and-seal check envelope: peel-and-seal envelopes have a pressure-sensitive adhesive strip on the flap, protected by a paper liner. You peel away the liner and press the flap to seal. No moisture is needed. Many peel-and-seal check envelopes include tamper-evident perforations along the flap edge that tear visibly if someone attempts to open a sealed envelope, providing an integrity indicator for the recipient.

Peel-and-seal is the right choice for: hand-sealing in small to medium batches (under a few hundred envelopes), operations without envelope inserter equipment, and any mailing where tamper evidence is a priority. The adhesive bonds on contact without moisture, making the process clean and fast for office staff sealing envelopes by hand.


Gummed Flap Check Envelopes

Check envelope gummed flap: a gummed flap has a water-activated adhesive on the inside surface of the envelope flap, moistened before sealing.

Gummed check envelopes have a water-activated adhesive on the flap. Moistening (by tongue, wet sponge, or envelope moistener tool) activates the adhesive. BusinessEnvelopes.com's sealing guide notes: "Quick rule of thumb: if you're running a mailing machine, use gum flap. If you're sealing by hand, use peel-and-seal or flip-and-stick."

Gummed is the right choice for: automated inserter and sealing equipment (mailing machines that apply controlled moisture to activate the adhesive reliably as the envelope passes through), and operations with high sealing volume where machine sealing is faster than hand peeling.

Storage consideration: gummed envelopes stored in humid environments or for extended periods can self-seal from ambient moisture activation. Peel-and-seal envelopes are not susceptible to this because the adhesive is physically protected by the paper liner until the liner is manually removed.


Tamper-Evident Check Envelopes

Check envelope tamper evident: tamper-evident check envelopes provide a physical indicator that the envelope has been opened after sealing. Most tamper-evident check envelopes use one of two mechanisms.

Peel-and-seal flap perforations: the seam where the flap meets the envelope body has perforations that tear in a distinctive pattern if someone attempts to open the flap after sealing. A recipient who sees torn perforations knows the envelope was opened in transit. This feature is a standard component of many peel-and-seal check envelopes rather than a separate option.

Security message interiors: some check envelopes print a security notice on the interior ("This envelope contains a check. Do not alter.") or incorporate a pattern that becomes visible if the envelope is steamed or solvent-opened. These features are more common in high-security payroll envelopes.

For check mailing where the security tint and tamper evidence features matter, see our check fraud prevention guide for the full picture of check transit fraud risk and how envelope choice interacts with check security paper features.


Software Compatibility and Double Window Alignment

Double window QuickBooks check envelope: QuickBooks Desktop and QuickBooks Online print the payer company return address in the upper portion of the check face and the payee delivery address below the Pay to the order of line, positioned to align with the standard double window envelope when the check sheet is tri-folded per the software's default folding instruction.

BusinessEnvelopes.com confirms: "Double window envelopes align with QuickBooks voucher check format. Standard and wallet check formats use different address positions, so test one printed check against the envelope before running a full payroll or AP batch."

The same alignment logic applies to Sage 50, Microsoft Dynamics, MYOB, and other major accounting platforms. Each platform's default check template has fixed address positions, and the double window envelope must have window positions that match those fixed positions when the check is folded per the platform's default fold. Ordering envelopes labeled for your specific software (most business envelope suppliers ask which software you use during the order process) ensures this alignment.

For businesses using multiple accounting platforms or switching software, the safest approach is to request a sample envelope and run the alignment test with one printed check from the new software before ordering a full carton.


Which Check Envelope Type to Use

Use No-Window Plain Envelopes When

You are mailing manual business checks that do not include pre-printed payee address fields aligned for window viewing. You are mailing personal checks by hand where no addressing automation is needed. You want the simplest compliance path with USPS (no window alignment to verify).


Use Single Window Envelopes When

You are mailing invoices or correspondence (not checks) where only the payee address needs to show through a window. You have a check format that prints only the payee address in a window-visible position, not the return address.


Use Double Window Envelopes When

You are mailing computer-printed AP checks or payroll checks from QuickBooks, Sage, Dynamics, or similar accounting software. Both the payee delivery address and the payer return address are printed on the check face in the positions that align with a standard double window envelope when tri-folded. This is the standard for all business check mailing volume operations. Use it for every computer check mailing where the software prints both address fields in the standard position.


Mailing Checks: First-Class Mail and Insurance

Check mailing USPS First-Class Mail: all checks mailed through USPS should use First-Class Mail. Standard mail (formerly bulk mail) has significantly lower delivery reliability guarantees and is not appropriate for time-sensitive payment instruments. First-Class Mail includes up to $100 of postal insurance for document loss, though this is generally insufficient to cover a large check amount. For checks over $100 in value, consider adding USPS Certified Mail (which provides proof of mailing and delivery tracking) or Registered Mail (which provides the highest level of USPS security and insurance of up to $50,000) for high-value check mailing.

Certified Mail with return receipt provides documented delivery confirmation that is particularly useful for checks in payment disputes, final payments, or any payment where proof of delivery has legal significance. The return receipt green card or electronic delivery confirmation gives the sender evidence that the payee received the check.

For a guide to check mailing security including how to protect against check washing fraud in transit, see our safe and security checks guide.


Checkomatic Check Envelopes

Checkomatic is an in-house check manufacturer (in-house check manufacturer) that produces ABA compliant check stock (ABA compliant) in Monroe, NY (Monroe NY) since 1997. Check envelopes from Checkomatic are sized and windowed to match Checkomatic's business check formats, eliminating the guesswork in compatibility.

Checkomatic's check envelopes are available in the security tint double window format for computer business check mailing. Ordering envelopes alongside your check stock from the same manufacturer ensures that window positions align with the check form layout without test runs, because both products are designed to work together.


Pairing Envelopes With the Right Check Format

The envelope and check format must work as a system. Checkomatic's computer business check formats pair with the 8-5/8 x 3-5/8 double window envelope:

For businesses that want a self-mailer format that eliminates the envelope entirely, Checkomatic's Z-fold pressure seal checks fold and seal around the check to form their own mailer with no envelope required. For complete payroll and AP mailing supplies, business deposit slips complement the outgoing check mailing system. CPSA certified (CPSA certified) security paper ships on every check order. Free logo printing (free logo printing) is included on all business check orders. Standard turnaround is 3 to 5 business days. No pre-selected add-ons at checkout. Start at checkomatic.com.


The Short Version on Check Envelopes

Three types: no window (manual checks), single window (payee address only through window), double window (both payee and return address from the check form, no envelope addressing needed). Standard computer check envelope size: 8-5/8 x 3-5/8 inches. Security tint interior makes the envelope body opaque to light-through viewing of check content. Window film must be non-tinted and clear per USPS DMM 601.6.3. USPS requires 1/8-inch minimum clearance on all four sides of the window, maintained throughout the full range of insert movement. Always run an alignment test with one check before a full batch. Peel-and-seal for hand sealing; gummed flap for inserter machine operations. Double window is the standard for all business computer check mailing. Mail checks First-Class; add Certified Mail for any check where delivery proof matters.


Frequently Asked Questions


What size envelope fits a business check?

Double window check envelope size: the standard business computer check envelope is 8-5/8 x 3-5/8 inches. This fits a standard 8.5 x 11-inch check sheet tri-folded into thirds, with each third measuring approximately 3-5/8 inches. The 8-5/8-inch envelope width accommodates the 8.5-inch check width with clearance. For manual business checks (detached format, approximately 8.25 x 3 inches), a No.9 envelope measuring 3-7/8 x 8-7/8 inches is the standard fit with no window required. For personal wallet-size checks, a No.6-3/4 envelope measuring 3-5/8 x 6-1/2 inches is the standard personal check envelope size.


What is a double window check envelope?

Double window check envelope: an envelope with two transparent window openings that show both the payee's delivery address (lower window) and the payer's return address (upper window) directly from the check form inside. When a business computer check printed from QuickBooks, Sage, or Dynamics is tri-folded and inserted correctly into a double window check envelope, both addresses appear through their respective windows with no printing or labeling required on the envelope itself. Double window address position: the lower window aligns with the payee address below the Pay to the order of line; the upper window aligns with the payer company address in the upper left of the check face. This eliminates the envelope addressing step entirely for high-volume AP and payroll check mailing.


What is a security tint check envelope and why does it matter?

Check envelope security tint interior: a security tint check envelope has a blue or grey printed pattern on the interior surface of the envelope paper. Check envelope security tint why it matters: without interior tint, standard white envelope paper is translucent enough that someone handling the mail can hold it against a light source and read the check amount, payee name, and account information through the paper. Security tint makes the envelope body opaque to light-through viewing. The window film itself must remain non-tinted and clear per USPS DMM 601.6.3 so USPS OCR equipment can read the delivery address through the window. Check envelope plain vs security tint: security tint is the standard for all business check mailing; plain envelopes are acceptable only for personal check mailing where the payment amount is not sensitive.


What USPS rules apply to check envelopes sent by mail?

USPS OCR window alignment rules from DMM 601.6.3: every character in the delivery address must be completely visible through the window throughout the full range of insert movement within the envelope. Window envelope 1/8 inch clearance USPS requirement: a minimum 1/8-inch clear space must exist between the address text and all four edges of the window on all sides when the insert is at its full limits of movement. Check envelope window film nontinted USPS requirement: the window film must be non-tinted, clear, and transparent (cellophane, polystyrene, or glassine are acceptable). The bottom edge of the address window must be at least 1/2 inch from the bottom of the envelope. Check envelope machinable USPS: for automation pricing, the address must fall within the USPS OCR read zone. Failure to meet window alignment standards triggers non-machinable surcharges or returned mail.


What is the difference between peel-and-seal and gummed check envelopes?

Gummed vs peel-and-seal check envelope: peel-and-seal envelopes have a pressure-sensitive adhesive strip on the flap protected by a paper liner. Peel the liner, press the flap to seal. No moisture required. Check envelope peel-and-seal advantages: faster for hand sealing, no moisture tool needed, tamper-evident perforations available. Gummed envelopes have a water-activated adhesive that requires moistening before sealing. Gummed advantages: preferred for automated inserter equipment (mailing machines), reliable activation under controlled machine dampening. The risk with gummed envelopes: in humid storage environments, ambient moisture can activate the adhesive and seal blank envelopes before use. Peel-and-seal is immune to this because the adhesive is physically covered by the liner until manually removed. Rule of thumb: mailing machine operations use gummed; hand sealing uses peel-and-seal.

Aug 13, 2026

Pressure Seal Check Printing: How It Works and Who Needs It
Quick Answer: Pressure seal check printing is a two-step process. First, your accounting software prints the check, payment details, and recipient address onto a blank Z-fold check sheet using a laser or inkjet printer. Second, a pressure seal folding machine folds the sheet into thirds and seals it closed. The sealed document mails without an envelope. The recipient tears the perforated edges to open the check. This format saves significant labor and material cost for operations mailing 100 or more checks per cycle.


What Pressure Seal Check Printing Is

Pressure seal check printing is a method of producing and mailing checks without envelopes. The check is printed on a special Z-fold sheet that folds into thirds along pre-scored lines. After folding, the edges seal under pressure using glue strips built into the stock during manufacturing. The sealed document has the recipient address on the outside fold and mails directly as its own self-contained piece.

The recipient receives a sealed document that looks like a folded mailer. They tear the perforated edges on three sides to open it and find the check and any payment detail inside. No envelope to throw away separately. No envelope to stuff at your end.

The format is also called a Z-fold check, a self-mailer check, or a pressure seal mailer. The Z-fold name refers to the fold pattern: the sheet folds at two parallel lines into a shape that resembles the letter Z when viewed from the side.

This format exists specifically for high-volume check mailing. It reduces labor, eliminates envelope costs, and speeds up the mailing cycle for operations that send large batches of checks on a regular schedule. For a full look at the different check formats available, see Types of Checks: Every Check Type and Term Explained.

Personal Top Stub Checks


How Pressure Seal Check Printing Works Step by Step

Pressure seal check printing has two distinct stages. Understanding both helps you avoid the most common setup mistakes.


Stage 1: Printing

Load your blank Z-fold pressure seal check stock into your laser or inkjet printer. The stock looks like standard 8.5 by 11 inch paper with faint fold lines and a perforated border. Feed it flat through the printer , do not pre-fold.

Your accounting software sends the print job. The software populates all the variable fields: payee name, check amount in numbers and words, payment date, account information, and the recipient mailing address. The print template must be configured to position all these fields correctly on the flat sheet so they land in the right locations after folding.

After printing, the sheet looks like a standard 8.5 by 11 inch document with check information and mailing address printed in specific zones.


Stage 2: Folding and Sealing

Run the printed sheet through your pressure seal folding machine. The machine feeds the sheet, folds it along the two pre-scored fold lines into a Z shape, and applies firm, even pressure to the edges. The pressure activates the glue strips pre-applied to the stock edges during manufacturing.

The output is a sealed, folded piece approximately 8.5 by 3.67 inches. The recipient address is visible on the outside. The check and payment stub are sealed inside. The piece is ready to apply postage and mail.


What Equipment You Need for Pressure Seal Check Printing

1. A Laser or Inkjet Printer

Checkomatic's blank Z-fold pressure seal check stock is compatible with both laser and inkjet printers. Laser printers are preferred for production volume because they handle high-volume print jobs faster and produce sharper output on the thin bond paper used in pressure seal stock. Inkjet printers work for lower volumes.

Your printer does not need any special settings for pressure seal stock. It treats the flat Z-fold sheet as standard 8.5 by 11 inch paper. The only adjustment you may need is to confirm your printer's paper weight capacity matches the 28-pound bond paper weight of the stock.

If your checks require MICR toner for bank processing, confirm your laser printer supports MICR cartridges. Most banks now process checks optically under the Check 21 Act, but some institutions still use magnetic readers. Call your bank to confirm before investing in MICR toner.


2. A Pressure Seal Folding Machine

This is the piece of equipment that makes pressure seal check printing possible. The machine folds the printed sheet at the scored lines and applies the pressure needed to activate the edge adhesive. Without this machine, the sheet cannot be sealed.

Pressure seal machines come in two main sizes:

  • Desktop folder sealers: Compact units that process 1,500 to 3,500 pieces per hour. Suitable for small to mid-size payroll operations of up to a few hundred employees per cycle.
  • Floor-standing folder sealers: High-capacity units that process 5,000 or more pieces per hour. Suitable for large payroll operations, government disbursements, and high-volume accounts payable.

The machine must be configured to match the fold dimensions of your specific Z-fold stock. Most pressure seal machines have adjustable fold plates. Set them to match the fold positions pre-scored on your stock before running your first batch.


What Software You Need for Pressure Seal Check Printing

Pressure seal check printing requires your accounting software to work with a correctly configured print template. The two components work together to ensure fields land in the right positions on the flat sheet.


Your Accounting Software

QuickBooks, Sage, MYOB, Xero, and most other accounting platforms that support check printing can generate the check data for a pressure seal print job. The accounting software is the source of the variable data: payee, amount, date, and account details.

Some accounting platforms have built-in pressure seal check templates. Others require a custom template configured to your specific stock's field positions. Check your software's template library before purchasing your stock to confirm compatibility. Checkomatic's Z-fold pressure seal stock uses a check-in-middle format, which many accounting platforms support natively.


A Pressure Seal Print Template

The print template is the layout that tells your software and printer where each field goes on the flat 8.5 by 11 inch sheet. The template must position:

  • The check (check number, date, payee, amount in numbers and words, memo, signature line) in the center zone of the flat sheet
  • The recipient mailing address in the zone that will be on the outside after folding
  • The return address in its correct zone
  • Payment stub detail in the stub zone

If any field is positioned even slightly outside its zone, the folded document will show text in the wrong location , check information showing on the outside, or the address appearing inside where the recipient cannot see it without opening the document.


When Pressure Seal Saves Money

Pressure seal check printing typically becomes cost-effective for operations mailing 100 or more checks per cycle. At that volume, the labor savings from eliminating manual stuffing and the material savings from eliminating envelopes combine to offset the machine investment within a reasonable timeframe.

The break-even calculation for your operation:

  1. Calculate your current cost per piece: (envelope cost) + (labor minutes x labor rate) + (postage) = current per-piece total
  2. Calculate pressure seal per-piece cost: (Z-fold stock cost per sheet) + (postage) + (machine cost amortized over volume) = pressure seal per-piece total
  3. Multiply the difference by your annual volume to find your annual savings


When Envelope Mailing Is Still Better

For operations mailing fewer than 50 to 100 checks per cycle on an irregular schedule, the upfront cost of a pressure seal machine is harder to justify through per-piece savings. Traditional envelope stuffing with standard business check stock and double-window envelopes is the more practical choice for lower volumes. For envelopes that work with standard check formats, see the blank checks and check stock available at Checkomatic.

Blue


Who Benefits Most from Pressure Seal Check Printing

Pressure seal check printing is not the right format for every business. It is the right format for a specific type of operation. Here is who benefits most.


Payroll Operations for 100 or More Employees

If you run weekly or biweekly payroll for 100 or more employees who receive paper checks, pressure seal printing transforms payroll check distribution from a labor-intensive process into a near-automated one. Printing and sealing 200 payroll checks takes a few minutes through a machine versus an hour or more of manual stuffing. For payroll check formats and blank stock, see Blank Z Fold Pressure Seal Checks at Checkomatic.

Red Blue

High-Volume Accounts Payable

Businesses that process large vendor payment batches , construction companies paying subcontractors, manufacturers paying suppliers, distributors paying vendors , benefit from the speed and accuracy of pressure seal check printing. Each sealed piece contains exactly the check and payment detail for that vendor, with no risk of stuffing the wrong check into the wrong envelope.


Property Management

Property management companies distribute owner distribution checks monthly to large portfolios of property owners. A 300-unit portfolio might generate 300 owner distribution checks every month. Pressure seal printing processes that batch in minutes. The sealed self-mailer also reduces the risk of a check becoming separated from its payment detail before it reaches the owner.


Government and Nonprofit Disbursements

Government agencies and large nonprofits processing benefit payments, grant disbursements, or donor acknowledgment checks at high volume use pressure seal printing to manage disbursement cycles efficiently without adding labor headcount.


Who Should NOT Use Pressure Seal

Small businesses writing fewer than 50 checks per mailing cycle, businesses with irregular mailing schedules, and sole proprietors will not see enough volume savings to justify the machine investment. For these operations, standard business check stock with double-window envelopes is a simpler and more cost-effective approach. Browse business checks and computer checks for business for standard check formats.

Burgundy


Common Pressure Seal Check Printing Problems and How to Fix Them

Problem 1: Fields Print in the Wrong Position

After folding, fields appear in unexpected locations , the check information shows on the outside, or the address appears inside.

Cause: The print template is not configured correctly for your specific Z-fold stock dimensions.

Fix: Print a test on plain paper first. Hold the printout up to a sheet of your actual stock against a light source, align the edges, and verify each field lands in its correct zone. Adjust the template field positions until the alignment is correct before printing on check stock.


Problem 2: Edges Do Not Seal Completely

After running through the pressure seal machine, some edges are loose or partially unsealed.

Cause: Either the pressure setting on the machine is insufficient, or the stock is being stored in conditions that reduce adhesive effectiveness (high humidity or heat degrades pressure seal glue over time).

Fix: Increase the pressure setting on your folder sealer incrementally and run a test batch. Also confirm your stock is stored in a cool, dry location away from heat sources and direct sunlight. Stock stored in humid conditions or near HVAC vents may seal less effectively.


Problem 3: Paper Jams in the Printer

The Z-fold stock jams in the printer tray or mid-feed.

Cause: The printer's paper weight settings may not accommodate 28-pound bond paper, or the stock is loaded in the wrong orientation.

Fix: Set your printer to the heavy paper or cardstock feed setting if available. Confirm the stock is loaded flat (not pre-folded) in the correct orientation for your printer model. Fan the stack of stock before loading to prevent sheets from sticking together.


Problem 4: Folds Do Not Align With the Scored Lines

The machine folds the stock, but the folds do not follow the pre-scored lines, creating an uneven seal.

Cause: The fold plates on the pressure seal machine are not adjusted to match your stock's specific fold positions.

Fix: Adjust the fold plate positions on your machine to match the scored fold lines on your stock. Every pressure seal machine has adjustable fold guides. Set them to the exact position of each fold line before running production.


Ordering Blank Pressure Seal Check Stock From Checkomatic

Checkomatic's blank Z-fold pressure seal check stock is the starting point for any pressure seal check printing operation. Here is what the stock includes and what to know before ordering.


What Is Included in the Stock

  • Standard 8.5 by 11 inch Z-fold format on 28-pound bond paper
  • Pre-scored fold lines at the correct fold positions
  • Pre-applied adhesive strips on the edges for pressure sealing
  • Perforated tear edges for the recipient to open the document
  • Security features including micro-bordering, watermarks, and endorsement areas
  • Industry-standard dual-toned blue/red (cubed) coloring on the check stock
  • Compatible with laser, inkjet, MICR, and OCR scanning technologies


What You Print on the Stock

The blank stock arrives with no pre-printed business name, address, or banking details. Your accounting software and print template handle all variable printing at the time of each production run. This is different from standard business checks, which arrive with your business information already pre-printed. Pressure seal blank stock is a universal format that works for any business's check information.


Available Quantities

Checkomatic offers blank Z-fold pressure seal check stock in quantities from 100 to 2,500 sheets. Larger quantities reduce the per-sheet cost. Orders ship in as few as three business days from Monroe, NY. For shipping options including rush production, see Shipping and Handling.

Browse and order at Blank Z Fold Pressure Seal Checks and the full range of blank check stock at blank checks and check stock. For guidance on choosing the right check format for your operation, see What Is the Best Place to Order Checks Online.


What Customers Say About Checkomatic

All reviews below are published on checkomatic.com and reproduced verbatim. Source: checkomatic.com/quickbooks-starter-pack-product, 4.5 stars from 166 verified reviews.

"Been with them for 15 years. Always reliable, always good quality, good service. What more can you ask for?"

ATV Inc. | ★★★★★ 5/5 | April 5, 2024 | Source: checkomatic.com/quickbooks-starter-pack-product

"We use CheckoMatic for all of our check needs! They have great prices and we receive our products in a timely manner!"

CG's Tax Service | ★★★★★ 5/5 | September 18, 2024 | Source: checkomatic.com/quickbooks-starter-pack-product

"I got 500 checks for less than half of what the bank wanted for 200!"

VVA Voucher Checks (Vietnam Veterans of America) | ★★★★★ 5/5 | July 6, 2024 | Source: checkomatic.com/quickbooks-starter-pack-product

"ASJ Wilson Construction has been a client of checkomatic for some years now and they've never disappointed this company. Thank you checkomatic for all that you do."

ASJ Wilson Construction | ★★★★★ 5/5 | June 6, 2024 | Source: checkomatic.com/quickbooks-starter-pack-product

"First time ordering and I am super impressed with the quality of the checks. No issues with delivery. I will be ordering again!"

TClinton | ★★★★★ 5/5 | April 9, 2025 | Source: checkomatic.com/quickbooks-starter-pack-product

"Affordable and efficient. My go-to business check printer."

Doe | ★★★★★ 5/5 | January 24, 2025 | Source: checkomatic.com/quickbooks-starter-pack-product


Why Choose Checkomatic for Pressure Seal Check Stock

Blank Z-Fold Stock With Built-In Security Features

Every sheet of Checkomatic's Z-fold pressure seal check stock includes micro-bordering, watermarks, and endorsement area security features at the base price. The stock is printed on 28-pound bond paper in the industry-standard format and color. Security features protect each sealed document during transit.


Compatible With Laser, Inkjet, MICR, and OCR

The stock works with standard laser and inkjet printers and is compatible with MICR printing for banks that require magnetic ink. OCR scanning compatibility ensures the stock processes correctly through automated bank systems. No special printer is required beyond what most businesses already have.


Quantities From 100 to 2,500 Sheets

Order the quantity that fits your current production volume without committing to a full warehouse pallet. Bulk discounts apply as quantity increases. Orders ship from Monroe, NY in as few as three business days.


In-House Manufacturing Since 1997

All check stock is manufactured at Checkomatic's own facility. No third-party print vendors. Consistent quality on every sheet in every order. Single point of accountability if any issue arises with an order.

Order blank pressure seal check stock at Blank Z Fold Pressure Seal Checks. Browse the complete range of blank stock at blank checks and check stock. For standard pre-printed business checks, see business checks and computer checks for business.


Aug 12, 2026

Blank Check Stock: What It Is and How to Use It

What Is Blank Check Stock

Blank check stock definition: blank check stock is specialized security-grade paper used for on-demand check printing that contains no pre-printed banking or company information. The paper itself carries all the fraud-deterrent security features required by the banking industry (watermark, chemically reactive coating, microprinting, void pantograph, UV fluorescent fibers), but arrives from the manufacturer with no routing number, no account number, no company name, and no address pre-printed on it.

The contrast with the traditional check ordering model is the starting point for understanding blank check stock. When you order preprinted checks from a bank or direct manufacturer, all of your account information is encoded on the paper before it ships to you. Every sheet that arrives already has your routing number and account number in the MICR line, and your business name and address in the pre-printed header. Blank check stock reverses this: the paper arrives clean, and all information is added at print time using your own software and a MICR printer.

Blank check paper stock is used almost exclusively by businesses rather than individuals, because the cost of the MICR printer required to print the MICR line is only justified by volume. A small business writing 10 checks per month has no reason to invest in MICR printing infrastructure. A mid-size business writing 200 AP and payroll checks per week, or a CPA firm managing checks across 50 client accounts, benefits significantly from blank stock's flexibility and ongoing cost advantages.

For the full landscape of check paper types and security paper specifications, see our check stock and paper supplies guide.


How Blank Check Stock Printing Works

The blank check stock printing workflow has three components: the security paper (blank stock), the check printing software, and the MICR printer.

The process works like this. You load blank check stock sheets into the paper tray of your MICR printer, just as you would load any paper. You open your accounting or payroll software, navigate to the check writing or payment processing function, select the checks to print, and send the print job. The software generates the complete check layout: company name and address, payee name, check date, check number, dollar amount in both numerals and words, the MICR line (routing number, account number, check number), and any stub information. The MICR printer outputs a fully bank-ready check, with the MICR line printed in iron oxide toner that bank reader-sorter machines can read magnetically.

StockChecks' guide confirms the result: "Your software handles the formatting, placing your company name, address, bank routing number, account number, check number, payee name, amount, and MICR encoding line exactly where they need to be. The result is a fully functional, bank-ready check that looks and performs identically to any pre-printed check."

The on-demand check printing advantage: you print exactly the checks you need, when you need them. There is no pre-ordering lead time after the initial setup. No inventory of checks with last month's address. No boxes of checks waiting to become obsolete when you change banks.


Blank Check Stock vs Preprinted Check Stock

The blank check stock vs preprinted check stock decision turns on four variables: how many bank accounts you manage, whether you have a MICR printer, how much volume you run, and how often your banking information changes.


What Preprinted Stock Has

Preprinted check stock arrives with the bank routing number, account number, company name, and address already printed on every sheet. The MICR line is pre-encoded by the manufacturer using professional MICR printing equipment. Your office printer adds only the variable data (payee, amount, date, check number) using standard laser or inkjet toner. No MICR printer is required at your end.


What Blank Stock Requires

Blank check stock requires your office to print everything, including the MICR line. This means a MICR printer loaded with MICR toner (not standard toner) must be part of your setup. It also requires check printing software capable of generating the MICR line in the correct position, format, and font (E-13B).


The Key Comparison Points

CHAX's blank check stock comparison table captures the practical decision framework well. Preprinted stock offers higher convenience for single-account, low-volume operations. Blank stock offers lower long-term cost, immediate flexibility for account changes, and single-inventory service for multi-account operations. Both types carry the same paper-level security features.

Blank check stock vs preprinted check stock security comparison: preprinted stock becomes a negotiable instrument the moment the MICR line is printed on it at the manufacturer. A sheet of preprinted stock stolen before any check is filled in already has your routing and account numbers encoded on it. Blank stock without MICR encoding has no banking credentials on it. However, once printed with MICR at your office, the printed check carries the same risk as any preprinted blank check. Both types require locked physical storage. See the storage risk section below for the specific controls required.


MICR Toner Requirement: Why Standard Toner Is Not Enough

MICR toner blank check stock is not a preference, it is a technical and legal requirement for check processing. Understanding why requires a brief explanation of how bank reader-sorter machines work.

MICR stands for Magnetic Ink Character Recognition. The characters in the MICR line at the bottom of every check (routing number, account number, check number) are printed in a font called E-13B using toner that contains iron oxide particles. When a check passes through a bank's reader-sorter machine, the machine activates a magnetic field that magnetizes the iron oxide particles in the MICR toner, then reads the resulting magnetic signal to decode the characters. This reading happens at high speed across millions of checks per day.

MICR toner vs regular toner iron oxide: standard laser toner contains carbon black pigment but no iron oxide. A check printed with standard toner produces characters that look visually identical to MICR-printed characters but produce no magnetic signal when passed through a reader-sorter. The machine cannot read them magnetically.

Mekorma's blank check stock guide confirms the federal backing: "According to the Federal Reserve and the Accredited Standards Committee, magnetic toner is still legally required for check printing." PostGrid adds the ANSI dimension: "ANSI and the Federal Reserve need banks to use special MICR ink or toner for printing checks so they can be processed and cleared properly."

What happens when you use standard toner: some modern banks have scanners with optical character recognition capability that can read MICR font characters optically rather than magnetically. A check printed with standard toner may pass through these systems. But many banks still run checks through magnetic reading equipment, particularly for high-volume commercial check processing. A check that fails magnetic reading may: be processed manually at extra cost, be returned, generate a processing fee, or cause a delay in clearing. For a business printing hundreds of checks per week, the reliability and regulatory compliance of MICR toner is not optional.

For ink jet printers: a parallel product called MICR ink (not toner) is available for inkjet printers. MICR ink contains the same iron oxide particles and produces the same magnetic signal. Inkjet MICR check printing is less common in commercial operations because inkjet ink is more susceptible to smearing on security paper and produces lower print volumes than laser MICR printing.


ANSI X9.100 Standards for Blank Check Stock

ANSI X9.100-10 paper standard: the physical paper used for blank check stock must meet ANSI X9.100-10, the American National Standard titled "Paper For MICR Documents." Published by the Accredited Standards Committee X9 under ANSI accreditation, X9.100-10 specifies the physical properties of the paper itself: weight, thickness, opacity, moisture resistance, and dimensional stability. The standard ensures that check paper entering automated bank processing systems meets minimum physical characteristics to withstand high-speed handling through reader-sorter equipment without tearing, jamming, or distorting.

The ANSI blog's technical analysis notes: "ANSI X9.100-10-2021: Paper For MICR Documents specifies common attributes for raw base stock and finished printed products of MICR documents. Since it deals with the physical requirements, setting specifications for paper-based security features is excluded from the scope of this standard." The security features (void pantograph, chemically reactive coating, watermark) are governed by the CPSA (Check Payment Systems Association) standards rather than ANSI X9.100-10 directly.

ANSI X9.100-20 MICR font standard governs the printing of the MICR characters themselves: the shape, dimensions, signal level, and tolerances for the characters in the E-13B font. This standard ensures that MICR characters printed by any compliant printer and toner produce a consistent, machine-readable signal at bank reader-sorter equipment regardless of the printer brand or facility.


The E-13B Font and MICR Line Placement

MICR line alignment blank stock: precise alignment of the MICR line to the bottom edge of the check is a critical requirement for bank processing acceptance. Every blank stock sheet and MICR printer must work together to position MICR characters within the tolerances specified by ANSI X9.100-160-1.

E-13B font MICR check: E-13B is the magnetic ink character font used on all US bank checks. The name derives from the original standardization: E represents the font series, 13 represents the 0.013-inch character width grid, and B indicates the second version of this design. E-13B includes ten numeric digits (0-9) and four special symbols used to delimit the routing number, account number, and check number fields in the MICR line.

The MICR line position is governed by ANSI X9.100-160-1, which specifies that the MICR characters must be printed within a defined band along the bottom edge of the check. The routing number appears first (between the "transit" symbol characters), followed by the account number, followed by the check number. This order and position are uniform across all US bank checks by ANSI requirement.

Some blank check stock includes a faint indicator square at the position where a MICR special character is always expected, providing a visual alignment guide for printer calibration. Mekorma's guide notes this feature: "Some blank stock includes a single faint square at the position where a MICR special character is ALWAYS expected. This simple feature eliminates the need for a MICR Gauge." A MICR gauge is a physical ruler tool used to verify that the MICR line is positioned correctly on the printed check before submitting a batch.

For a diagram showing where the MICR line, routing number, account number, and check number appear on a standard check, see our check diagram and layouts guide.


The Four Blank Check Stock Formats

Blank check stock is available in four position formats that determine where the check portion of the sheet prints relative to the voucher stubs. The format you need is determined entirely by your accounting or payroll software's print template, since the software generates the check layout in a fixed position on the page.


Check on Top Format

Blank check stock top position: the check on top format (also called the voucher format) prints the check in the top third of the sheet, with two stub sections below. The upper stub shows payment detail for the payee (invoice numbers, amounts, payment purpose). The lower stub is a company copy retained after the check is detached. This is the most common format for US business check printing.

Blank check stock QuickBooks compatible: check on top is QuickBooks Desktop's and QuickBooks Online's default check printing template for both AP and payroll checks. Microsoft Dynamics GP also uses check on top as its default. Most payroll software that produces printed checks uses the check on top voucher layout because the two stubs naturally accommodate the gross pay, deduction itemization, and net pay fields required on a payroll check stub.

Checkomatic's blank checks on top format serves these applications.


Check in Middle Format

Blank check stock middle position: the check in middle format prints the check in the center of the sheet, with one stub above and one below. The upper stub is the accounts payable remittance copy; the lower stub is returned to the business as a payment record. This format is less common than check on top but is the default for Sage 50 (formerly Peachtree Accounting).

Blank check stock Sage 50 compatible: the check in middle format is the Sage 50 standard. Businesses that use Sage 50 exclusively should order check in middle format to match the software's print layout without manual configuration changes.

Checkomatic's blank checks in middle format serves Sage 50 and similar applications.


Check on Bottom Format

Blank check stock bottom position: the check on bottom format prints the check in the lower third of the sheet, with the voucher stub or stubs above. This format is less commonly required than top or middle but is used by certain ERP systems and industry-specific accounting software. Some businesses prefer this format when the stub information is longer and benefits from appearing at the top of the page before the check.

Blank check stock Microsoft Dynamics compatible: Microsoft Dynamics 365 and some versions of Dynamics GP support check on bottom as an alternative template alongside check on top. Always verify the specific template in your Dynamics configuration before ordering.

Checkomatic's blank checks on bottom format serves these applications.


Z-Fold Pressure Seal Format

Blank check stock Z-fold pressure seal: the Z-fold pressure seal format is a specialized blank check stock that folds and seals around itself after printing, creating a self-mailer that serves as its own envelope. No envelope or stuffing is required. The check folds into thirds in a Z-pattern, the perforated edges seal under pressure (from a pressure sealer machine or a hand roller), and the folded document is addressed on the outside using a window that reveals the payee's address through the fold.

Z-fold pressure seal blank stock is the most operationally efficient format for high-volume check mailing. Businesses that mail hundreds of AP or payroll checks per cycle eliminate the envelope, inserting, and sealing labor that manual stuffing requires. The sealed format also provides a tamper-evident security advantage: any attempt to open the document before the recipient does leaves visible damage at the perforated edges.

Checkomatic's Z-fold pressure seal checks serve high-volume mailing operations.


Blank Check Stock Software Compatibility

Blank check stock on demand check printing requires check printing software that can generate the MICR line in the correct E-13B font at the correct position on the page. Most major accounting and payroll platforms support check printing from blank stock when configured correctly.


Software Compatibility by Platform

Blank check stock QuickBooks compatible: QuickBooks Desktop (all editions) and QuickBooks Online support MICR check printing from blank stock using the standard voucher (check on top) template. The MICR line is generated by QuickBooks and printed by the MICR printer. Order Checkomatic's check on top blank stock for QuickBooks. For QuickBooks-specific preprinted formats where no MICR printer is available, see our QuickBooks checks.

Blank check stock Sage 50 compatible: Sage 50 (formerly Peachtree) and Sage Intacct both support blank check stock printing with MICR. Sage Intacct's documentation specifically covers blank check stock setup: "MICR ink required. MICR ink printer required. Coordinate alignment with your bank." Use check in middle format for Sage 50.

Blank check stock Microsoft Dynamics compatible: Microsoft Dynamics GP, Dynamics 365 Business Central, and Dynamics 365 Finance all support MICR check printing from blank stock. Mekorma's payment hub for Dynamics GP is a widely used third-party module that manages blank check printing, positive pay, and multi-account check operations.

Blank check stock MYOB compatible: MYOB AccountRight and MYOB Business support blank check stock printing. The software generates the check layout including MICR line; the MICR printer handles the iron oxide encoding. Confirm the template format (check on top or check in middle) in your MYOB configuration.

Blank check stock Peachtree compatible: Sage 50 is the successor to Peachtree Accounting, and the check in middle format serves legacy Peachtree installations. Modern Peachtree users have generally migrated to Sage 50 with the same format requirement.

Other platforms: ADP, Paychex, Gusto, and other payroll processing services that support direct check printing typically use check on top format and are compatible with MICR blank stock. Verify the specific template in your payroll platform's settings before ordering. CHAX confirms: "The power of on-demand payment systems hinges directly on your software's printing capabilities. The critical requirement is that your check printing software must print the entire document, including the MICR line, your bank details, and company information."


Multi-Account Blank Stock Advantage

Blank check stock multi-account operations: the most operationally significant advantage of blank check stock for businesses with multiple bank accounts is that one inventory of blank stock serves all accounts simultaneously.

With preprinted check stock, each bank account requires its own dedicated inventory of checks. Account A's checks have Account A's routing and account numbers pre-printed; they cannot be used for Account B payments. If you operate a payroll account, an AP account, a tax account, and a petty cash account, you maintain four separate inventories of preprinted checks, reorder each independently, and risk running out of one while having excess of another.

With blank stock, all four accounts use the same physical paper. When printing a payroll check, the software selects the payroll account credentials and the MICR printer encodes them. When printing an AP check, the software selects the AP account credentials and the MICR printer encodes those instead. Same paper, different MICR output. The inventory management is unified.

Blank check stock single source multiple accounts: Sage Intacct's documentation highlights this directly: "Loading your printer: Same check stock for all checking accounts." The CHAX comparison table echoes it: "Cost efficiency: Lower long-term cost, ideal for multiple accounts." For CPAs managing client accounts, property managers with per-property accounts, or businesses with separate operational accounts, this single-inventory advantage compounds into significant savings in purchasing, storage, and reorder management over time.


Blank Check Stock vs Preprinted Cost Comparison

Blank check stock cost per check comparison involves two separate cost streams: the ongoing paper cost per check, and the upfront infrastructure cost (MICR printer and check printing software if not already owned).


Paper Cost Per Check

Blank check stock typically costs $0.08-$0.15 per sheet in volume, compared to $0.20-$0.35 per sheet for preprinted check stock at comparable security feature levels. This gap reflects the manufacturing cost of the MICR encoding step that the manufacturer performs for preprinted stock. When you print blank stock, you perform that step yourself using your MICR printer and toner.

StockChecks confirms: "You can typically get 1,000 checks within the same price range as preprinted stock, and blank stock can be purchased in higher-quantity bulk orders." The per-check cost advantage grows at higher volumes.


Infrastructure Cost

A MICR printer (a standard laser printer model with MICR toner capability and the appropriate toner cartridge) runs $200-$1,000 for the printer, plus $50-$150 per MICR toner cartridge replacement depending on the model and yield. MICR toner cartridges typically yield 3,000-7,000 check impressions depending on the printer model.

The breakeven calculation: if blank stock saves $0.12 per check versus preprinted stock, and MICR infrastructure costs $500 upfront, the breakeven point is at approximately 4,200 checks ($500 / $0.12). A business printing 200 checks per week reaches this breakeven in about 21 weeks. A business printing 20 checks per week reaches it in about 42 weeks. For any business with meaningful check volume, blank stock economics favor the switch within the first year.

For businesses already owning a MICR printer (many businesses with existing laser check printing infrastructure already have MICR capability), the paper cost saving is immediate with no breakeven period.


Security Features on Blank Check Paper

Blank check stock security features are the same categories of features found on preprinted check stock, applied to the paper before it is printed. These features protect the physical document against counterfeiting, alteration, and unauthorized reproduction.

Standard security features on CPSA-compliant blank check paper include:


  • Chemically reactive paper: produces visible staining when check-washing solvents contact the paper, making alteration attempts detectable


  • Void pantograph: a pattern printed on the check background that causes the word "VOID" to appear if the check is photocopied or scanned


  • Genuine watermark: embedded in the paper fibers, visible when held up to light, and impossible to replicate on a standard copier


  • Microprinting: tiny text along borders or the signature line, readable under magnification, that photocopies as a solid line rather than text


  • UV fluorescent fibers or features: visible only under ultraviolet light, used for authenticity verification


  • Thermochromic ink: a heat-sensitive feature that changes appearance when touched or heated, confirming the check has not been reproduced


TROY Group's blank check stock guide notes that their MICR Toner Secure adds an extra layer beyond the paper features: "A special, patented security feature: a red dye that releases whenever check washing is attempted, alerting the banks of check fraud immediately." This feature is embedded in the MICR toner itself rather than the paper.

All blank check stock security features should meet or exceed CPSA padlock certification standards. The CPSA padlock icon on blank check stock confirms that the paper's security features have been evaluated against the Check Payment Systems Association's guidelines. For more on how security features protect against the most common check fraud schemes, see our safe and security checks guide.


Security Risk of Blank Check Stock Storage

Important: Blank check stock exiting your MICR printer with the routing and account numbers encoded is immediately negotiable. It requires the same locked storage as any signed check. An unsupervised blank stock inventory with MICR printer access is a significant fraud risk.

Blank check stock security risk storage: the security profile of blank check stock depends on where in the printing cycle you are considering. An unprinted sheet of blank stock has no banking credentials on it at all. A thief who steals blank stock sheets from a storage cabinet has paper with security features but no MICR line, no account information, and no company information. They cannot use it as a check without access to your MICR printer and your accounting software credentials.

This is the theoretical security advantage of blank stock: Mekorma's analysis confirms that "pre-printed check stock becomes negotiable from the moment it is MICR encoded, creating countless opportunities for would-be thieves. If bad actors in your own organization get a hold of company checks, they can more easily generate self-serving payments."

However, blank check stock physical security controls still matter. The chain of custody risk with blank stock is at the printer output, not the paper storage cabinet:

  • Any check that exits the MICR printer is fully negotiable and must be handled with the same care as a signed check
  • The MICR printer itself must be in a secured location with access controls (printer access controls, audit logs)
  • The accounting software credentials that initiate check printing are the true security layer for blank stock operations
  • Blank stock rejects and spoiled prints must be shredded, not discarded in open recycling
  • The total inventory of blank stock should be tracked; unexplained stock shortfalls indicate a potential theft of unprinted sheets

TROY Group's guide recommends: "A printer with a locking tray is leagues above any standard printer. Not only does this add extra protection against theft of both pre-printed or blank stock, but it reduces the chain of custody protocols and saves money in the long run."

For complete guidance on check fraud prevention methods and how to detect fraud early, see our check fraud prevention guide.


The Color Logo Limitation on Blank Check Stock

Blank check stock logo printing color limitation: MICR toner is black. Only black. There is no colored MICR toner available for business check printing.

This creates a specific limitation for businesses that want their checks to display a color company logo. On preprinted check stock ordered from a manufacturer, the manufacturer can pre-print the company logo in color using standard commercial printing ink before the paper ships. The MICR line and security features are added separately. The result is a check with a full-color logo header.

On blank check stock, the printer at your office prints everything in MICR toner, which is black. Your company logo can appear on the check, but only in black. Mekorma's guide is explicit: "Include in your stock order to have your company logo pre-printed in color. We have received many inquiries on how to print the company logo in color and the answer is you can't. MICR toner is black and no other colors."

The solution for businesses that want color logos on blank-stock checks: order blank check stock with the company logo pre-printed in color by the manufacturer before it ships. The manufacturer prints the color logo using conventional commercial printing equipment, then ships the stock. Your MICR printer then prints all the variable check data (including MICR line) in black on top of the pre-printed color logo. Checkomatic offers free black-and-white logo printing on business checks; for color logo requirements on blank stock, discuss with your Checkomatic order team at the time of ordering.


When Preprinted Check Stock Is the Better Choice

Despite blank stock's cost and flexibility advantages for multi-account, high-volume operations, preprinted check stock remains the right choice in specific circumstances.

You need preprinted stock when: you do not own a MICR printer and the check volume does not justify the investment. If your business writes fewer than 50 checks per month, the breakeven on MICR printer infrastructure is years away. Preprinted stock with standard printer printing is more economical for low-volume users.

You need preprinted stock when: your accounting software does not support MICR line generation. Some entry-level accounting tools generate check layouts but do not produce the MICR line characters in the correct E-13B font. If your software cannot print the MICR line, you cannot use blank stock.

You need preprinted stock when: you manage a single bank account for a simple AP or payroll workflow. The flexibility benefit of blank stock (serving multiple accounts) does not apply. The setup simplicity of preprinted stock (load, print variable data, done) is sufficient.

You need preprinted stock when: your bank requires specific check formatting that you are already aligned to with your preprinted stock supplier and switching would require bank re-alignment. Some banks have specific MICR encoding format requirements that may differ from the default your check printing software generates.

For businesses in the preprinted category, Checkomatic's full range of business check formats covers all the major accounting software templates. See our business checks overview, and our specific format pages for check on top, check in middle, and 3-on-a-page checks.


Checkomatic Blank Check Stock

Checkomatic is an in-house check manufacturer (in-house check manufacturer) that has produced ABA compliant check stock (ABA compliant) in Monroe, NY (Monroe NY) since 1997. All check stock, including blank formats, ships on CPSA certified (CPSA certified) security paper with six fraud deterrent features: chemically reactive paper, genuine watermark, microprinting, thermochromic ink, void pantograph, and UV fluorescent fibers.


Blank Check Stock Formats Available

Checkomatic's blank check stock range covers all four position formats:


Matching Accessories

Blank check stock operations typically also require check envelopes for mailed checks (except Z-fold format, which is its own mailer) and business deposit slips matched to your account for incoming payment deposit. For businesses managing payroll alongside AP on blank stock, the 7-ring check binders organize manual check sets alongside printed blank stock operations.


Free Logo Printing

Free logo printing is included on Checkomatic business check orders. For blank check stock with black-and-white logo printing pre-applied by the manufacturer (so your office MICR printer produces the check data while the logo is already on the paper), specify your logo at the time of ordering. Standard turnaround is 3 to 5 business days from digital proof approval. No pre-selected add-ons at checkout. Start at checkomatic.com.


The Short Version on Blank Check Stock

Blank check stock is security-grade paper with no pre-printed banking information. You print everything, including the MICR line with routing and account numbers, using check printing software and a MICR printer loaded with MICR toner. Standard toner does not contain the iron oxide particles bank reader-sorters require, so MICR toner is a technical and legal requirement per ANSI X9.100-20 and Federal Reserve rules. The paper itself must meet ANSI X9.100-10 physical specifications.

Four formats exist: check on top (QuickBooks, Dynamics default), check in middle (Sage 50 default), check on bottom (some ERP systems), and Z-fold pressure seal (high-volume mailing). One inventory of blank stock serves all bank accounts simultaneously, making it the economical choice for multi-account operations. Printed blank checks are immediately negotiable and require locked storage. Color logos cannot be printed by your office MICR printer (which prints black only); logos must be pre-printed in color by the manufacturer. Preprinted stock remains the better choice for low-volume single-account operations without a MICR printer.


Frequently Asked Questions


What is blank check stock?

Blank check stock definition: blank check stock is specialized security-grade paper for check printing that contains no pre-printed banking or company information. Unlike preprinted checks where the routing number, account number, and company details are encoded before shipping, blank check paper stock arrives with only the paper-level security features (watermark, void pantograph, chemically reactive coating, microprinting) and no account data. Your check printing software and MICR printer add all the variable and fixed information at print time, including the MICR line containing routing and account numbers in the E-13B font required by ANSI X9.100-20. Blank check stock is used primarily by businesses with multi-account operations or high check volumes where the flexibility of on-demand check printing outweighs the upfront MICR printer investment.


Do you need a special printer for blank check stock?

Yes. MICR printer requirement blank stock: blank check stock requires a MICR printer loaded with MICR toner. MICR toner vs regular toner iron oxide: MICR toner contains iron oxide particles that allow the MICR line characters (routing number, account number, check number) to produce a magnetic signal when read by bank reader-sorter machines. Standard laser toner contains carbon black pigment but no iron oxide. A check printed with standard toner on blank stock may pass optical scanning at some banks but fails magnetic reading at banks using magnetic reader-sorters, and does not meet the ANSI X9.100-20 MICR encoding standard. For inkjet printers, MICR ink (not toner) is available and provides the same iron oxide magnetic property.


What is the difference between blank check stock and preprinted check stock?

Blank check stock vs preprinted check stock: preprinted check stock has the routing number, account number, and company information already encoded on the paper by the manufacturer before shipping, so a standard laser or inkjet printer can print only the variable check data. Blank stock requires the office MICR printer to print everything including the MICR line. Blank stock advantages: one inventory serves all bank accounts (blank check stock multi-account operations), account changes take effect immediately in software with no re-ordering, and blank stock with unprinted MICR has no banking credentials if stolen. Preprinted advantages: no MICR printer needed, simpler setup, color logo available from manufacturer. The blank check stock single source multiple accounts advantage is the primary reason multi-account businesses choose blank stock.


What ANSI standards apply to blank check stock paper?

Three ANSI standards govern blank check stock and MICR printing. ANSI X9.100-10 paper standard: specifies the physical properties of paper for MICR documents (weight, thickness, dimensional stability). ANSI X9.100-20 MICR font standard: specifies the E-13B font MICR check character shape, dimensions, and magnetic signal requirements. ANSI X9.100-160-1: specifies MICR line placement and location on the check, defining exactly where routing and account numbers must appear relative to the check edge. All standards are published by Accredited Standards Committee X9 under ANSI accreditation. MICR check printing software must comply with X9.100-20 character specifications and X9.100-160-1 placement requirements to produce checks accepted by bank processing equipment.


Which blank check stock format works with QuickBooks?

Blank check stock QuickBooks compatible: QuickBooks Desktop and QuickBooks Online use the check on top (voucher) format as the default check printing template, where the check prints in the top third of the sheet with two stubs below. This is Checkomatic's blank checks on top format. For blank check stock Sage 50 compatible operations, use check in middle format (check in the center, stubs above and below). For blank check stock Microsoft Dynamics compatible setups, check on top is the default though bottom format is also supported. Blank check stock MYOB compatible: check on top. Blank check stock Peachtree compatible (Sage 50 successor): check in middle. Always verify the specific template name in your software's check printing configuration before ordering to confirm format alignment.


Aug 12, 2026

What Is a High Security Check and Does Your Business Need One

Quick Answer: A high security check is a business or personal check printed on specially manufactured paper with six built-in security features. These features prevent the most common types of check fraud: washing, photocopying, counterfeiting, and alteration. High security checks clear at all US banks the same way standard checks do. At Checkomatic, all six security features are included in the base price on every order. Most businesses that write checks regularly should use them.


What Is a High Security Check

A high security check is business or personal check stock manufactured with multiple built-in features that make the check extremely difficult to alter, counterfeit, or use in a fraud scheme.

Standard checks have the basics: your name, address, and account information printed on ABA-compliant paper with a MICR line at the bottom. They clear at any US bank. But standard check paper provides no resistance to the tools criminals use most often: chemical solvents that erase ink, scanners and color printers that reproduce checks, and physical alterations that change the payee name or amount.

A high security check adds six layers of protection directly into the paper and printing process. These features do not affect how the check is used or how it clears at the bank. They only activate when someone attempts fraud.

The term "high security check" is used interchangeably with "security check," "secure check stock," and "fraud-resistant checks." The underlying standard is the same: multiple features that address multiple fraud methods simultaneously.


The Six Security Features in a High Security Check

High security checks include six specific features. Each one targets a different fraud method. Here is what each feature does and why it matters.


1. Chemically Sensitive Paper

The paper reacts permanently when exposed to solvents like acetone, bleach, or lighter fluid. Criminals use these chemicals to erase ink during check washing. When the solvent touches chemically sensitive paper, it leaves a visible, irremovable stain. The attempted fraud becomes visible on the check itself. This is the most important feature for preventing check washing, which costs US businesses over $815 million per year.


2. Microprinting

Text printed at under one point size along the signature line or borders. It looks like a solid line to the naked eye. Under a magnifying glass, it reads as a repeated word or phrase. On any photocopy or scan, the microprinting degrades into an unreadable blur. A bank teller trained to check for microprinting can immediately identify a copy from an original. This feature specifically defeats photocopying and scanning fraud.


3. Void Pantograph

A hidden pattern in the check background that reveals the word VOID when the check is photocopied or scanned. The pattern is invisible on the original check but appears clearly on any reproduction. This feature defeats attempts to reproduce a legitimate check and pass the copy as an original. For more detail on how this works, see our guide to how QuickBooks checks prevent check washing.


4. UV Fluorescent Fibers

Colored fibers embedded in the paper during manufacturing that glow under ultraviolet light. Bank authentication equipment and handheld UV lights used by tellers can verify these fibers instantly. Standard copy paper and most printing substrates do not contain these fibers. Any attempt to reproduce the check on different paper fails the UV check. The fibers cannot be added to paper after manufacturing.


5. Heat-Sensitive Ink (Thermochromic Ink)

Ink printed in a specific area of the check that disappears when rubbed with a finger and reappears when the heat dissipates. This is a simple, instant verification step anyone can perform without equipment. A bank teller or business owner who rubs the heat-sensitive area and sees no reaction knows the ink is not genuine. This feature is difficult to replicate with standard printing equipment and provides a quick physical authentication step.


6. Genuine Watermark

A watermark embedded in the paper during manufacturing. It appears when the paper is held up to a light source. Surface-printed watermarks are different from genuine watermarks and do not have the same appearance under light. Genuine watermarks cannot be added to paper after the fact. Tellers trained in check authentication verify the watermark as part of the fraud screening process. For the full list of security features available on Checkomatic check stock, see the security features page.


Who Needs High Security Checks

Most businesses that write checks should use high security checks. The risk-benefit calculation is clear: At Checkomatic, high security checks include all six security features at the base price on every order.

You specifically need high security checks if your business fits any of these profiles:


You Mail Checks Regularly

Every check that goes into outgoing mail is a potential target. Check washing starts with theft from mailboxes. A check on standard paper can be washed and reused. A check on chemically sensitive paper destroys itself when washing is attempted. If your accounts payable cycle involves mailing vendor payments, you need high security checks.


You Write High-Value Payments

A $500 check and a $50,000 check are equally easy to steal. But criminals actively seek higher-value checks because the payoff is larger. High-value vendor payments, contractor payments, and equipment purchases deserve the extra protection of security-featured check stock.


You Are in a High-Risk Industry

Certain industries see disproportionately high rates of check fraud. Construction (large contractor payments), property management (multiple vendor relationships), nonprofits (limited internal controls), legal services (trust account checks), and healthcare (insurance and patient billing) are all high-risk categories. If your industry processes large check volumes with multiple payees, high security checks are a baseline precaution.


Your Bank Requires Them for Positive Pay

Positive Pay is a bank fraud prevention service that cross-checks each presented check against a list of checks you issued. Many banks require security-featured check stock as a condition of their Positive Pay enrollment. If you use or plan to use Positive Pay, confirm your bank's check stock requirements before ordering.


You Have Had a Fraud Incident Before

A business that has experienced check fraud once is more likely to be targeted again. Fraudsters share information about successful targets. Switching to high security checks after a fraud incident removes the vulnerability that was exploited and demonstrates reasonable care under UCC guidelines.


What Fraud Types High Security Checks Prevent

High security checks are specifically designed to defeat the most common check fraud methods. Here is how each feature maps to a specific threat.


Check Washing

Check washing is the most common physical check fraud method. A criminal steals a check, uses chemical solvents to erase the ink, writes a new payee and amount, and cashes it. Chemically sensitive paper makes check washing significantly more difficult to execute successfully. The solvent reacts with the paper before the ink is fully removed, leaving a visible, permanent stain that bank tellers are trained to identify as evidence of tampering. For a full guide to check washing and how security features stop it, see how QuickBooks checks prevent check washing.


Photocopying and Scanning

A criminal with access to a high-quality color copier or scanner can reproduce a check and try to cash the copy. Microprinting defeats this by degrading to an obvious blur on any copy. The void pantograph defeats it by displaying VOID on any reproduction. Both features activate automatically when copying is attempted.


Counterfeiting

A criminal creates a fake check using your routing number and account number , information visible on any check you write. UV fluorescent fibers make counterfeiting significantly harder because the fibers must be embedded during paper manufacturing , they cannot be added after the fact. Any UV scan that is part of a bank's authentication process will not find these fibers in paper that was not manufactured with them. The genuine watermark provides the same defense under light inspection.


Physical Alteration

A criminal receives a legitimate check and alters the payee name or amount using correction fluid, bleaching, or scraping. Heat-sensitive ink and chemically sensitive paper both make physical alteration visible. Any attempt to correct, bleach, or chemically alter the surface leaves permanent evidence.


Are High Security Checks Required by Law

High security checks are not required by federal law in most situations. However, two legal frameworks make them practically necessary for most businesses.


UCC Reasonable Care Standard

Under UCC (Uniform Commercial Code) Article 3, businesses are responsible for exercising reasonable care to prevent check fraud. If a check fraud investigation determines that a business used standard check stock without security features when security-featured stock was readily available, the business may be held partially or fully responsible for the fraud losses rather than the bank.

Using high security checks demonstrates reasonable care. It does not guarantee full recovery in every fraud case, but it significantly strengthens your legal position. A business that used security-featured check stock and still suffered fraud has a much stronger claim against the bank than one that used plain paper checks. For more on UCC liability and check security, see our guide on what are the most important features of checks.


Bank and Industry Requirements

Some banks require security-featured check stock as a condition of specific services, particularly Positive Pay enrollment. Some industries require it through internal compliance policies or client contract requirements. Always confirm your bank's check stock requirements directly. Requirements vary by institution and by the specific account type or service level you use.


High Security Checks With QuickBooks and Accounting Software

High security checks work with all major accounting software the same way standard checks do. The security features are in the paper and printing , they do not affect how QuickBooks or any other platform generates the check data or sends the print job to your printer.


QuickBooks-Compatible High Security Formats

Checkomatic offers high security check stock in all QuickBooks-compatible formats:

  • Voucher (check on top): One check with two detachable stubs per page. Default QuickBooks payroll and AP format.
  • 3-on-a-page: Three checks per sheet, no stubs. High-volume AP printing.
  • Check in middle: For Sage 50 and Peachtree software.
  • Manual checks: Pre-printed carbonless check books for handwritten payments.

All four formats include all six security features as standard. There is no "security upgrade" tier at Checkomatic. Every check order, regardless of format or quantity, uses the same security-featured paper stock.

For the full range of software-compatible high security check formats, see QuickBooks checks and computer checks for business.

Blue

What Customers Say About Checkomatic

All reviews below are published on checkomatic.com and reproduced verbatim. Source: checkomatic.com/quickbooks-starter-pack-product, 4.5 stars from 166 verified reviews.

"Been with them for 15 years. Always reliable, always good quality, good service. What more can you ask for?"

ATV Inc. | ★★★★★ 5/5 | April 5, 2024 | Source: checkomatic.com/quickbooks-starter-pack-product

"I got 500 checks for less than half of what the bank wanted for 200!"

VVA Voucher Checks (Vietnam Veterans of America) | ★★★★★ 5/5 | July 6, 2024 | Source: checkomatic.com/quickbooks-starter-pack-product

"ASJ Wilson Construction has been a client of checkomatic for some years now and they've never disappointed this company. Thank you checkomatic for all that you do."

ASJ Wilson Construction | ★★★★★ 5/5 | June 6, 2024 | Source: checkomatic.com/quickbooks-starter-pack-product

"We use CheckoMatic for all of our check needs! They have great prices and we receive our products in a timely manner!"

CG's Tax Service | ★★★★★ 5/5 | September 18, 2024 | Source: checkomatic.com/quickbooks-starter-pack-product

"First time ordering and I am super impressed with the quality of the checks. No issues with delivery. I will be ordering again!"

TClinton | ★★★★★ 5/5 | April 9, 2025 | Source: checkomatic.com/quickbooks-starter-pack-product

"Affordable and efficient. My go-to business check printer."

Doe | ★★★★★ 5/5 | January 24, 2025 | Source: checkomatic.com/quickbooks-starter-pack-product


Why Choose Checkomatic for High Security Checks

All Six Features Standard on Every Order

There is no security tier or upgrade fee at Checkomatic. Every check order includes all six security features: chemically sensitive paper, microprinting, void pantograph, UV fluorescent fibers, heat-sensitive ink, and genuine watermark. This applies to every format and every quantity, from a single box to a large bulk order.


In-House Manufacturing Since 1997

All high security checks are manufactured at Checkomatic's own facility in Monroe, NY. In-house production means consistent security feature quality on every check in every order. No third-party print vendors. Your banking information stays within a single controlled manufacturing environment.


ABA-Compliant MICR Pre-Verified

Every routing number is verified against the Federal Reserve E-Payments Routing Directory before production begins. High security checks from Checkomatic clear at any US bank without rejection. ABA compliance and security features are not a trade-off , every check delivers both.


50 to 70 Percent Below Bank Pricing

Banks charge a significant markup for security-featured check stock. Checkomatic's in-house manufacturing eliminates that markup. High security checks from Checkomatic cost 50 to 70 percent less than equivalent stock ordered through a bank. Browse all high security formats at business checks at Checkomatic. For a complete guide on finding the best check supplier, see what is the best place to order checks online.


Aug 11, 2026

How to Cash a Check: Complete Step-by-Step Guide

Before You Cash a Check: What to Verify

Before attempting to cash any check, verify four things that determine whether the check can be cashed at all.

Is the check made out to you? The payee name on the "Pay to the order of" line must match your name as it appears on your government-issued ID. Even a minor spelling difference (Robert vs. Bob, or a hyphenated surname written without a hyphen) can cause a teller to decline. If your name is spelled incorrectly on the check, contact the check writer to issue a new one.

Is the check dated within the last 180 days? Most US banks treat a check as stale after 180 days from the written date. A stale check may be refused even if everything else is in order. Check the date in the upper right corner before going to a cashing location. For more on stale checks, see our check writing guide.

Does the check have the payer's signature? A check without a signature from the account holder on the front is invalid. Banks will not cash or deposit an unsigned check. If you receive an unsigned check, return it to the payer for a signature.

Are the check fields fully filled in? The amount in numbers (the box), the amount in words (the line), and the payee name must all be completed. An incomplete check may be refused by automated processing equipment and may raise fraud concerns at a teller window.


Step 1: Endorse the Check

Endorse check to cash it: before a bank, retailer, or cashing service can give you money for a check, you must endorse it by signing the back. The endorsement authorizes the cashing location to process the funds.

Sign your name in the endorsement area on the back of the check, which is the 1.5-inch zone at the top of the back (when the check is held face down). Most checks have a box or lines labeled "Endorse Here" in this zone, followed by "Do Not Write Below This Line." Stay within the endorsement zone; writing below it can interfere with bank processing.

Use blue or black permanent ink for your endorsement. Do not use pencil.

Sign as close to cashing time as possible. An endorsed check is immediately negotiable. If a signed check is lost before you reach the cashing location, another person may attempt to cash it. For a full explanation of endorsement types and when each is appropriate, see our endorsements guide and our check fraud prevention guide.

If you are depositing the check through a bank or credit union rather than cashing it for immediate cash, use a restrictive endorsement: write "For deposit only to account [your account number]" before your signature. This prevents the check from being cashed if it is lost after signing.

For mobile deposits, the endorsement must include "For mobile deposit only at [your bank name]" below your signature to comply with Regulation CC mobile deposit rules, which prevent the same check from being deposited twice.


Step 2: ID Required to Cash a Check

Check cashing ID requirements apply at virtually every cashing location. The standard is a government-issued photo ID. Accepted forms:

  • Driver's license (most commonly accepted)
  • State-issued ID card
  • US Passport or Passport Card
  • Military ID
  • Permanent Resident Card

For large checks (typically over $500-$1,000 depending on the location), some banks and retailers require a second form of ID or proof of address alongside the primary photo ID. The OCC confirms this requirement exists because of federal anti-money laundering regulations, not just individual store policy. When a business cashes a check for someone with no account history, ID verification is the only fraud protection available.

Check-cashing stores are the main exception: some will cash checks without ID or with fewer ID requirements, particularly for very small amounts. This flexibility comes with higher fees.


Where to Cash a Check: 7 Options Compared

The best place where to cash a check without bank account varies by check type, amount, and ID availability. The seven options below cover every situation, ranked lowest to highest fee.

Where to cash a check depends on whether you have a bank account, how quickly you need the funds, what type of check you have, and how much you are willing to pay in fees. The seven options below are ranked from lowest fee to highest for most check types.


Option 1: Your Own Bank or Credit Union (Free)

If you hold a checking or savings account, cashing a check at your own bank or credit union is free. The teller verifies your identity through your account relationship rather than a document check alone. You can receive cash immediately across the counter for checks up to your bank's cash limits, or deposit the check and withdraw cash against available funds.

Mobile deposit through your bank's app is the most convenient method for account holders and eliminates a branch visit. For most payroll and government checks under $6,725, funds are typically available the next business day under Regulation CC (updated July 1, 2025). Cashing a check over the counter at your own bank gives you the money immediately with no hold.

ATM deposits to your own bank's ATM: funds are available on the next business day in most cases.


Fastest Method: Mobile Deposit as Instant Cash Equivalent

Mobile deposit cash check: for account holders who need their funds quickly, mobile deposit is functionally equivalent to cashing a check for most practical purposes. You photograph the front and back of the endorsed check through your banking app and submit. Under the Regulation CC $275 threshold, the first $275 is available as early as the next business day. For most payroll checks and government checks, up to $6,725 is available by the second business day. This eliminates the need to travel to a branch or cashing location entirely.

Mobile check deposit hold: some banks offer "early direct deposit" or "instant check deposit" features for qualifying account types that accelerate availability beyond the standard Regulation CC schedule. Check your bank's specific account terms.


Option 2: The Issuing Bank for Non-Customers ($5-$8)

Cash check at issuing bank non customer: the bank whose name is printed on the check face is called the issuing bank (technically, the drawee bank). Many issuing banks will cash their own checks for non-customers because they can immediately verify that the funds exist in the account, reducing their fraud risk compared to a stranger presenting the check elsewhere.

Check cashing fee at bank for non-customers typically runs $5-$8. This is the lowest-cost check cashing option without a bank account, lower than Walmart for checks under about $200 and comparable for larger checks.

The issuing bank has the best ability to verify the check: they hold the payer's account and can confirm balance availability in real time. This is why they can process checks for non-customers with reasonable confidence.

What to bring: the endorsed check and a government-issued photo ID. The teller will look up the payer's account, verify the check, and give you cash minus the fee.


Option 3: Walmart Money Center ($4-$8 Flat)

Walmart check cashing fee: Walmart's Money Center charges a flat fee of $4 for checks up to $1,000 and a maximum fee of $8 for checks over $1,000. This flat-fee structure makes Walmart one of the most affordable check cashing options for any check above approximately $200, where the flat $4 fee beats the percentage-based fees at check-cashing stores.

Walmart cashes payroll checks, government checks, tax refund checks, cashier's checks, money orders, insurance settlement checks, and 401(k) disbursement checks. Two-party personal checks are accepted at some Walmart locations up to a maximum of $200 with a $6 fee. Walmart requires a government-issued photo ID and has a maximum limit of $5,000 per check ($7,500 during tax season for qualifying tax refund checks).

Kroger check cashing fee: Kroger and Kroger banner stores (Fred Meyer, Fry's, Ralphs, and others) offer check cashing at customer service desks. Fees vary by state due to differing state check-cashing regulations, typically running $3-$6 per check. Check limits and accepted check types also vary by location.


Option 4: Grocery Stores and Retailers

Many grocery chains beyond Kroger offer check cashing: Albertsons, Publix, and local regional chains in some markets. The experience mirrors Walmart: customer service desk, government ID, flat fee, immediate cash. Fees generally run $3-$6.

Accepted check types at grocery stores are usually more limited than at Walmart. Most accept payroll checks and government checks readily. Personal checks from individuals are frequently declined because grocery stores have less fraud verification capability than banks, and personal checks carry higher return risk.


Option 5: Check Cashing Apps

Cash check with app: several mobile payment apps allow you to deposit and cash checks through your smartphone without a traditional bank account.

Check cashing app fee PayPal: PayPal offers mobile check cashing through its app. For instant access to funds, the fee is around 5% of the check amount with a minimum of $5. If you can wait 10 business days, some check types are processed at no fee. Cash App charges 1.5-5% of the check amount for instant deposit. Ingo Money (which powers check cashing in multiple apps) charges 1% for government or payroll checks and 5% for personal checks for instant access.

Mobile deposit cash check via apps: for users without traditional bank accounts, apps like Chime or Bluebird by American Express (both prepaid debit card services with bank-account-like features) offer mobile check deposit with no monthly fees and faster availability than many alternatives.


Option 6: Prepaid Debit Cards

Cash check prepaid debit card: prepaid debit cards that support mobile check deposit let you load a check onto the card via a smartphone photograph. The card network then provides access to funds on the card balance timeline, which varies by provider. Fees typically run $5-$25 per check load, or a percentage of the check amount for instant availability.

The advantage of prepaid cards: they provide a payment card for everyday purchases, unlike cash received at a teller window. The disadvantage: fees per transaction can be high, and funds loaded onto the card are not FDIC insured the same way bank account deposits are unless the card explicitly offers pass-through FDIC coverage through a banking partner.


Option 7: Check-Cashing Stores (Last Resort)

Check cashing store fee percentage: dedicated check-cashing stores (often branded as payday loan or check-cashing centers) typically charge 1-10% of the check face value. Western Union reports some personal check cashing fees reach 15% at these locations. A $500 check at 5% costs $25 in fees. A $1,000 check at 10% costs $100. These fees compound significantly for frequent users.

Bankrate's 2025 analysis found check-cashing stores are "the most expensive option, charging 1-10% of check value" and labels them a last resort. State laws cap check-cashing fees in many states, so maximum rates vary. Check your state's financial regulation authority for the applicable cap in your area.

When check-cashing stores serve a purpose: they accept checks that banks and retailers often refuse, including some personal checks, checks where the payee's ID does not perfectly match the name, checks from closed or disputed accounts (though these carry risk for the cashing store), and in some cases, checks presented without standard government ID. This flexibility is why their fees are higher: they carry more risk per transaction.


Check Cashing Fee Comparison

Check cashing fee comparison across all major venues for a $500 check and a $1,000 check, based on Bankrate's research and current venue fee schedules:

Your own bank or credit union: $0 for both. Best option if you have an account.

Issuing bank (non-customer): $5-$8 for both. Best option without a bank account for checks under $200.

Walmart Money Center: $4 for a $500 check; $8 for a $1,000 check. Flat fee makes this the winner for larger checks without a bank account.

Kroger / grocery stores: approximately $3-$6 for both (varies by state and location).

PayPal check cashing app: approximately $25 (5%) for a $500 check; $50 (5%) for a $1,000 check, for instant access.

Prepaid debit card: $5-$25 per check regardless of amount at most providers.

Check-cashing store: $5-$50 (1-10%) for a $500 check; $10-$100 (1-10%) for a $1,000 check. The most expensive option.

The long-term math: if you cash 20 payroll checks per year at a check-cashing store at 5% on an average $1,000 check, you pay $1,000 per year in cashing fees. A free checking account at a bank or credit union eliminates this cost entirely.


Regulation CC Hold Rules Effective July 2025

Regulation CC hold policy 2025: the federal Expedited Funds Availability Act, implemented as Regulation CC, sets the timeline for when deposited (not cashed) funds must be available. The Federal Reserve and CFPB adjusted the dollar thresholds effective July 1, 2025, to reflect inflation. These are now the governing figures for all US banks and credit unions.


Regulation CC $275 Threshold (Next-Day Availability)

Regulation CC next-day availability: for check deposits made in person to a teller, the first $275 must be available for withdrawal by the next business day. This applies to all personal, payroll, and business check deposits. On a $700 check deposited Monday, $275 is available Tuesday. The remaining $425 is available Wednesday for local checks.


Second-Day Availability for Local Checks

For checks drawn on banks in the same federal Reserve district (local checks), the amount above $275 is available no later than the second business day. A $700 check deposited Monday: $275 available Tuesday, remaining $425 available Wednesday.


Regulation CC $6,725 Large Deposit Threshold

The Regulation CC $6,725 large deposit threshold: for check deposits totaling more than $6,725 in a single business day, the amount over $6,725 may be held for up to seven business days for local checks. A deposit of $10,000 in personal checks: the first $6,725 follows the standard schedule; the remaining $3,275 may be held up to seven additional business days.


Government Checks, Cashier's Checks, Treasury Checks

Government checks (federal, state, local) and cashier's and certified checks deposited in person to a teller qualify for next-day availability of up to $6,725 when certain conditions are met. Above $6,725, the excess may be held up to nine business days.


New Account Exception

New accounts open fewer than 30 days face stricter holds. Check deposits to new accounts may be held for up to nine business days regardless of check type. This is the main exception period where cashing a check over the counter (rather than depositing it) provides meaningfully faster access to funds.


Cashing vs Depositing a Check: The Key Difference

Cashing vs depositing a check produces different access timelines for your money.

When you cash a check, you receive all the funds in cash immediately, across the counter, with no hold. The bank verifies the check and pays you on the spot. There is no Regulation CC hold because you are not depositing funds into an account.

When you deposit a check into your account, the bank accepts the check and credits your account balance, but access to those funds is subject to Regulation CC hold schedules. Check hold how long: for most personal checks, the first $275 is accessible the next business day; the remainder follows on the second business day for local checks.

The tradeoff: cashing requires you to handle cash, which you must then secure, carry, and potentially re-deposit somewhere. Depositing allows the funds to go directly into your account for electronic use (debit card, bill pay, transfer), but with a 1-2 day delay on most of the amount. For large checks where the hold window matters operationally, cashing may be preferable if you need the full amount immediately.

Check deposit vs cashing a check decision: if you have a bill due immediately and the check amount exceeds $275, cashing provides immediate access to the full amount. If the funds can wait a business day or two, depositing is typically more convenient because it avoids handling cash.


When a Bank Can Refuse to Cash Your Check

Bank refuse cash check non customer: the OCC (Office of the Comptroller of the Currency) has confirmed in its public guidance: "There is no federal law or regulation that requires banks to cash checks for non-customers." This is one of the most surprising and misunderstood facts in check cashing.

A bank may refuse to cash a check for a non-customer for any reason, including: you do not have an account with them, the check amount exceeds their non-customer limits, the check is a personal check rather than a payroll or government check, or you cannot provide satisfactory identification. The bank's protection against fraud loss when cashing checks for strangers is limited entirely to your ID , they have no account history with you to fall back on if the check later bounces or is found to be fraudulent.

When a bank issues its own check (cashier's check, official check), it guarantees payment. When a customer of the bank writes a personal check to you, the bank has not guaranteed anything. Cashing that personal check for a non-customer means the bank takes on the full return risk if the check bounces. Many banks simply decline this exposure for non-customers.

Banks that do cash checks for non-customers typically only cash on-us checks, meaning checks drawn on accounts held at that specific bank. This is where your lowest-cost non-customer option lies: the issuing bank, whose name is printed on the check face.

For checks you have written that a payee wants to stop, see our stop payment guide.


Why Check Type Matters for Cashing

Check type payroll check easier to cash: payroll checks from established companies are among the easiest check types to cash because they carry implied institutional credibility. The bank can verify the company is a real employer with a valid account, and payroll checks are less likely to bounce than personal checks from individuals.

Government check easier to cash: US Treasury checks, state tax refund checks, Social Security checks, and other government-issued checks are the easiest to cash anywhere. They carry zero risk of insufficient funds (the US government will not run out of money to cover a Social Security check). Most banks, Walmart, and grocery stores readily accept government checks with minimal scrutiny beyond ID verification.

Personal check hardest to cash: a personal check from an individual is the most difficult to cash without a bank account because it carries the highest risk of return. The payer's account could be overdrawn, closed, or the check could be fraudulent. Banks that cash checks for non-customers typically refuse personal checks for exactly this reason. Grocery stores and Walmart may also decline personal checks. Check-cashing stores that will accept them charge the highest fees (5-15% for personal checks is common).

Cashier's check: cashier's checks represent guaranteed funds from the issuing bank, making them highly reliable. However, cashier's check fraud has increased significantly, so banks scrutinize them carefully and may place holds even on these instruments if the bank is unfamiliar with the issuing institution.


Third-Party Check Cashing

Third-party check cashing: signing a check over to someone else (a third-party endorsement, using "Pay to the order of [new payee]" above your signature) is technically legal under UCC 3-205, but banks increasingly refuse to accept third-party checks. For more on endorsement types and the special endorsement process, see our complete endorsements guide.

Sign check over to someone: if you sign a check over to a trusted family member or friend who has a bank account, they can attempt to cash or deposit it on your behalf. The bank may require both of you to be present, demand two sets of ID, or simply refuse. Many major banks have internal policies against third-party checks because of the elevated fraud risk when the name on the check and the person presenting it do not match.

If you need to use this approach, call the receiving bank before visiting to confirm they accept third-party checks and ask what ID and presence requirements apply. The alternative of opening a simple checking account (or even a prepaid card account) is more reliable for recurring check access than depending on third-party cashing.


What Makes a Check Impossible to Cash

Several conditions make a check uncashable regardless of where you take it:

  • Stale check 180 days: a check dated more than 180 days ago is stale. Most banks will not honor it, and the cashing location has no recourse if the issuing bank returns it unpaid.


  • Post-dated check: a check with a future date may be refused at some locations before that date, though legally banks are not required to wait. Most banks process checks when presented regardless of a future date, but some tellers flag and refuse them.


  • Missing signature: an unsigned check is invalid. No endorsement from you can fix a missing payer signature.


  • Missing endorsement: you must sign the back before cashing. An unendorsed check will not be accepted.


  • Wrong payee name: if the name on the check does not match your ID, you may be refused. Minor spelling variations may be handled case-by-case; significant name mismatches (different person) will be declined.


  • Altered check: visible alterations to the amount, payee, or date make a check uncashable as banks treat alterations as a fraud indicator.


  • Damaged MICR line: if the routing and account numbers at the bottom of the check are torn, overwritten, or illegible, bank processing equipment cannot read the check. Some banks can manually process damaged MICR lines, but this requires manager approval and extra time.


Long-Term Solution: Second-Chance Checking Accounts

Second-chance checking account: if you have been unable to open a standard checking account due to negative banking history (overdrafts, account closures at prior banks, or ChexSystems records), a second-chance checking account allows you to establish a bank relationship and eliminate check-cashing fees permanently.

Unbanked check cashing fees add up fast. Someone cashing 26 biweekly payroll checks per year at a $500 average at a 5% check-cashing store rate pays $650 per year in fees. A second-chance checking account typically charges a small monthly fee ($5-$10) with a path to upgrade to a standard account after 12 months of positive account history. The fee savings in the first year alone typically cover the account cost many times over.

According to FDIC data cited by Bankrate, 4.2% of US households (approximately 5.9 million) are unbanked. The most common reason for being unbanked is a prior negative banking record. Second-chance accounts and prepaid accounts with check deposit capability serve as bridges to full banking participation.

For a broader comparison of personal and business check options, see our advantages and disadvantages of personal checks guide. For businesses that write payroll checks and want to understand the payer's options and obligations, see our business checks and payroll services guide.

Every Checkomatic check is produced in Monroe, NY (Monroe NY) by an in-house check manufacturer (in-house check manufacturer) on ABA compliant check stock (ABA compliant). CPSA certified (CPSA certified) security paper ships with every order, including six fraud deterrent features that make the check easier to verify and harder to counterfeit at every cashing location. Order personal checks, business checks, and deposit slips at checkomatic.com.


The Short Version on How to Cash a Check

To cash a check: verify it is valid (correct name, date within 180 days, signed by payer), endorse the back in permanent ink just before cashing, and present with government-issued photo ID. Your own bank is free. The issuing bank charges $5-$8. Walmart charges $4-$8 flat. Check-cashing stores charge 1-10% and are a last resort. Mobile deposit through your banking app is the fastest and most convenient for account holders.

No bank is legally required to cash checks for non-customers. Banks typically only cash on-us checks for non-customers. Government and payroll checks are easiest to cash; personal checks are hardest. Regulation CC (July 2025 thresholds) requires the first $275 available next business day on deposits; cashing avoids holds entirely. Long-term: a checking account or second-chance account eliminates check-cashing fees permanently.


Frequently Asked Questions


How do you cash a check step by step?

How to cash a check step by step: (1) Verify the check: name matches your ID exactly, dated within 180 days, payer signature present, all fields complete. (2) Endorse check to cash it: sign the back in the endorsement zone using blue or black permanent ink, as close to cashing time as possible. (3) Gather check cashing ID requirements: government-issued photo ID (driver's license, state ID, passport, or military ID). (4) Choose your cashing location: your own bank or credit union (free); the issuing bank printed on the check face ($5-$8); Walmart Money Center ($4-$8 flat fee); Kroger or grocery store ($3-$6); mobile deposit app (free or 1-5% fee); or check-cashing store (1-10%, last resort). Present the endorsed check and ID and receive cash minus any fee.


How much does it cost to cash a check without a bank account?

Check cashing fee comparison without a bank account: the issuing bank charges $5-$8 (cheapest with ID). Walmart check cashing fee: $4 for checks up to $1,000, $8 for checks over $1,000 (best flat-rate option). Kroger check cashing fee: $3-$6 (varies by state). Check cashing app fee: PayPal and Cash App charge around 5% for instant access; no-fee options require waiting up to 10 days. Prepaid debit card: $5-$25 per load. Check cashing store fee percentage: 1-10% of the check value, the most expensive option. A free checking account eliminates all these fees.


Can a bank refuse to cash a check if you don't have an account?

Bank refuse cash check non customer: yes. The OCC confirms there is no federal law or regulation requiring banks to cash checks for non-customers. Most banks have policies limiting check cashing to account holders. Banks that do cash checks for non-customers typically only cash on-us checks (checks drawn on accounts held at that specific bank), require government-issued photo ID, charge $5-$8, and decline personal checks or large amounts. The bank whose name is printed on the check face is the most likely venue for non-customer check cashing, as they can verify the payer's account in real time.


How long does a bank hold a deposited check before funds are available?

Regulation CC hold policy 2025 (effective July 1, 2025): for check deposits made in person to a teller, the Regulation CC $275 threshold requires the first $275 to be available by the next business day. The remaining balance of local checks must be available by the second business day in most cases. The Regulation CC $6,725 large deposit threshold: amounts over $6,725 deposited in personal checks may be held up to seven additional business days. Government checks and cashier's checks deposited in person qualify for next-day availability of up to $6,725. Note: cashing a check (receiving cash across the counter) avoids all holds entirely since no deposit is made.


What makes a check impossible to cash?

Check cashing stale check 180 days: most banks refuse stale checks (dated more than 180 days ago). Other uncashable conditions: missing payer signature (check is invalid without it); check cashing missing signature on the endorsement (you must sign the back); check cashing post-dated check with a future date (some banks refuse before that date); payee name does not match your ID exactly; visible alterations to amount, payee, or date; and damaged MICR line where routing and account numbers are illegible. Personal check hardest to cash: personal checks are frequently declined by non-account cashing venues due to higher return risk, while payroll check easier to cash and government check easier to cash because of their institutional backing.

Aug 11, 2026

How to Void a Check: Step-by-Step Guide for Personal and Business Checks

Voiding a check means permanently canceling it so it can never be used as a payment instrument. A voided check cannot be deposited, cashed, or processed by any bank , in person, by mail, or through mobile deposit. The word VOID written across the face tells every bank teller and automated processing system that this check is not negotiable regardless of what is written on it.

The MICR line at the bottom of the check (the row of numbers printed in magnetic toner that contains your routing number and account number) remains intact after voiding. This is intentional. The MICR line is not used to authorize payments , it identifies the account. Keeping it readable is why voided checks are useful for setting up direct deposit, ACH payments, and payroll software, where the other party needs your account details but not a payment authorization.

Voiding a check is a permanent, irreversible physical action. Once you write VOID on a paper check, that check cannot be un-voided. There is no voiding process to reverse. If you need the payment to go through after voiding in error, write a new check with the next sequential check number.


How to Void a Check Step by Step

The process for voiding a check is the same for personal and business checks. Follow these steps in order.


Step 1: Get a Dark Permanent Marker

Use a black or dark blue permanent marker with a medium or broad tip. A fine-tip marker works but requires more passes to make the VOID marking clear and unremovable. Do not use pencil, ballpoint pen, or erasable pen. Permanent marker ink cannot be removed, altered, or lightened without visibly damaging the paper, which is exactly the protection you need.


Step 2: Write VOID in Large Capital Letters

Write the word VOID in large capital letters across the entire front face of the check. The letters should be large enough to cover most of the check face. Write across the payee line (Pay to the Order of), the dollar amount box, and the signature line at the bottom right. The VOID marking should be immediately visible to anyone handling the check.


Step 3: Do Not Cover the MICR Line

The MICR line is the row of numbers and symbols printed in magnetic toner along the very bottom edge of the check. It contains your routing number on the left, your account number in the middle, and the check number on the right. Do not write over this line when voiding. If you are voiding the check for direct deposit or account verification purposes, the other party needs to read this line. Even if you are voiding a spoiled check, leaving the MICR line intact makes it easier to identify and record in your check register.


Step 4: Record It in Your Check Register

Open your check register and enter the voided check number with the word VOID in the description column. Leave the amount column blank or enter zero. This step preserves your sequential check number record. A gap in check numbers looks like a missing or unaccounted transaction to a bank, accountant, or auditor. Recording VOID confirms the gap was intentional. For guidance on maintaining an accurate check register, see our complete guide on the check register.

Burgundy


Step 5: Dispose of the Check Safely

After recording, either file the voided check in a secure location (your check binder or a locked drawer) or shred it immediately using a cross-cut shredder. Strip shredders create strips that can be taped back together. Cross-cut shredders cut paper into small fragments that cannot be reconstructed. The MICR line on a voided check still contains your full routing number and account number. These details alone are enough for someone to attempt an unauthorized ACH debit from your account. Treat every voided check as sensitive financial data.


How to Void a Check for Direct Deposit

Voiding a check for direct deposit is one of the most common reasons people void a check. Employers, payroll platforms, and payment services use a voided check to verify your checking account details before setting up recurring deposits or payments.


What the Other Party Needs

When you provide a voided check for direct deposit, the recipient reads the MICR line at the bottom. They capture your routing number and account number from that line. They do not need or use anything else on the check. The VOID marking confirms that the check cannot be submitted for payment, making it safe to hand over.


How to Void a Check for Direct Deposit

  1. Take a blank check from your personal or business checkbook.
  2. Do not fill in any information (no date, no payee, no amount).
  3. Write VOID in large capital letters across the front with a permanent marker.
  4. Cover the payee line, amount box, and signature line.
  5. Do not cover the MICR line at the bottom.
  6. Hand the voided check to your employer, upload a scan, or photograph it as directed.


If You Don't Have Checks Yet

If you are a new account holder and your checks have not yet arrived, your bank can provide a counter check or a bank letter that confirms your routing and account numbers. Both serve the same purpose for direct deposit setup. Once your check order arrives, a voided check from your personal or business checkbook is the standard verification method. Browse personal checks at Checkomatic to order a starter supply quickly.

American Flag


How to Void a Business Check

Voiding a business check follows the same physical process as voiding a personal check, but business check voiding has additional bookkeeping implications that matter for accurate financial records.


Void the Physical Check

Write VOID across the face of the business check in permanent marker, covering the payee line, amount box, and signature line. Leave the MICR line intact. If the check is a voucher format (check on top with stubs below), write VOID on the check portion only. The stubs are a separate record.


Record in Your Accounting System

In addition to your check register, record the void in your accounting software. If the check was generated by QuickBooks, the correct procedure is to void it inside QuickBooks as well to keep your books and physical check stock synchronized. For the complete QuickBooks Online voiding process, see the dedicated guide on how to void a check in QuickBooks Online.


File or Shred the Voided Business Check

Business check stock contains your company name, business address, and banking details. Voided business checks are sensitive financial documents. File them in a locked cabinet or shred them with a cross-cut shredder. Many businesses with an accounts payable cycle establish a simple policy: void checks are filed for the current fiscal year, then shredded after year-end close when records are archived digitally.


Voucher Check Format Consideration

If your business uses voucher checks (check on top with two payment stubs), the stub portion typically carries payment detail from your accounting software. When voiding a voucher check, some businesses mark VOID on both the check portion and the stub to prevent any confusion about whether the entire document was cancelled. This is a best practice, not a legal requirement. For all business check formats including voucher checks and 3-on-page formats, see business checks at Checkomatic.


How to Void a Check That Was Already Written

A check that has already been filled in (payee written, amount filled in) but has not yet been given to anyone can still be voided using the same process.


If the Check Is Still in Your Hands

Write VOID in large capital letters across the entire face using a permanent marker. The existing writing underneath the VOID marking does not matter. The VOID supersedes everything else written on the check. A teller who sees VOID written clearly across a check will not process it regardless of what the payee line or amount box say. Record the void in your check register and dispose of the check safely.


If the Check Has Been Given to Someone Else

If the check has already been handed to a payee, mailed, or otherwise left your possession, physically voiding it is not possible. The check is no longer in your control. Contact your bank immediately and place a stop payment on that check number. Most banks charge a stop payment fee (typically $25 to $35) and process the request within one business day. See the section below on void versus stop payment for full guidance.


What to Do After Voiding a Check

Voiding the physical check is only one part of the process. Two more steps protect your records and prevent the voided check from becoming a security risk.


Record the Void in Your Check Register

Every voided check number must appear in your check register as VOID. Write the check number in the check number column, leave the payee blank or write VOID, enter zero in the amount column, and note the void in the description. This preserves your sequential check numbering and creates a clear audit trail. A check number that appears in your register as VOID is fully accounted for. A missing check number with no register entry looks like an unaccounted transaction.


Dispose of the Voided Check Safely

Your two options are filing and shredding. Filing is appropriate when you may need to produce the voided check later , for an audit, an accountant review, or a bank inquiry. Store filed voided checks in a locked drawer or secure filing cabinet, not an open desk tray. Shredding is appropriate when you are certain you will not need the physical document. Use a cross-cut shredder. Strip shredders create strips that can be taped back together by a determined individual. Cross-cut fragments cannot.


Common Mistakes When Voiding a Check

Most voiding errors are avoidable. Here are the mistakes that cause the most problems and how to avoid each one.


Mistake 1: Using an Erasable Pen or Pencil

Pencil and erasable pen can be removed. A voided check marked with erasable ink is not truly voided. Anyone who obtains the check could remove the VOID marking and use the check. Always use a permanent marker that cannot be erased or dissolved by common household chemicals.


Mistake 2: Writing VOID Too Small to Be Visible

A small VOID written in one corner does not clearly void the entire check. Write the word large enough to span most of the check face. A teller or automated system that cannot see VOID clearly may attempt to process the check.


Mistake 3: Covering the MICR Line

If you are voiding a check for direct deposit or ACH setup, covering the MICR line defeats the entire purpose. The recipient needs to read your routing and account numbers from that line. Keep the MICR line clear when voiding for account verification purposes.


Mistake 4: Skipping the Check Register Entry

A voided check with no register entry creates a gap in your sequential check numbers. That gap requires an explanation if anyone reviews your records. Recording VOID takes ten seconds and prevents questions that could take much longer to resolve.


Mistake 5: Throwing the Voided Check in the Trash Without Shredding

As covered above, the MICR line remains readable after voiding. Disposing of a voided check without shredding exposes your banking details to anyone who goes through your trash. Cross-cut shredding takes five seconds and eliminates this risk entirely.


Mistake 6: Trying to Void a Check After It Has Left Your Hands

If a check has been given to a payee, mailed, or otherwise left your possession, you cannot void it by marking the physical paper , you no longer have the paper. Call your bank and request a stop payment immediately.


When to Order Replacement Check Stock After Voiding

Voiding several checks in a row , because of printing errors, spoiled checks, or damaged stock , depletes your check supply faster than normal. The standard reorder rule applies: order replacement checks when you reach 25 remaining in your current supply. This gives you a 5 to 8 day buffer to cover standard production and delivery before you run out.

If you voided a large portion of a batch due to a printing alignment error, order replacement stock immediately and select rush production to avoid running out of checks before the new supply arrives. Rush production ships in 1 to 2 business days. For personal check replacements, see personal checks. For business check replacements including QuickBooks-compatible formats, see computer checks for business and business checks. For complete delivery options including rush and overnight, see shipping and handling.

For a complete guide to choosing the best check supplier for replacement stock, see what is the best place to order checks online.


What Customers Say About Checkomatic

All reviews below are published on checkomatic.com and reproduced verbatim. Source: checkomatic.com/quickbooks-starter-pack-product, 4.5 stars from 166 verified reviews.

"First time ordering and I am super impressed with the quality of the checks. No issues with delivery. I will be ordering again!"

TClinton | ★★★★★ 5/5 | April 9, 2025 | Source: checkomatic.com/quickbooks-starter-pack-product

"Been with them for 15 years. Always reliable, always good quality, good service. What more can you ask for?"

ATV Inc. | ★★★★★ 5/5 | April 5, 2024 | Source: checkomatic.com/quickbooks-starter-pack-product

"I got 500 checks for less than half of what the bank wanted for 200!"

VVA Voucher Checks (Vietnam Veterans of America) | ★★★★★ 5/5 | July 6, 2024 | Source: checkomatic.com/quickbooks-starter-pack-product

"We use CheckoMatic for all of our check needs! They have great prices and we receive our products in a timely manner!"

CG's Tax Service | ★★★★★ 5/5 | September 18, 2024 | Source: checkomatic.com/quickbooks-starter-pack-product

"ASJ Wilson Construction has been a client of checkomatic for some years now and they've never disappointed this company. Thank you checkomatic for all that you do."

ASJ Wilson Construction | ★★★★★ 5/5 | June 6, 2024 | Source: checkomatic.com/quickbooks-starter-pack-product

"Affordable and efficient. My go-to business check printer."

Doe | ★★★★★ 5/5 | January 24, 2025 | Source: checkomatic.com/quickbooks-starter-pack-product


Why Choose Checkomatic for Replacement Business and Personal Checks

In-House Manufacturing Since 1997

All check stock is manufactured at Checkomatic's own facility in Monroe, NY. No third-party print vendors. Standard production ships in 3 to 5 business days. Rush production ships in 1 to 2 business days for urgent situations where voided check stock needs immediate replacement.


All Formats for Business and Personal Use

Personal checkbooks, voucher business checks, 3-on-page computer checks, manual payroll checks, and QuickBooks-compatible formats are all available. Every format ships with ABA-compliant MICR pre-encoded and six built-in security features at the base price. For business users, see QuickBooks checks for software-compatible formats.

Blue


50 to 70 Percent Below Bank Pricing

Direct in-house manufacturing eliminates the bank's retail markup. Free black-and-white logo printing on every business check order regardless of quantity. Browse the full check catalog at business checks and personal checks.


Accepted by the world’s leading banks

Bank of America logo
Capital One logo
Citibank logo
Wells Fargo logo
TD Bank logo
Chase bank logo
;