Blog

Aug 25, 2026

How Many Checks Should I Order? A Guide by Business Size and Volume
Quick Answer: For most small businesses writing 20 to 50 checks per month, 250 to 500 checks per order is the right starting point. This quantity covers 5 to 12 months of supply, qualifies for meaningful bulk pricing, and does not lock you into a large batch you might not use if your business details change. For payroll, always keep at least one full payroll run worth of checks in reserve. For your very first order from any new supplier, order a smaller quantity first to confirm alignment before committing to 500 or more.

How Many Checks to Order by Business Size

The most practical starting point for answering how many checks you should order is your business size and the number of checks you write per month. Every business is different, but these ranges apply to the majority of US small and medium-sized businesses.

Business TypeChecks/MonthAnnual NeedRecommended Order
Solo operator / freelancer5 to 1060 to 120100 to 150
Small business, AP only20 to 30240 to 360250 to 400
Small business, AP + payroll30 to 60360 to 720400 to 600
Medium business, high AP60 to 150720 to 1,800600 to 1,000
Property manager (multiple properties)40 to 100480 to 1,200500 to 1,000
Non-profit / school / foundation10 to 30120 to 360150 to 400
Construction / trades50 to 150600 to 1,800600 to 1,000

These ranges assume you are ordering one format at a time. If you use both voucher checks for payroll and 3-on-a-page for AP, calculate each separately and order them as separate batches with separate check number sequences. Mixing formats in a single order creates tracking and alignment confusion.

Quick Reference: Checks Needed by Monthly Volume

If you know roughly how many checks your business writes per month, this table tells you how many to order at once to cover 6 months, 12 months, and 18 months of supply.

Checks/Month6-Month Supply12-Month Supply18-Month Supply
5306090
1060120180
20120240360
30180360540
50300600900
1006001,2001,800
1509001,8002,700

How Check Format Affects Your Quantity Decision

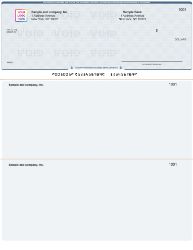
QuickBooks check on top voucher format from Checkomatic showing one check per page for quantity calculation when deciding how many checks to order for business payroll and accounts payable

Voucher checks ; one check per page. Your monthly usage equals your monthly check count exactly.

The format you choose affects how quickly you go through a batch of check stock. Understanding this before placing an order helps you buy the right quantity the first time.

Voucher Checks (Check-on-Top)

One check per 8.5 by 11 inch sheet. If you write 30 checks per month, you use 30 sheets of voucher stock per month. The calculation is one-to-one: your monthly check count equals your monthly sheet count. Voucher format is the standard for payroll and accounts payable where a physical stub record is required per payment. For voucher format business checks, see QuickBooks checks and business checks at Checkomatic.

3-on-a-Page Checks (Standard Format)

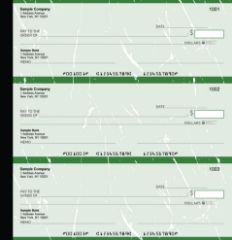
Three checks per 8.5 by 11 inch sheet. If you write 90 checks per month, you use only 30 sheets of 3-on-a-page stock. The calculation is one-third: your monthly check count divided by 3 equals your monthly sheet count. This format is more paper-efficient for high-volume accounts payable runs. For 3-on-a-page format, see 3-on-a-page checks at Checkomatic.

Manual Checks (Handwritten)

Three checks per page with carbonless duplicate copies. The carbon duplicate creates an automatic paper record of every check you write. Manual checks are sold by the book or in individual sheets. If you write 10 to 30 checks per month by hand, a standard manual check supply covers your needs without requiring accounting software. For manual check formats, see manual checks at Checkomatic.

FormatChecks/SheetSheets for 300 ChecksBest For
Voucher (check-on-top)1300 sheetsPayroll, AP with stubs
3-on-a-page (standard)3100 sheetsHigh-volume AP, no stubs needed
Manual (handwritten)3 (with carbon)100 sheetsNo software, occasional payments

For a full comparison of check formats and which situations call for each, see voucher checks vs wallet checks: when to use each.

How Many Checks to Order for Payroll

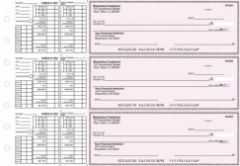
Payroll business checks from Checkomatic showing voucher format with two detachable stubs for employee pay records with quantity guide for how many payroll checks to order based on employee headcount and pay frequency

Payroll business checks from Checkomatic ; order quantity based on headcount and pay frequency.

Payroll is the most time-sensitive check use case. Running out of payroll checks before a pay date means employees do not get paid on time, which creates both a legal risk and an employee relations problem. The quantity calculation for payroll checks is more precise than for general AP checks.

Payroll Quantity Formula

Start with your employee headcount paid by check at each pay run. Multiply by the number of pay runs per year. Add 10 to 15 percent buffer for voided checks, new employees, and corrections.

  • Weekly payroll, 5 employees: 5 x 52 = 260 checks per year. Order 300.
  • Biweekly payroll, 10 employees: 10 x 26 = 260 checks per year. Order 300.
  • Biweekly payroll, 25 employees: 25 x 26 = 650 checks per year. Order 750.
  • Monthly payroll, 15 employees: 15 x 12 = 180 checks per year. Order 250.

The Payroll Reserve Rule

Always keep at least one full payroll run worth of checks in reserve before triggering a reorder. If you pay 10 employees biweekly, your reorder trigger is when you have 10 to 15 checks remaining, not when you have 25 remaining. The 25-check general rule is a floor; for payroll, build the trigger around your headcount.

For the complete guide to payroll check formats and compliance requirements, see business checks for payroll: the complete employer guide.

First-Time Order: What Quantity to Start With

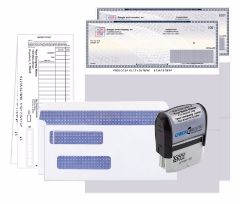
QuickBooks starter pack from Checkomatic showing complete first order bundle with checks deposit slips envelopes and endorsement stamp ideal first time check order quantity for new business setup

Checkomatic starter pack ; the right first order for new businesses getting their check supply set up.

The first order from any check supplier is different from a reorder. With a reorder, you already know the format works, the alignment is correct, and the quality meets your standard. With a first order, you are verifying all of these for the first time.

Why First Orders Should Be Smaller

Even with a supplier that pre-formats check stock to your software's print template, individual printer models vary. The margins on your specific printer may require a small alignment adjustment. If you order 500 checks and discover the alignment requires correction after running through 50 checks, you have wasted 50 sheets of security paper. Starting with a smaller quantity gives you the chance to confirm alignment on your specific printer before committing to a large batch.

Recommended First-Order Quantities

  • New business, low volume (under 20 checks/month): Start with 100 to 150 checks.
  • Existing business, switching suppliers: Start with 150 to 250 checks.
  • New business, medium volume (20 to 50 checks/month): Start with 250 checks.
  • Established business with confirmed format: Order 500 or more for bulk pricing.

For new businesses setting up their complete check-writing system for the first time, the starter kit bundle covers checks, deposit slips, double-window envelopes, and an endorsement stamp in a single order. See the business check starter kit at Checkomatic.

Bulk Pricing: When Ordering More Saves Money

Per-check cost decreases as quantity increases. The savings between a small order and a medium or large order are meaningful for businesses that use checks regularly.

How Bulk Pricing Works

Check printing has fixed production costs (setup, MICR encoding verification, security paper preparation) and variable costs (paper, toner, binding). The fixed costs are the same whether you order 50 checks or 500 checks. Spreading those fixed costs over a larger quantity lowers the per-check price at every tier above the minimum order. This means the per-check cost of a 500-check order can be 40 to 60 percent lower than the per-check cost of a 50-check order from the same supplier for the same format.

When to Take Advantage of Bulk Pricing

  • After your first order confirms quality and alignment ; then move to larger quantities on reorders.
  • When your business details (name, address, bank account) are stable for at least 12 months.
  • When your monthly check volume is consistent enough to estimate 12-month usage reliably.
  • When you have confirmed your accounting software and check format are correctly matched.

When NOT to Order in Bulk

  • First order from a new supplier ; verify quality and alignment first.
  • Your business is growing rapidly and you expect your details (name, address) to change.
  • You are not sure which check format your software needs ; confirm format before ordering large batches.
  • You have recently changed banks or are in the process of changing your legal entity name.

What Happens If You Order Too Few Checks

Running out of business checks creates a different problem depending on what you use them for.

Running Out During an AP Run

If you run out of checks mid-month during a vendor payment run, you have a few options: ACH transfer or wire for urgent payments (these take 1 to 3 business days), digital payment platforms for vendors who accept them, or a rush reorder that ships within 1 to 2 business days at additional cost. Missing vendor payment deadlines due to check supply issues can affect vendor credit terms and relationships.

Running Out Before Payroll

This is the highest-risk scenario. Running out of payroll checks before a pay date means employees do not receive payment on time. In states with strict payroll timing laws, late payroll triggers penalties even when the cause is a supply issue rather than intentional delay. Always maintain a one-full-payroll-run reserve above your reorder trigger.

The Rush Order Cost

Rush check orders are available at Checkomatic and ship within 1 to 2 business days. However, rush production costs more than standard production. Businesses that consistently run out of checks and reorder on rush terms pay more per check over time than businesses that manage their supply with planned reorders. The 25-check reorder trigger (described in the reorder section below) eliminates the need for most rush orders entirely.

What Happens If You Order Too Many Checks

Ordering too many checks creates a different but equally real problem: outdated stock.

When Check Stock Becomes Unusable

Pre-printed business checks carry your business name, address, ABA routing number, account number, and starting check number. If any of these change before you use up a large batch, the remaining checks are unusable. Banks reject checks with account information that does not match their records. You cannot handwrite corrections on pre-printed check stock.

The most common reasons check stock becomes outdated before it is used up:

  • Business relocates to a new address
  • Business changes its legal name (LLC restructuring, DBA change, acquisition)
  • Bank changes routing number after a merger or acquisition
  • Business switches banks entirely
  • Business changes its account number (rare but occurs after fraud events)

The 18-Month Rule

A practical rule for how many checks to order at once: never order more than an 18-month supply. Most businesses can estimate their usage reliably over 18 months, and most business details remain stable over 18 months. At 24 months or more, the probability of a business detail change increases enough that the risk of wasted stock begins to outweigh the bulk pricing savings. Order 12 to 18 months of supply at a time for the best balance of savings and flexibility.

When to Reorder: The 25-Check Rule

Once you have your first order in hand and have confirmed everything works correctly, the next question is when to place the next order. The practical reorder trigger for most businesses is when you have approximately 25 checks remaining.

Standard production and shipping at Checkomatic takes 3 to 5 business days. Twenty-five checks at a volume of 3 to 5 checks per day gives you 5 to 8 business days of supply. This buffer is enough to cover the standard production window with a few days to spare. For businesses with concentrated check-writing periods (end of month AP runs, biweekly payroll), adjust the trigger higher. For businesses with irregular low-volume check writing, 15 checks remaining may be enough of a trigger.

For the complete reorder process including how to find your starting check number in QuickBooks Desktop, QuickBooks Online, and manual check binders, see how to reorder business checks online: step-by-step.

Common Check Quantity Ordering Mistakes

Mistake 1: Ordering the Same Format in Different Quantities for Different Accounts

If your business has two bank accounts and you use different check formats or check number sequences for each, order them as separate batches. Combining checks for two accounts into one order creates confusion during reconciliation. Keep each account's check stock in separate, clearly labeled storage.

Mistake 2: Calculating Quantity Based on Sheets Instead of Checks

If you use 3-on-a-page format and order 100 sheets, you have 300 checks. If you use voucher format and order 100 sheets, you have 100 checks. Confirm whether the supplier's pricing and quantity display is in checks or in sheets before placing the order. Most Checkomatic product pages list quantities in individual checks, not sheets.

Mistake 3: Not Ordering Enough Buffer for New Hires

Payroll check usage is predictable based on headcount, but headcount changes. If you plan to hire 5 new employees in the next 6 months, factor that into your payroll check order today. Running a larger payroll on a supply calculated for a smaller workforce means running short before your planned reorder date.

Mistake 4: Ordering a Large Batch Before Confirming Format

Ordering 500 checks before confirming your accounting software's format setting matches the physical stock is the most avoidable and most costly quantity mistake. Confirm the Check Style in your software's printer settings (Voucher, Standard, or Wallet) before placing any order. A format mismatch wastes the entire batch.

Mistake 5: Not Factoring in Void Rate

Every business voids some checks due to printer jams, writing errors, or checks that are spoiled during processing. A realistic void rate for most businesses is 2 to 5 percent of total check usage. Add this buffer to your quantity calculation. A business using 250 checks per year should order 265 to 275 to account for voids without running short.

What Customers Say About Checkomatic

All reviews below are published on checkomatic.com and reproduced verbatim. Source: checkomatic.com/quickbooks-starter-pack-product, 4.5 stars from 166 verified reviews.

"I got 500 checks for less than half of what the bank wanted for 200!"

VVA Voucher Checks (Vietnam Veterans of America) | ★★★★★ 5/5 | July 6, 2024 | Source: checkomatic.com/quickbooks-starter-pack-product

"Been with them for 15 years. Always reliable, always good quality, good service. What more can you ask for?"

ATV Inc. | ★★★★★ 5/5 | April 5, 2024 | Source: checkomatic.com/quickbooks-starter-pack-product

"First time ordering and I am super impressed with the quality of the checks. No issues with delivery. I will be ordering again!"

TClinton | ★★★★★ 5/5 | April 9, 2025 | Source: checkomatic.com/quickbooks-starter-pack-product

"We use CheckoMatic for all of our check needs! They have great prices and we receive our products in a timely manner!"

CG's Tax Service | ★★★★★ 5/5 | September 18, 2024 | Source: checkomatic.com/quickbooks-starter-pack-product

"ASJ Wilson Construction has been a client of checkomatic for some years now and they've never disappointed this company. Thank you checkomatic for all that you do."

ASJ Wilson Construction | ★★★★★ 5/5 | June 6, 2024 | Source: checkomatic.com/quickbooks-starter-pack-product

"Affordable and efficient. My go-to business check printer."

Doe | ★★★★★ 5/5 | January 24, 2025 | Source: checkomatic.com/quickbooks-starter-pack-product

Why Choose Checkomatic for Your Business Check Order

Quantity Options From 50 to 1,000+ With Bulk Pricing at Every Level

Checkomatic's check ordering allows you to select the exact quantity that matches your usage without being forced into fixed pack sizes. Bulk pricing reduces your per-check cost at higher quantities so you benefit from ordering the right amount for your volume. Browse all quantity options at business checks and computer checks for business.

Digital Proof Before Production on Every Order

Before any check prints, Checkomatic generates a digital proof for you to verify. Confirm your business name, address, ABA routing number, account number, and starting check number before anything goes to production. A proof verification step on your first order is the simplest way to avoid ordering too many checks with an error in them.

Rush Production for Urgent Needs

Rush production options ship within 1 to 2 business days for businesses that need checks quickly before a payroll date or an urgent AP run. Rush availability means that even if you run lower than planned on your check supply, same-week production is available. For the best ordering experience and guidance on the right quantity for your business, browse the full catalog at what is the best place to order checks online.


Aug 24, 2026

How to Write a Business Check: Step-by-Step Guide
Quick Answer: To write a business check, fill in the date, vendor or payee name (their full legal name, not a nickname), dollar amount in numbers, dollar amount in words, invoice number in the memo field, and sign with the authorized signatory signature on file with your bank. If your account requires dual signatures, both signatories must sign before the check leaves the office. Complete the voucher stubs at the same time. Record the check in your check register immediately.


Before You Write: What You Need Ready

Writing a business check correctly takes less than two minutes when you have the right information in front of you before you start. Gathering this before picking up the pen prevents errors that require voiding and rewriting.

  • The payee's full legal name. For a vendor, this is their business name exactly as it appears on their invoice ; not an abbreviation, nickname, or contact person's name. "Smith Electrical Contractors LLC" not "Bob Smith." The name you write on the payee line must match the name on the payee's bank account for the check to clear without delays.
  • The exact dollar amount. Pull the invoice and verify the total. Do not estimate. If there are multiple invoices in a single payment, add them before you start writing and confirm the total.
  • The invoice or PO number. This goes in the memo field. Having it written on the invoice in front of you before you start prevents forgetting it and having to add it later.
  • Your next check number. Check numbers run sequentially. The next check in your book or printer should follow the last check you wrote. Do not skip numbers and do not reuse numbers.
  • Your check register or accounting software open. You record the check immediately after writing it, while all the details are in front of you.


How to Write a Business Check: Every Field Step by Step

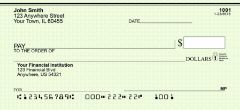
Business check on top format from Checkomatic showing all fields to fill in when writing a business check including date field payee line dollar box written amount line memo field and authorized signature for step-by-step guide

Voucher business check on top format ; all fields must be completed correctly before signing.


Step 1: Write the Date

Write today's date in the date field in the upper right area of the check. Use the standard US format: month/day/year. Write the full date clearly ; do not abbreviate the year to two digits or use shorthand that could be misread.

Do not post-date business checks by writing a future date. Post-dating does not legally prevent a bank from processing the check before that date in most US states. If you need to delay a payment, discuss payment terms with the vendor rather than relying on a future date on the check. For situations where you need to cancel a check before it clears, the correct tool is a stop payment order at your bank.


Step 2: Write the Payee Name

On the "Pay to the Order of" line, write the full legal name of the vendor, supplier, or individual being paid. For business vendors, use their registered business name exactly as it appears on their invoice. For employees, use their full legal name as it appears on their employment documents and tax forms.

Never leave the payee line blank. A blank payee line on a signed business check is functionally equivalent to a signed blank check. Anyone who receives it can write their own name in that field. If you need to issue a check before you have confirmed the exact payee name, hold the unsigned check until you can confirm the correct name. Never sign a check with a blank payee line.


Step 3: Enter the Dollar Amount in the Box

In the small rectangular box to the right of the payee line, write the numeric dollar amount. Start writing as close to the left edge of the box as possible ; this prevents anyone from inserting additional digits before your number. Write clearly in pen.

Include cents even when the amount is a round number. Write $500.00, not $500. The bank and your records benefit from the explicit decimal notation. If the amount has no cents, write 00/100 on the written line and confirm the box shows the decimal.


Step 4: Write the Dollar Amount in Words

On the written amount line below the payee field, write the dollar amount in words. For $1,247.50, write: "One thousand two hundred forty-seven and 50/100." Start at the far left of the line. After writing the amount, draw a horizontal line from the end of the words to the pre-printed "Dollars" at the right end of the line. This line fills the remaining space and prevents anyone from adding additional words to inflate the amount.

Under UCC Article 3, the written amount is the legally controlling amount if it conflicts with the numeric amount in the box. If you write $1,247.50 in the box but "one thousand two hundred and 50/100" in words, the check legally authorizes $1,200.50. Always verify both fields match before signing.


Step 5: Write the Invoice Number in the Memo Field

In the memo field in the lower left corner of the check, write the invoice number, purchase order reference, or payment description. For vendor payments: "Invoice 2847" or "INV-2847" or "PO-1094." For rent: "Rent March 2026." For payroll: "Pay period 08/01-08/15." This step is covered in full in the memo line section below.


Step 6: Sign the Check as the Authorized Signatory

Sign the check in the signature field in the lower right corner. The signature must match the specimen signature on file with your bank for the account. The bank's processing system and tellers use this signature to verify authenticity.

Sign only after all other fields are completely filled in. Never sign a blank check or a check with any unfilled fields. If your business account requires dual signatures, both authorized signatories must sign before the check leaves your office. This is covered in the dual signature section below.


How to Complete the Voucher Stubs on a Business Check

If you use voucher format business checks ; the most common format for business accounts payable and payroll ; each check comes with two detachable stubs below the check itself. The stubs must be completed at the same time you write the check, not after.


What Goes on Each Stub

Both stubs carry the same payment information. Fill in each stub with:

  • Date: Same as the check date.
  • Check number: The sequential number of this check.
  • Payee name: Same vendor or employee name as on the check face.
  • Invoice or reference number: The same invoice number you wrote in the memo field.
  • Amount: Same dollar amount as the check.
  • Balance forward (if applicable): Running account balance with the vendor, if you track partial payments against open invoices.


What Happens to Each Stub

The first stub goes to the payee. It functions as a remittance advice document ; it tells the vendor exactly which invoice your check covers without requiring a separate remittance letter or email. This is particularly important when paying partial amounts against a large invoice or consolidating multiple invoices into one check payment.

The second stub stays with you as a physical accounts payable record. File it with the corresponding invoice copy. The stub plus the invoice creates a complete paper trail for this payment transaction that exists independently of your accounting software.

For full guidance on voucher vs other business check formats, see voucher checks vs wallet checks: when to use each. To browse all voucher format business check options, see business checks at Checkomatic.


Authorized Signatory Rules for Business Checks

Self-inking endorsement stamp from Checkomatic for business check endorsement and authorized signature use showing pre-inked stamp for for deposit only business check processing and AP workflow

Self-inking endorsement stamps from Checkomatic for business check processing and deposit workflows.

This is the most important rule that separates business check writing from personal check writing. On a personal check, anyone who holds the check and knows the account can theoretically write a check. On a business account, only specifically designated individuals can legally authorize payments.


Who Is an Authorized Signatory

An authorized signatory is an individual whose name and signature specimen are on file with the bank as authorized to draw checks against a specific business checking account. When your business opens a checking account, the bank requires a signature card or account agreement that names these individuals. Only those named individuals ; by legal name as registered ; can sign checks on that account.


Why This Matters More Than People Think

If an employee who is not an authorized signatory writes and signs a business check, the bank may still honor it if the signature looks plausible. But the business retains liability for payments made by unauthorized signatories, and depending on the circumstances, the signing employee may face personal liability for the unauthorized transaction. This is why internal check authorization controls are not just procedural ; they are a legal protection for the business.


Best Practice for Authorized Signatories

Designate at least two authorized signatories so check writing can continue when the primary signatory is unavailable due to travel, illness, or other reasons. Common business setups include: the owner or CEO plus the controller or CFO for a small business; the CFO plus the AP manager for a medium-sized business. The bank updates the authorized signatory list through a formal process ; changes are not automatic when personnel changes occur. Keep the bank's signatory records current when key personnel change.


When a Business Check Requires Two Signatures

Some business checking accounts require two signatures on checks above a specified dollar threshold. This is a fraud prevention control that prevents a single individual from issuing large unauthorized payments unilaterally.


How Dual Signature Thresholds Work

At account opening, a business can request that the bank flag checks above a specified amount for dual signature verification. Common thresholds are $1,000, $5,000, or $10,000. Below the threshold, one authorized signatory can sign. Above it, two signatories must sign before the check is presented to the bank.


Setting the Right Threshold

Set the threshold low enough to catch significant vendor payments and high enough that routine operating expenses (office supplies, utilities, small vendor invoices) do not require two people to approve every check. For most small businesses, a $2,500 to $5,000 threshold balances control with operational efficiency.


What Happens Without the Second Signature

A check presented to the bank without the required second signature may be honored anyway depending on the bank's internal processes. Some banks verify dual signature requirements on every check. Others spot-check. The fact that the bank might honor the check does not eliminate the business's internal control violation. If the payment later turns out to be unauthorized or fraudulent, the absence of the second signature weakens the business's legal position in any recovery action.


How to Use the Memo Line for Accounts Payable Tracking

The memo line on a business check is one of the most underused fields in small business accounting. It takes five seconds to fill in and saves hours of AP research later.


What to Write in the Memo Field

  • Single invoice payment: "Invoice 4821" or "INV-4821"
  • Multiple invoices in one check: "INV-4821, 4822, 4823" or "Invoices per attached remittance"
  • Partial payment against an invoice: "INV-4821 partial" or "INV-4821 $500 of $1,200"
  • Rent or recurring payment: "Rent March 2026" or "Monthly retainer March 2026"
  • Payroll check: "Pay period 08/01-08/15/2026"
  • Utility or vendor account number: "Account 88471-223"


Why Invoice Numbers in the Memo Field Matter

When a vendor calls three months later claiming they never received payment for Invoice 4821, you can pull your check register, search for "INV-4821" in the memo column, and find the check number, date, and amount in under 60 seconds. Without the memo notation, tracing that payment requires cross-referencing dates, amounts, and vendor names manually ; a process that can take 20 to 30 minutes per disputed payment. For businesses that cut dozens of checks per month, the memo field is a free accounts payable efficiency tool on every check.


Memo Field Limitations

The memo field does not appear on your bank statement, does not affect check processing, and does not communicate directly to the payee's bank. It is a record-keeping tool for your books and a communication tool to the payee via the stub. If the payee needs specific information to process your payment, include it in the memo AND on the stub that goes to them.


How to Record a Business Check in Your Register

Every business check must be recorded in two places: your physical check register (or check stub) and your accounting software. Record both immediately after writing the check, while the details are in front of you.


In Your Check Register

Enter the check number, date, payee name, memo description, and dollar amount in the Payment column. Update the running balance. Your register balance decreases by the check amount the moment you write the check, not when it clears the bank. This is how you maintain an accurate available balance that accounts for checks you have written but that have not yet been presented for payment. For the complete check register guide, see check register: how to set up and use a checkbook ledger.


In QuickBooks or Accounting Software

Record the check as a check transaction in your accounts payable or checking account register. Apply the payment to the specific open invoice for that vendor. This closes the invoice in your AP ledger and matches the payment to the obligation it covers. If you use QuickBooks, the software generates a check record that can be printed, searched, and reconciled during month-end. The physical check stub and the software record should match exactly in amount, date, and payee name.


Immediate vs Delayed Recording

Always record immediately ; not at the end of the day, not at the end of the week, not during month-end reconciliation. A check you write and forget to record creates a phantom available balance in your account. If you write more checks against that phantom balance, you risk overdrafts. Even one check recorded late can cascade into multiple overdrafts if several checks clear before you update the balance.


Manual vs Computer-Printed Business Checks

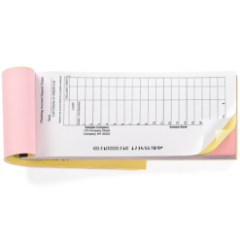
Manual executive deskbook business checks from Checkomatic showing handwritten business check format for writing a business check without accounting software with carbonless duplicate copies for AP record keeping

Manual executive deskbook business checks from Checkomatic ; carbonless duplicates create an instant payment record as you write.

The steps in this guide apply to both manual handwritten checks and computer-printed checks. The difference is who fills in the variable fields.

FactorManual Handwritten ChecksComputer-Printed Checks
Who fills fieldsAuthorized signatory by handAccounting software prints all fields
Record keepingCarbonless duplicate creates instant copySoftware records automatically at print
Best volumeUnder 20 checks per month20 or more checks per month
Software requiredNoYes ; QuickBooks, Sage, etc.
Error riskHigher ; handwriting errors possibleLower ; software fills fields from records
Signatory still required?Yes ; sign by handYes ; sign by hand after printing

For manual checks in binder or book format, see manual checks at Checkomatic. For computer-printed formats compatible with QuickBooks and other software, see computer checks for business.


Common Business Check Writing Mistakes

Mistake 1: Writing a Personal Name Instead of the Business Entity Name

A check drawn on "Smith Electrical LLC" signed by "John Smith" but written to "Bob Jones" instead of "Jones Plumbing Supply Inc." may create a tax and AP documentation problem. Always write the legal business name of the payee when paying a business entity. For a vendor that is a sole proprietor doing business as a company, confirm whether to use their personal name or DBA name before writing the check.


Mistake 2: Leaving the Memo Field Blank

Every business check payment has an underlying invoice, contract, or obligation it covers. Leaving the memo field blank makes that connection invisible on the physical check. Six months later, when a vendor disputes payment of Invoice 4821, the blank memo check provides no immediate confirmation of what it was for. Five seconds at the time of writing saves twenty minutes of research later.


Mistake 3: Not Completing the Voucher Stubs Before Detaching

Tearing the check away from the stubs before completing them defeats the purpose of voucher format. The stub is the physical payment documentation. A blank or partially completed stub is not a useful AP record. Complete both stubs fully before signing and detaching the check.


Mistake 4: Not Recording the Check Immediately

Writing a check and intending to record it later creates a phantom balance in your checking account. If you forget to record it and write additional checks against the unrecorded balance, you risk overdrafts when the unrecorded check clears. Record every check in your check register the moment you write it.


Mistake 5: Discarding a Voided Check Instead of Marking It

When you make an error on a check and need to start over, never simply discard the check. Write VOID in large permanent marker across the front of the check, record it as VOID in your check register with the check number noted, and retain the voided check for your records. A missing check number in your sequence triggers questions during audits and bank reconciliation. For the complete guide on voiding, see how to void a check: step-by-step guide for business.


Mistake 6: Using the Wrong Business Name on Check Stock

If your check stock prints the wrong business name, a name that has changed since the check stock was ordered, or a DBA name that does not match the bank account registration, every check you write creates an IRS documentation mismatch and may face payee deposit delays. Order new check stock whenever your legal business name changes. For all business check formats with correct entity name printing, see business checks at Checkomatic.


What Customers Say About Checkomatic

All reviews below are published on checkomatic.com and reproduced verbatim. Source: checkomatic.com/quickbooks-starter-pack-product, 4.5 stars from 166 verified reviews.

"Been with them for 15 years. Always reliable, always good quality, good service. What more can you ask for?"

ATV Inc. | ★★★★★ 5/5 | April 5, 2024 | Source: checkomatic.com/quickbooks-starter-pack-product

"First time ordering and I am super impressed with the quality of the checks. No issues with delivery. I will be ordering again!"

TClinton | ★★★★★ 5/5 | April 9, 2025 | Source: checkomatic.com/quickbooks-starter-pack-product

"We use CheckoMatic for all of our check needs! They have great prices and we receive our products in a timely manner!"

CG's Tax Service | ★★★★★ 5/5 | September 18, 2024 | Source: checkomatic.com/quickbooks-starter-pack-product

"I got 500 checks for less than half of what the bank wanted for 200!"

VVA Voucher Checks (Vietnam Veterans of America) | ★★★★★ 5/5 | July 6, 2024 | Source: checkomatic.com/quickbooks-starter-pack-product

"ASJ Wilson Construction has been a client of checkomatic for some years now and they've never disappointed this company. Thank you checkomatic for all that you do."

ASJ Wilson Construction | ★★★★★ 5/5 | June 6, 2024 | Source: checkomatic.com/quickbooks-starter-pack-product

"Affordable and efficient. My go-to business check printer."

Doe | ★★★★★ 5/5 | January 24, 2025 | Source: checkomatic.com/quickbooks-starter-pack-product


Why Choose Checkomatic for Business Check Stock

All Business Check Formats in One Place

Voucher (check on top), check in middle, check on bottom, 3-on-a-page, manual handwritten, payroll, and accounts payable formats. Every format manufactured at Checkomatic's facility in Monroe, NY since 1997. ABA routing number verified against the Federal Reserve E-Payments Routing Directory before every production run. Browse all formats at business checks and computer checks for business.


Manual Checks With Carbonless Duplicates for Handwritten AP

If you write checks by hand, Checkomatic's manual business checks include carbonless duplicate pages that create an instant copy of every check you write. The copy stays in the binder as your AP record. No separate register entry needed for the basic payment detail ; the carbon provides it automatically. Browse manual formats at manual checks.


Six Security Features Standard on Every Check

Chemically sensitive paper, microprinting, void pantograph, UV fluorescent fibers, heat-sensitive ink, and genuine watermark on every check at the base price. No security tier upgrade required. The security features protect every business check you write from the most common forms of business check fraud.


Pre-Printed Deposit Slips to Complete the Payment Cycle

When a vendor deposits your business check, they may need to fill out a deposit slip. For your own deposits of received checks, pre-printed deposit slips with your account details pre-printed save time at the teller. For business deposit slips matched to your account, see business deposit slips.


Aug 22, 2026

3-on-a-Page Checks: What They Are, Who Needs Them, and When to Use Them

Quick Answer: 3-on-a-page checks are business check stock where three individual checks print per full-size sheet with no attached stubs. Payment records stay in your accounting software instead of on physical paper. This format is called Standard in QuickBooks. It is most efficient for high-volume accounts payable runs. It is not the right format for payroll in states requiring physical pay stubs. Always confirm the format setting in your software before ordering.


What Are 3-on-a-Page Checks

3-on-a-page checks are business check stock that prints three individual checks on a single 8.5 by 11 inch sheet of paper. Each check sits one above the other, occupying approximately 3.5 inches of the page. The checks are separated by perforations that allow clean tear-out. There are no attached stubs.

The name comes directly from the physical layout: three checks, one page. In QuickBooks, this format is called Standard in the Check Style selector. In other accounting platforms it may be called Standard, 3-per-page, or simply listed by the check dimensions.

3-on-a-page checks are the second most popular business check format after voucher (check-on-top). They are used primarily for accounts payable runs where digital software records replace physical paper stubs, and for any business that prioritizes paper efficiency and per-check cost over physical stub documentation.


How 3-on-a-Page Checks Work

The workflow is the same as any computer check format. Your accounting software handles the data. The check stock handles the physical security layer.


What the Check Stock Does

The check stock arrives pre-printed with your business name, bank name, routing number, account number, and starting check number. The MICR line at the bottom of each check is pre-printed in certified magnetic toner. Security features are embedded in the paper ; chemically sensitive coating, void pantograph, microprinting, UV fluorescent fibers, heat-sensitive ink, and genuine watermark. None of this is printed at run time. It ships on the stock before it reaches you.


What Your Accounting Software Does

When you run a check print job in QuickBooks or another compatible platform, the software sends a print command for each payment. The print command positions the variable data fields for all three checks on the sheet: payee name, dollar amount in numerals, dollar amount in words, date, and check number. Your laser or inkjet printer outputs these fields onto the pre-printed stock in one pass per sheet, producing three completed checks ready to sign and mail.


Where the Payment Records Go

With voucher checks, one physical stub per check stays with you as a paper accounts payable log. With 3-on-a-page checks, no physical record attaches to each payment. The payment record lives entirely inside your accounting software. Every check QuickBooks or your platform prints is automatically recorded in the check register, accounts payable ledger, and vendor history in the software. The digital record replaces the physical stub.


3-on-a-Page Checks vs Voucher Checks: Full Comparison

QuickBooks voucher check on top format from Checkomatic showing one check per page with two detachable stubs below for comparison with 3-on-a-page standard format for business accounts payable and payroll

Voucher (check-on-top) format ; one check per page with two detachable stubs. Compare with 3-on-a-page above.

Factor3-on-a-Page (Standard)Voucher (Check-on-Top)
Checks per sheet3 per 8.5 by 11 inch sheet1 per 8.5 by 11 inch sheet
Attached stubsNoneTwo perforated stubs per check
Payment recordsDigital only ; in accounting softwarePhysical stub plus digital in software
Per-check paper useOne-third of a sheet per checkOne full sheet per check
QuickBooks settingStandardVoucher
Best forHigh-volume AP; digital-first operationsPayroll; AP requiring remittance stubs
Payroll useNot recommended in most statesStandard choice for payroll
Paper efficiency3x more efficient than voucherOne sheet per payment

For a deeper comparison of when to use voucher format vs other check formats for different business situations, see voucher checks vs wallet checks: when to use each.


Who Should Use 3-on-a-Page Checks

High-Volume Accounts Payable Operations

If your business cuts 50 or more vendor checks per week, 3-on-a-page format delivers a meaningful efficiency advantage. Each print job runs three payments per sheet rather than one, cutting your paper use by two-thirds for the same number of payments. Over a month of regular AP runs, the paper savings are measurable. Over a year, they are significant at higher volumes.


Businesses That Track Everything Digitally

If your business runs QuickBooks, Sage, Xero, MYOB, or any other accounting platform and relies entirely on software records for accounts payable documentation, 3-on-a-page checks are the right fit. The digital records in your accounting software serve the same function as a physical stub. You get searchable, permanent payment history without the physical paper overhead of a stub per check.


Non-Profits, Schools, and Foundations

Organizations that process regular vendor payments, grant disbursements, and operational expenses but do not run employee payroll through check printing benefit from the paper and cost efficiency of 3-on-a-page format. Grant management software and accounting platforms used by non-profits typically support this format.


Small Businesses With Consistent Vendor Rosters

A small business with 10 to 20 regular vendors paid monthly by check gets the same per-check cost efficiency without needing the stub record that a larger AP operation might want. When vendor relationships are consistent and payment details are simple, digital records in the accounting platform are sufficient documentation.


Property Management Companies

Property managers cutting maintenance vendor checks, utility payments, and owner distributions typically process high volumes across multiple accounts. 3-on-a-page format reduces paper overhead for these runs while software records maintain the payment audit trail by property and vendor.


Who Should NOT Use 3-on-a-Page Checks

Payroll business checks from Checkomatic showing voucher format with detachable stubs for employee earnings and deductions required for payroll check printing when 3-on-a-page checks are not appropriate

Payroll business checks from Checkomatic ; voucher format with stubs for employee pay documentation.

Businesses Running Payroll in Stub-Required States

This is the most important restriction on 3-on-a-page checks. Many US states require employers to provide employees with an itemized wage statement at every pay period showing gross earnings, tax withholdings, deductions, and net pay. A 3-on-a-page check has no stub. An employee who receives a stub-free check receives only the check amount ; no wage detail. If your state requires physical pay stubs at each pay period, using 3-on-a-page format for payroll puts you out of compliance unless you print and distribute separate pay stubs alongside every check.

For payroll, use voucher format. One check per page with two detachable stubs provides the physical wage documentation employees need and satisfies state itemized wage statement requirements at the point of payment. For the complete guide to payroll check formats, see business checks for payroll: the complete employer guide.


Businesses Whose Vendors Require Remittance Stubs

Some vendors, particularly large suppliers with high-volume AP processing departments, require a remittance advice document to match your payment to their open invoices. A voucher check stub serves this function at no extra step ; the stub tells the vendor exactly which invoices your check covers. A 3-on-a-page check provides no such document. If you pay vendors who require remittance advice, either use voucher format or print separate remittance documents and mail them with each 3-on-a-page check.


Businesses Without Reliable Accounting Software

3-on-a-page checks work only when a software system maintains the digital payment records that the missing physical stubs would otherwise provide. If your business does not use accounting software consistently, or if the software records are poorly maintained, 3-on-a-page format leaves you without a reliable payment audit trail. In that situation, voucher format provides a physical backup record per payment that exists independently of any software system.


Which Accounting Software Supports 3-on-a-Page Checks

Most major accounting platforms with check printing functionality support 3-on-a-page format. The format you order must match your software's configured print layout.


QuickBooks Desktop and Online

QuickBooks calls this Standard format. It is available across all QuickBooks Desktop editions (Pro, Premier, Enterprise) and all QuickBooks Online subscription tiers. In QuickBooks Desktop, select Standard in File, Printer Setup, Check Style. In QuickBooks Online, select Standard in the gear icon, Print Checks setup. The 3-on-a-page stock must be in your printer when you select Standard. For the complete QuickBooks Desktop print setup walkthrough, see how to print checks from QuickBooks Desktop in 2026. For QuickBooks Online, see how to set up check printing in QuickBooks Online: step by step.


Sage 50, Xero, and MYOB

Sage 50, Xero, and MYOB all support 3-on-a-page check printing through their check printing modules. The format name and the path to select it vary by platform. Confirm the format selection in your specific software's check printing settings before ordering. Checkomatic's 3-on-a-page check stock is compatible with all three platforms and carries the same MICR pre-printing that clears at any US bank.


Quicken

Quicken supports check printing and includes a 3-per-page option in addition to voucher and wallet formats. Personal and home business Quicken users who print checks for regular vendor or contractor payments find the 3-on-a-page format particularly practical at lower volumes.


Other Platforms

Any accounting platform that includes check printing functionality and a format selector that lists 3-per-page, Standard, or a similar label supports this check stock format. If your platform is not listed, contact Checkomatic before ordering. Custom formatting is available for non-standard software configurations. For all compatible platforms and format guidance, see QuickBooks-compatible checks: voucher, wallet, and 3-on-a-page explained.


Cost Savings: 3-on-a-Page vs Voucher Format

The per-check cost difference between 3-on-a-page and voucher format comes directly from paper use. Three checks on one sheet means one-third of the paper per check compared to voucher format.


How the Savings Work at Scale

Consider a business that cuts 100 vendor checks per month. With voucher format, that is 100 sheets of check stock per month, or 1,200 sheets per year. With 3-on-a-page format, the same 100 checks use approximately 34 sheets per month, or 400 sheets per year. The per-sheet price of both formats is similar. The reduction in sheets needed is where the savings come from.

For businesses with lower check volumes ; under 20 checks per month ; the cost difference between formats is small enough that the stub versus no-stub decision matters more than the cost calculation. For businesses printing 100 or more checks per month, the cost and paper difference is meaningful.


When Cost Is Not the Right Deciding Factor

If your payroll requires stubs or your vendors require remittance documentation, no cost advantage justifies choosing 3-on-a-page. The stub provides compliance and documentation value that costs more to replicate separately than the savings on paper. Use the right format for your workflow, then benefit from cost efficiency where it applies.


How to Confirm Your Format Before Ordering

The single most important step before ordering any check stock is confirming your software's format setting. A format mismatch between your check stock and your software setting wastes the entire order.


QuickBooks Desktop

  1. Open QuickBooks Desktop.
  2. Go to File, then Printer Setup.
  3. In the Form Name dropdown, select Check or Paycheck.
  4. Look at the Check Style field. If it shows Standard, order 3-on-a-page stock. If it shows Voucher, order voucher stock.


QuickBooks Online

  1. Click the gear icon in the upper right corner.
  2. Under Tools, select Print Checks.
  3. The check style selector shows your current setting. Standard means 3-on-a-page.


Other Software

Open the check printing or payment settings in your platform. Look for a format selector, check style field, or print template option. The preview shown in that setting tells you exactly which format to order. If the preview shows three checks on one page with no stubs, order 3-on-a-page stock.

For all 3-on-a-page formats in QuickBooks-compatible and general computer check versions, browse QuickBooks checks 3 on a page and computer checks 3 on page at Checkomatic.


Common 3-on-a-Page Check Ordering Mistakes

Mistake 1: Ordering 3-on-a-Page When the Software Is Set to Voucher

This is the most common and most costly mistake. If QuickBooks is set to Voucher and you load 3-on-a-page stock, the check layout prints in the wrong third of the sheet. The payee line, amount, and date all land in positions designed for a full-page voucher layout. Every check in the batch is unusable. Always check the software setting first. Always.


Mistake 2: Using 3-on-a-Page for Payroll Without Checking State Requirements

Switching payroll to 3-on-a-page format to reduce costs and then discovering mid-year that your state requires physical pay stubs is an avoidable compliance problem. Check your state's wage statement law before making the switch. If stubs are required, stay with voucher format for payroll. See business checks for payroll: the complete employer guide for payroll check format guidance.


Mistake 3: Not Running a Paper Alignment Test First

Even with the correct format selected, individual printer models can introduce minor scaling differences. Print the test page in QuickBooks printer settings on plain paper, hold it against your actual check stock, and confirm field alignment before running a full batch. Five minutes of testing prevents wasting an entire batch of check stock.


Mistake 4: Assuming 3-on-a-Page Works for All Vendors

Before switching from voucher to 3-on-a-page for accounts payable, confirm that your key vendors do not require a physical remittance stub with payment. Most vendors do not require it, but large suppliers with structured AP processing departments sometimes do. A quick check with your five largest vendors before switching format takes ten minutes and prevents payment processing problems.


Mistake 5: Ordering Without Checking Starting Check Number

If you are switching from voucher to 3-on-a-page stock for the first time, the new stock must continue your existing check number sequence. Do not restart at 1001 unless you are opening a new bank account. Your accounting software and your bank both track check numbers, and gaps or restarts in the sequence create reconciliation confusion. Note your last used check number from your current supply and set the starting number on your 3-on-a-page order to continue from there.


What Customers Say About Checkomatic

All reviews below are published on checkomatic.com and reproduced verbatim. Source: checkomatic.com/quickbooks-starter-pack-product, 4.5 stars from 166 verified reviews.

"Been with them for 15 years. Always reliable, always good quality, good service. What more can you ask for?"

ATV Inc. | ★★★★★ 5/5 | April 5, 2024 | Source: checkomatic.com/quickbooks-starter-pack-product

"First time ordering and I am super impressed with the quality of the checks. No issues with delivery. I will be ordering again!"

TClinton | ★★★★★ 5/5 | April 9, 2025 | Source: checkomatic.com/quickbooks-starter-pack-product

"We use CheckoMatic for all of our check needs! They have great prices and we receive our products in a timely manner!"

CG's Tax Service | ★★★★★ 5/5 | September 18, 2024 | Source: checkomatic.com/quickbooks-starter-pack-product

"I got 500 checks for less than half of what the bank wanted for 200!"

VVA Voucher Checks (Vietnam Veterans of America) | ★★★★★ 5/5 | July 6, 2024 | Source: checkomatic.com/quickbooks-starter-pack-product

"ASJ Wilson Construction has been a client of checkomatic for some years now and they've never disappointed this company. Thank you checkomatic for all that you do."

ASJ Wilson Construction | ★★★★★ 5/5 | June 6, 2024 | Source: checkomatic.com/quickbooks-starter-pack-product

"Affordable and efficient. My go-to business check printer."

Doe | ★★★★★ 5/5 | January 24, 2025 | Source: checkomatic.com/quickbooks-starter-pack-product


Why Choose Checkomatic for 3-on-a-Page Business Checks

Pre-Formatted for QuickBooks Standard Template

Checkomatic's 3-on-a-page check stock is sized and positioned to match QuickBooks Standard print template alignment for all current QuickBooks Desktop and Online versions. The alignment adjustment most users need is minimal. Check stock not pre-calibrated to your software's template may require significant alignment adjustments and multiple test runs.


MICR Line Pre-Printed on Every Sheet

The MICR line at the bottom of each check is pre-printed in certified magnetic toner before the stock ships and verified against the Federal Reserve E-Payments Routing Directory. Your laser or inkjet printer handles only the variable fields QuickBooks generates. No MICR toner required from your printer.


Six Security Features at Base Price

Chemically sensitive paper, microprinting, void pantograph, UV fluorescent fibers, heat-sensitive ink, and genuine watermark ; all standard on every 3-on-a-page order regardless of quantity. No security upgrade fee. The same fraud prevention built into Checkomatic's voucher format ships on every 3-on-a-page order at no additional cost.


All Computer Check Formats Available

If you determine that 3-on-a-page is not the right fit for your workflow after reading this guide, every other format is available at the same facility. Voucher (check-on-top), check-in-middle, check-on-bottom, and 3-on-a-page formats all manufactured in Monroe, NY. Browse all formats at computer checks for business.


Order Directly for QuickBooks or General Computer Check Use

For QuickBooks-specific 3-on-a-page stock verified compatible with all QB versions, see QuickBooks checks 3 on a page. For general-purpose 3-on-a-page computer checks compatible with Sage, Xero, MYOB, Quicken, and other platforms, see computer checks 3 on page.


Aug 21, 2026

Writing a Check to Yourself for Deposit: Step-by-Step Guide
Quick Answer: To write a check to yourself for deposit, write your own name on the Pay to the Order of line. Fill in the dollar amount in the box and in words on the written line. Write today's date. Sign the front. On the back, write "For Deposit Only to Account [your account number]" and sign. Then deposit at your bank in person, by ATM, or via mobile deposit. The funds must be available in the account you are drawing from before you make the deposit.


Three Reasons People Write Checks to Themselves for Deposit

Writing a check to yourself for deposit is more common than most people realize. There are three situations where it comes up regularly.


Reason 1: Transferring Money Between Your Own Accounts at Different Banks

If you hold accounts at two different banks, transferring money between them electronically can take several days or require setting up a linked external account ; a process that itself takes several days the first time. Writing a check from your account at Bank A and depositing it at Bank B is often the faster alternative. You draw the check from one account and deposit it into the other. Both accounts are in your name. The transaction is legal and common.


Reason 2: Withdrawing Cash When a Debit Card Is Not Available

If your debit card is lost, frozen, or expired, writing a check to yourself and cashing it at the bank teller is a direct way to access your funds. You write the check to yourself, go to your bank branch, present the check and your identification, and receive cash over the counter. Some people also write the check payable to "Cash" for this purpose, though writing your own name is more secure because a check payable to cash can be cashed by anyone who finds it.


Reason 3: Depositing at a Branch Without an ATM or Mobile Deposit

Some credit unions, community banks, and regional institutions have limited ATM networks and require in-person deposits for checks drawn on outside institutions. Writing a check from your primary account and depositing it in person at a secondary institution is a practical workaround. It also creates a physical paper trail that both institutions record, which can be useful for bookkeeping purposes.


How to Write a Check to Yourself Step by Step

How to write a check to yourself for deposit using Checkomatic personal checkbook showing checkbook with pay to the order of line filled with own name amount date and signature for self-check deposit transfer between bank accounts

Checkomatic personal checkbooks ; for writing checks to yourself or any payee.

The process is identical to writing a check to anyone else. The only difference is that your own name goes on the payee line.


Step 1: Fill in the Date

Write today's date in the date field in the upper right area of the check. Use the month/day/year format. Do not post-date the check by writing a future date. Post-dating a check does not legally prevent a bank from processing it early in most US states, and if the funds are not in the account at the time of deposit, the check will bounce.


Step 2: Write Your Name on the Pay to the Order of Line

Write your full name exactly as it appears on the account you are depositing into. If your name on the receiving account is "John A. Smith," write "John A. Smith" on the payee line. Using a nickname or an abbreviation that does not match the name on file can cause the bank to delay or reject the deposit.


Step 3: Write the Dollar Amount in the Box

In the small rectangular box to the right of the payee line, write the numeric dollar amount. For example: 500.00. Write it clearly and start from the left edge of the box to prevent someone from inserting additional digits before your number.


Step 4: Write the Amount in Words on the Written Amount Line

On the line below the payee line, write the amount in words. For $500.00 write: Five hundred and 00/100. Draw a horizontal line from the end of your words to the printed "Dollars" text to fill the remaining space. Under UCC Article 3, if the numeric amount and the written amount conflict, the written amount controls. Get both right, but the written line is the legally binding one.


Step 5: Write a Memo (Optional but Recommended)

In the memo field in the lower left corner, write a brief description of the purpose. "Transfer to savings," "Account transfer," or "Withdrawal" are all appropriate. This note does not affect whether the check clears but makes your check register and bank statement easier to reconcile later.


Step 6: Sign the Front of the Check

Sign your name in the signature field in the lower right corner of the check. This is your authorization as the drawer ; the person authorizing the bank to release the funds. Without a signature, the check is not valid.


How to Endorse a Check Written to Yourself

How to endorse a check written to yourself using self-inking endorsement stamp showing For Deposit Only restrictive endorsement on back of personal check for self-check deposit into bank account

Self-inking endorsement stamps from Checkomatic ; stamp "For Deposit Only" in one press.

Endorsing a check you wrote to yourself works the same way as endorsing any other check. The endorsement method you choose determines how securely the check is protected between the time you sign the back and the time it reaches the bank.


Use a Restrictive Endorsement

A restrictive endorsement is the safest option for any check you are depositing. In the endorsement area on the back of the check, write:

For Deposit Only to Account [your account number]

Then sign your name below that text. The phrase "For Deposit Only" tells the bank that the check can only be deposited, not cashed over the counter or transferred to a third party. Adding your specific account number directs the deposit to exactly one account. A check with a restrictive endorsement cannot be cashed by someone who finds it or steals it from the mail.


For Mobile Deposit

If you are depositing the check through your bank's mobile app, write:

For Mobile Deposit Only

Then sign below. This phrasing provides protection under Regulation CC against duplicate deposit liability. If a check bearing "For Mobile Deposit Only" is later presented again for deposit (either by mistake or intentionally), the indemnification language helps protect the bank and the depositor from the second deposit going through. Never use a plain signature without any restrictive language on a mobile deposit check.


Never Use a Blank Endorsement

A blank endorsement is just your signature with no additional text. Under UCC Article 3, a blank endorsement converts the check into a bearer instrument ; anyone who holds it can cash or deposit it regardless of whose name is on the front. A self-check with a blank endorsement that falls out of your pocket on the way to the bank can be cashed by whoever picks it up. Always add the restrictive text before signing. For the complete guide to all endorsement types, see how to endorse a check: every type and stamp explained.


How to Deposit a Check Written to Yourself

After writing and endorsing the check, you have three deposit options. Each has different timing for when funds become available.

How to deposit a check written to yourself using Checkomatic pre-printed business deposit slips with account number bank name and routing number already printed ready for self-check deposit at bank teller ATM or mobile deposit

Pre-printed deposit slips from Checkomatic; account details already on the slip.


In Person at a Bank Teller

Hand the endorsed check to a teller along with a completed deposit slip. The teller verifies your identification and the check details, processes the deposit, and gives you a receipt. The first $225 is typically available the same business day. The remainder is usually available within one to two business days under Regulation CC. For the full guide to completing a deposit slip, see how to fill out a deposit slip: step-by-step guide.


ATM Deposit

Insert the endorsed check into your bank's ATM. The ATM images the check and processes the deposit. Availability is typically the same as teller deposits for checks under $225, though individual bank policies vary. Some banks hold ATM-deposited checks for one additional business day compared to teller deposits.


Mobile Deposit

Open your bank's mobile app, navigate to the deposit function, enter the amount, and photograph the front and back of the endorsed check. Funds from mobile deposits are often available within one to two business days for the first $225, with the remainder available within five business days at some banks. Mobile deposits on checks over $5,000 may face longer hold periods regardless of account history.


Check Kiting: The Risk You Must Understand

Check kiting is the illegal practice of writing a check from an account with insufficient funds, depositing it to create a temporary false balance, and then withdrawing or spending that false balance before the originating check is returned unpaid. It exploits the processing delay between when a check is deposited and when it fully clears.


Why This Matters for Self-Checks

Writing a check to yourself becomes check kiting when the account the check is drawn on does not have sufficient available funds to cover the amount. The pattern looks like this: you write a check from Account A for $2,000, deposit it in Account B, then spend from Account B before the check from Account A clears. Meanwhile, Account A is short and the check bounces. If this is done repeatedly with increasing amounts, it is a federal crime under 18 U.S.C. 1344 (bank fraud).


How to Stay on the Right Side

  • Confirm available balance in the source account before writing the self-check.
  • Do not spend funds from the deposit until the originating check has fully cleared the source account.
  • Do not write self-checks back and forth between accounts to manufacture a temporary balance at either account.
  • If you need to move money between accounts quickly, an ACH transfer is faster than a self-check and eliminates the float risk entirely.


Self-Check vs ACH Transfer: Which Is Faster for Moving Money

FactorSelf-Check DepositACH Transfer
Setup requiredNone; need a check and deposit accessLink external account first (3 to 5 days one-time)
Transfer speed1 to 5 business days for full availabilitySame day or next day at most banks
Paper requiredYes; physical check neededNo; fully electronic
Float riskExists; check processes over 1 to 5 daysMinimal; both accounts update quickly
Best forWhen ACH is not set up; cash withdrawal; emergency transferRegular inter-account transfers; recurring moves
CostOne check from your supplyUsually free at most banks

For regular inter-account transfers, ACH is faster and does not require a physical check. For emergency situations where ACH is not set up, writing a check to yourself remains a reliable option as long as the source account has sufficient funds.


How to Record a Self-Check in Your Check Register

Recording a self-check in your check register is the same as recording any other check you write. The key is doing it at the moment you write the check, not after the deposit clears.


In Your Physical Check Register

Enter the check number, today's date, the description ("Transfer to savings" or "Account transfer"), and the dollar amount in the Payment column. Calculate and update your running balance. The balance decreases by the check amount the moment you write it, even though the check has not yet been presented. Your register should always reflect what you have authorized to leave the account, not what has already cleared. For the complete guide to maintaining an accurate register, see check register: how to set up and use a checkbook ledger.


In QuickBooks or Accounting Software

Record the self-check as a check transaction from the source account with a memo of "Transfer to [destination account name]." On the receiving side, record the deposit when it posts. For business accounts, your bookkeeper may categorize this as an inter-account transfer rather than an expense. Check with your accountant on the correct category for your bookkeeping setup.


During Monthly Reconciliation

The self-check will appear on your source account's bank statement as a paid check and on your receiving account's statement as a deposit. During monthly reconciliation, match the check number and amount on both sides. Any gap between the date you wrote the check and the date it cleared is the float period. For the full reconciliation process, see checkbook management: how to balance and reconcile your account every month.


Common Mistakes When Writing a Check to Yourself

Mistake 1: Writing Your Name Incorrectly on the Payee Line

If the name you write on the payee line does not match the name on the receiving account, the bank may put a hold on the deposit pending identity verification. Write your name exactly as it appears on the account statement ; including middle initials or suffixes if they are part of the account name.


Mistake 2: Blank Endorsement Instead of Restrictive Endorsement

Signing the back without adding "For Deposit Only" first converts the check into a bearer instrument. If it is lost, stolen, or found, anyone can cash it. Always write "For Deposit Only to Account [number]" before signing.


Mistake 3: Depositing Before Confirming Available Funds

Available balance differs from account balance. A deposit you made yesterday may not yet be available. Pending transactions may reduce what you can draw from. Writing a self-check against unavailable funds creates an overdraft on the source account and potentially a check kiting flag.


Mistake 4: Not Recording the Check Immediately

Writing the check and depositing it without recording it in your register leaves your running balance wrong until the check clears. This creates reconciliation confusion and may cause you to accidentally write another check that overdrafts the account. Record it the moment you write it.


Mistake 5: Double-Depositing the Physical Check After Mobile Deposit

After a mobile deposit, keep the physical check but do not deposit it again. Double-depositing a check is fraud, even when accidental. Write "MOBILE DEPOSITED [date]" in pen across the front of the physical check after the mobile deposit confirms, so you do not accidentally deposit it again at an ATM or teller.


What Customers Say About Checkomatic

All reviews below are published on checkomatic.com and reproduced verbatim. Source: checkomatic.com/quickbooks-starter-pack-product, 4.5 stars from 166 verified reviews.

"Been with them for 15 years. Always reliable, always good quality, good service. What more can you ask for?"

ATV Inc. | ★★★★★ 5/5 | April 5, 2024 | Source: checkomatic.com/quickbooks-starter-pack-product

"First time ordering and I am super impressed with the quality of the checks. No issues with delivery. I will be ordering again!"

TClinton | ★★★★★ 5/5 | April 9, 2025 | Source: checkomatic.com/quickbooks-starter-pack-product

"We use CheckoMatic for all of our check needs! They have great prices and we receive our products in a timely manner!"

CG's Tax Service | ★★★★★ 5/5 | September 18, 2024 | Source: checkomatic.com/quickbooks-starter-pack-product

"I got 500 checks for less than half of what the bank wanted for 200!"

VVA Voucher Checks (Vietnam Veterans of America) | ★★★★★ 5/5 | July 6, 2024 | Source: checkomatic.com/quickbooks-starter-pack-product

"ASJ Wilson Construction has been a client of checkomatic for some years now and they've never disappointed this company. Thank you checkomatic for all that you do."

ASJ Wilson Construction | ★★★★★ 5/5 | June 6, 2024 | Source: checkomatic.com/quickbooks-starter-pack-product

"Affordable and efficient. My go-to business check printer."

Doe | ★★★★★ 5/5 | January 24, 2025 | Source: checkomatic.com/quickbooks-starter-pack-product


Why Choose Checkomatic for Personal and Business Checks

Personal Checks in Duplicate Format

When you write checks to yourself regularly for inter-account transfers, keeping accurate records matters. Personal checkbooks in duplicate format create a carbonless copy of every check you write at the moment you write it. The copy stays in the check register stub area automatically ; no separate entry needed. The duplicate records the check number, date, payee (your own name), and amount instantly. For personal checkbook options including duplicate formats, see personal checkbook at Checkomatic.


Business Checks for Business Account Transfers

Business owners who write checks between business accounts need checks that clear at all US banks without friction. Checkomatic's business checks are ABA-verified, MICR-encoded, and accepted at every major US financial institution. No alignment issues, no bank rejections. For all business check formats, see business checks at Checkomatic.


Pre-Printed Deposit Slips for the Receiving Account

When depositing a self-check in person, a pre-printed deposit slip speeds up the teller process significantly. Checkomatic's deposit slips arrive with your account number, bank name, and routing number already printed. You fill in only the date and amount. For deposit slips matched to your account, see business deposit slips.


In-House Manufacturing Since 1997

All checks manufactured at Checkomatic's own facility in Monroe, NY. Standard production ships in 3 to 5 business days. ABA routing numbers verified against the Federal Reserve E-Payments Routing Directory before every production run. SSL-encrypted checkout protects your banking information.


Aug 20, 2026

ABA Routing Number: What It Is and Where to Find It

ABA Routing Number Definition

ABA routing number definition: an ABA routing number is a 9-digit numeric code that identifies a specific financial institution in the United States payment system. ABA stands for American Bankers Association, the organization that created and maintains the routing number system. Routing numbers are also called routing transit numbers (RTN), check routing numbers, or ABA numbers, all referring to the same 9-digit identifier.

Routing number meaning: the routing number tells US payment networks where to send or receive money. When you write a check, the routing number in the MICR line tells the Federal Reserve check clearing system which bank holds the account the funds should come from. When you set up direct deposit, your employer uses your routing number to tell the ACH network which bank should receive your paycheck. When you initiate a wire transfer, the routing number identifies both the sending and receiving institution in the Fedwire system.

The Stripe explainer captures it simply: "ABA routing numbers are unique nine-digit codes that financial institutions in the United States use to identify specific banks or credit unions. They're used in financial transactions, such as electronic funds transfers, to ensure that these transactions are sent to the correct institution."

Every US bank, credit union, thrift institution, and savings bank that holds a master account at a Federal Reserve Bank has at least one routing number. The ABA's official routing number information page confirms: "An ABA Routing Number can be issued only to a federal or state chartered financial institution which has been determined to be eligible for a master account by a Federal Reserve Bank."


History of Routing Numbers

ABA routing number history 1910: the routing number system was created by the American Bankers Association in 1910 and formally adopted by the US banking industry in 1911. The ABA's Routing Number Policy states: "The routing number, devised by the American Bankers Association (ABA) in 1910 and adopted by the industry in 1911, serves to identify the specific financial institution which is responsible for the payment of a negotiable instrument."

The original purpose was purely operational: to enable the sorting, bundling, and physical delivery of paper checks across the country's growing banking network. Before routing numbers existed, banks had to manually identify where each check came from and where it needed to go for clearing. The 9-digit standardized code allowed automated sorting equipment to route paper checks to the correct Federal Reserve branch for physical delivery to the paying bank.

Wikipedia's routing transit number article traces the evolution: "The American Bankers Association developed the system in 1910 to facilitate the sorting, bundling, and delivering of paper checks to the drawer's (check writer's) bank for debit to the drawer's account." Over the following century, the system expanded from paper check routing to electronic funds transfer routing, ACH network processing, and Fedwire funds transfer, while maintaining the same 9-digit format and the same Federal Reserve district encoding in the first two digits.

Today, ABA routing number registrar LexisNexis Risk Solutions: this organization (formerly Bankers Almanac) serves as the official ABA-designated registrar. Any new financial institution must apply to LexisNexis Risk Solutions to receive an ABA routing number assignment.


Where to Find the Routing Number on a Check

Routing number location on check: the routing number is printed in the MICR line at the bottom of the check. The MICR line runs along the very bottom edge of the check face and contains three groups of numbers printed in a distinctive typeface called E-13B using magnetic ink.

Looking at the bottom of a check, reading left to right:

  • First group (leftmost): The 9-digit ABA routing number, bracketed by two transit symbols
  • Second group (middle): The account number, which varies in length from 8-12 digits
  • Third group (rightmost): The check number, typically 4 digits

The ABA confirms this order: "You can find the ABA Routing Number at the bottom of your checks. The ABA Routing Number is the left-most number, followed by your account number, and then by the number of the check."

Routing number 9 digits: the routing number is always exactly 9 digits. If the number you are reading from the check is 8 digits, you may have missed a leading zero (some routing numbers begin with zero). If it is 10 or more digits, you may be including part of the account number. Count carefully; the transit symbol brackets define exactly where the routing number begins and ends.

For personal checks, the routing number appears at the bottom left. For business checks, the same MICR line structure applies. Checkomatic pre-encodes the routing number in the MICR line of every check before shipping, so you will not need to locate or enter it manually , it is already on the check. For a complete check diagram showing where each MICR field appears, see our check diagram and layouts guide.


The MICR Line Structure: Routing, Account, Check Number

Routing number account number check number MICR order: the MICR line on a US check follows a standardized layout established by ANSI and the Federal Reserve. The three fields always appear in the same left-to-right sequence, separated by special MICR characters.

The complete MICR line structure:

  1. Transit/routing field: The 9-digit routing number. Preceded and followed by a transit symbol (a character unique to MICR that looks like a colon with an added vertical stroke, used only in MICR printing). This field tells bank processing equipment exactly where the routing number begins and ends.
  2. On-us field: The account number and any additional bank-specific information. The account number field length varies by bank; it can be 8-17 characters depending on the bank's internal account numbering scheme. This field is delimited by "on-us" symbols in the MICR line.
  3. Check amount field: On checks that have the amount pre-printed (as opposed to handwritten), the dollar amount also appears in the MICR line. On most personal and business handwritten checks, this field is left blank and is encoded by the bank's reader-sorter during processing after the check amount is read optically.

For a full explanation of MICR encoding, including why standard toner cannot be used and why iron oxide toner is required for bank processing, see our blank check stock guide.


Transit Symbols and MICR Field Brackets

Routing number transit symbol MICR: the transit symbols (also called "transit/routing symbols" or "bracket characters") are two special characters in the E-13B MICR font that bracket the routing number field. They appear on the left and right side of the routing number in the MICR line and serve as machine-readable delimiters that tell bank reader-sorter equipment exactly where the 9-digit routing number begins and ends.

Transit symbols are unique to the MICR E-13B character set. They are not standard characters in any typographic font; they exist only in E-13B MICR printing. This is why MICR fonts are required for check printing: a standard font cannot produce the transit symbol characters that define the routing number field for bank processing equipment.

When you read a check MICR line visually, the transit symbols look like a colon or bracket character flanking the routing number. The routing number field is always the first bracketed group reading from the left, always 9 digits, always using these symbols as delimiters. The account number and other fields use different delimiter symbols (on-us symbols, amount symbols) that are also unique to the E-13B character set.


Routing Number vs Account Number

Routing number vs account number: these two numbers identify different things. The routing number identifies the bank; the account number identifies your specific account at that bank.

Every account holder at the same bank uses the same routing number (or the same routing number for their state or region). Your routing number is not a secret; banks publish them on their websites, and they appear on every check. The routing number for Chase in California is the same for every Chase customer in California regardless of account type.

Your account number is unique to your account. No other account at your bank has the same account number. Account numbers are sensitive financial information. Sharing your account number gives the recipient the ability to set up ACH debits from your account (with the routing number). This combination is why phishing scams that obtain both your routing number and account number can be used to initiate unauthorized ACH withdrawals.

On a check MICR line: routing number (9 digits, leftmost, in transit symbol brackets) followed by the account number (8-12+ digits, middle field). The check number appears at the right. Some banks include the check number in both the MICR line and printed in the upper right corner of the check face. Both are the same number.

For the full explanation of how to void a check for direct deposit setup (which requires providing both routing and account numbers), see our voided check guide.


Federal Reserve District Routing Number Encoding

Federal reserve district routing number: the first two digits of any ABA routing number encode the Federal Reserve district where the bank is registered.

Routing number digits 1-2 Federal Reserve: the first two digits of an ABA routing number encode the Federal Reserve district and processing information. This encoding is the historical foundation of the routing number system , it tells the Federal Reserve network which district bank is responsible for processing the item.

Wells Fargo's routing number guide explains: "A routing number, sometimes called an ABA number, is a unique identifier that directs electronic payments to the correct financial institution. Routing numbers also embed Federal Reserve processing information. The first few digits indicate the Federal Reserve district and processing center."

The Federal Reserve has 12 districts across the US, numbered 1-12. The first two digits of a routing number correspond to the Federal Reserve district where the bank is headquartered or the processing location assigned to the bank:

  • Districts 01-12: Federal Reserve Bank cities (Boston, New York, Philadelphia, Cleveland, Richmond, Atlanta, Chicago, St. Louis, Minneapolis, Kansas City, Dallas, San Francisco)
  • Digits 21-32: Same districts but for checks drawn on thrift institutions (originally savings and loan associations)
  • Digits 61-72: Used for electronic check presentment (ECP) and processing center designations
  • Digits 80: Used for traveler's checks (special purpose)

Wikipedia's routing transit number article provides the historical context: "The prefix and the Federal Reserve Routing Symbol (XXXX) are determined by the bank's geographical location and treatment by the Federal Reserve type, while the remaining data (YYYY, and Branch number, if present) depends on the specific bank, and are unique within a Federal Reserve district."

Digits 3-4 of the routing number identify the specific Federal Reserve processing center within the district. Digits 5-8 identify the specific financial institution within the Federal Reserve district. Digit 9 is the check digit, calculated from the previous 8 digits using the validation algorithm covered below.


The 9-Digit Routing Number Structure

ABA routing number structure:

  • Digits 1-2: Federal Reserve Routing Symbol, first two digits. Indicates the Federal Reserve district (01-12 for commercial banks, 21-32 for thrift institutions, 61-72 for electronic processing centers).


  • Digits 3-4: Federal Reserve Routing Symbol, last two digits. Indicates the specific Federal Reserve processing center within the district.


  • Digits 5-8: ABA Institution Identifier. Uniquely identifies the specific financial institution within the Federal Reserve district. These four digits are what distinguish Chase from Bank of America from your local credit union within the same district.


  • Digit 9: Check digit. Calculated from the previous 8 digits using the modulo-10 weighted sum algorithm. Validates that the routing number is a legitimate ABA routing number, not a random 9-digit number.


This structure means every valid ABA routing number encodes geographic (Federal Reserve district), institutional (specific bank), and validation (check digit) information simultaneously. A routing number that fails the check digit test is invalid and will be rejected by ACH, wire, or check processing systems.


The ABA Routing Number Check Digit Algorithm

Routing number check digit formula: the 9th digit validates the first 8 using a modulo-10 weighted sum. Any single-digit change will fail this check.

ABA routing number check digit algorithm: the 9th digit of every valid ABA routing number is calculated from the first 8 digits using a modulo-10 weighted sum formula. This check digit allows payment systems to instantly validate any routing number without looking it up in a database.

Routing number modulo 10 weighted: the algorithm assigns specific weights to each of the 9 digit positions, reading left to right:

Position: 1 2 3 4 5 6 7 8 9
Weight: 3 7 1 3 7 1 3 7 1

To validate a routing number:

  1. Multiply each digit by its corresponding weight
  2. Sum all 9 products
  3. If the sum is divisible by 10 (that is, sum modulo 10 equals 0), the routing number is valid

Example validation for routing number 121000248 (Bank of America California):

1×3 + 2×7 + 1×1 + 0×3 + 0×7 + 0×1 + 2×3 + 4×7 + 8×1
= 3 + 14 + 1 + 0 + 0 + 0 + 6 + 28 + 8
= 60
60 ÷ 10 = 6 with remainder 0 ✓ Valid

The Apache Commons Validator library, which is widely used in banking software, documents this algorithm: "Modulus 10 ABA Number (or Routing Transit Number (RTN)) Check Digit calculation/validation. Check digit calculation is based on modulus 10 with digits being weighted based on their position (from right to left): Digits 3, 6 and 9 are weighted 3; digits 2, 5 and 8 are weighted 7; digits 1, 4 and 7 are weighted 1."

This algorithm is the reason the check digit exists: any number entered with a single digit transposition or substitution will almost always fail the modulo-10 test, immediately flagging the error before any money moves. Payment systems that accept routing numbers run this validation before attempting to process a transaction.


Why Banks Have Multiple Routing Numbers

Multiple routing numbers same bank: it is normal and common for the same bank to have more than one routing number. How many routing numbers a bank has depends on two factors: geographic coverage and transaction types.


Geographic State/Region Split

How many routing numbers does a bank have? Large national banks have separate routing numbers for different states and regions because the Federal Reserve district in the first two digits of the routing number reflects geographic location. A bank that operates in multiple Federal Reserve districts may have different routing numbers for customers in different states. Checkomatic's routing number guide confirms: "Large banks have separate routing numbers for different purposes or different regions. Chase, for instance, has roughly 24 different routing numbers covering different states and account types."

Routing number by state bank: when you look up a routing number for a large bank like Chase, Wells Fargo, or Bank of America, the results differ by state. A Chase account opened in California has a different routing number than a Chase account opened in New York. This is why "what is Chase's routing number" does not have a single answer , it depends on the state where the account was opened.

The correct routing number for your account is the one printed on your existing checks from that account. This is the definitive source for your check-specific routing number, because it is pre-encoded by the bank for your specific account at the time the checks are manufactured.


Transaction Type Split

Wire routing number vs ACH routing number same bank: in addition to geographic splits, many banks use different routing numbers for different transaction types. Wells Fargo's routing guide is explicit: "Banks may have one routing number for ACH, one for wires, and one shown on paper checks, because each transaction type uses different Federal Reserve networks (FedACH, Fedwire, and check clearing)."

The three transaction types and their routing number usage:


  • Paper check routing number: Pre-printed in the MICR line on your physical checks. Used for check clearing through the Federal Reserve check processing system.


  • ACH routing number: Used for direct deposit, automatic bill payments, and other Automated Clearing House transactions through FedACH.


  • Wire transfer routing number: Used specifically for domestic Fedwire transfers, which settle in real time rather than in batches.


Wire Routing Number vs ACH Routing Number

Wire vs ACH routing number same bank: the most practically consequential difference in routing numbers that most guides do not explain clearly. At many banks, the routing number used for wire transfers is different from the routing number used for ACH transactions. Using the wrong one for the wrong transaction type can delay or fail the payment.

Checkomatic's routing guide explains the specific consequence: "This matters because the routing number on your checks has to be the one your bank uses for paper check processing in your state. Using the ACH routing number on a paper check causes the check to bounce back through the Federal Reserve system, which can delay clearing by 1 to 3 business days."

The same problem applies in reverse: if you provide your paper check routing number for an ACH direct deposit setup and your bank uses a different number for ACH, the direct deposit may fail or be rejected. The Wikipedia routing transit number article confirms: "The same bank may use different routing numbers for checks vs. wire transfers."

How to get the right routing number for each purpose:


  • For paper check ordering and check-related transactions: Use the routing number from the MICR line on an existing check from the same account.


  • For direct deposit (ACH) setup: Use the routing number specified by your bank for ACH transactions, which you can find in your online banking portal under account details, or by calling your bank.


  • For wire transfers: Use the wire routing number your bank specifies for Fedwire, which may differ from both the paper check and ACH routing numbers. Most banks publish their wire routing numbers in the account services section of their websites.


When in doubt, call your bank and specify the type of transaction: "I need to set up direct deposit ACH , what routing number should I use?" or "I need to receive an incoming domestic wire , what routing number should I give the sender?" Banks commonly receive these questions and can confirm the correct number for each purpose.

Why Deposit Slips May Show a Different Routing Number

Routing number on deposit slip warning: as covered in detail in our deposit slips guide, many banks print a note on their deposit slips that reads "Do not use this routing number for automated payments. Use a voided check instead." This warning exists because Deposit slip routing number different from check: the routing number on some deposit slips is a deposit-processing code used internally for routing incoming deposits through the check clearing system, not the ABA routing number needed for ACH, direct deposit, or wire transfers.

This is the most commonly encountered practical example of the multiple routing number problem. The routing number on your deposit slip may match your check routing number at some banks and differ at others. Because you cannot know which situation applies to your bank without checking, always use the routing number from your checks (or your bank's confirmed ACH routing number) for electronic payment setup, not the number from a deposit slip.

For a full explanation of deposit slip routing numbers and when to use a voided check instead, see our voided check guide.


5 Ways to Find Your Routing Number

Five reliable ways to find your routing number, in order of reliability:

1. From the MICR Line on an Existing Check

Routing number on check is the most authoritative source for the paper check routing number. The leftmost 9-digit group in the MICR line at the bottom of any existing check from the account is the routing number to use for paper check-related purposes, check ordering, and voided check submissions. Checkomatic's routing guide confirms: "To confirm you have the right routing number for paper checks, look at an existing check from the same account. The MICR line on that check is the one you want. Don't substitute the ACH or wire routing number that comes up on lookup sites."


2. From Your Bank's Online Banking Portal

Most banks display the routing number prominently in the online banking account details section. Stripe's guide confirms: "Online bank portal: Log in to your bank's website and navigate to your account details or payment settings. The routing number is often listed alongside your account number." For ACH setup (direct deposit), the number shown in online banking is typically the ACH routing number, which may or may not match the paper check routing number depending on your bank.


3. From Your Bank's Public Website

Most major banks publish their routing numbers on their public websites under routing number lookups or account services pages. Search "[your bank name] routing number [your state]" to find the published number for your state. Verify that the number you find matches the one on your existing checks before using it for check ordering.


4. From Your Bank Statement

Some banks include the account routing number in the header of monthly paper or electronic statements. Stripe confirms: "Bank statements: Many banks also include the routing number on your monthly bank statements. It might be located in the upper right corner or in your account information details."


5. By Calling Your Bank

If you need to verify routing numbers for specific transaction types (ACH vs wire vs paper check), calling your bank's customer service line and asking directly is the most definitive approach. Tell them the transaction type and ask which routing number to provide. Banks commonly receive these questions and can confirm the correct number for each use case.


How to Verify an ABA Routing Number for Free

How to verify routing number: two free public tools verify any ABA routing number.

Federal Reserve E-Payments Routing Directory

Federal Reserve E-Payments Routing Directory: the Federal Reserve Banks maintain a free public routing directory at frbservices.org that lists every active ABA routing number. The directory is synchronized with the Federal Reserve FedACH and Fedwire databases daily. Search by routing number and the directory shows the financial institution's name, address, and which payment types the routing number supports (FedACH, Fedwire). This is the authoritative verification tool.

Checkomatic's routing guide confirms this resource: "Use the Federal Reserve's E-Payments Routing Directory. It's free and lists every active routing number in the US. Type in your number and it should show your bank's name, address, and which payment types it supports."

Note: the directory lists Fedwire participants separately from FedACH participants. Search both if you are verifying a number for a specific transaction type. A routing number may appear in one directory but not the other, indicating which transaction types it supports.


The Check Digit Algorithm

ABA routing number lookup free using math: the modulo-10 check digit algorithm described in the check digit section above can be applied to any 9-digit number to determine whether it is a structurally valid ABA routing number. This does not confirm the number belongs to an active institution, but it immediately eliminates clearly invalid numbers. Any number that fails the check digit test cannot be a valid ABA routing number.

For the check ordering process specifically, Checkomatic verifies routing numbers against the Federal Reserve directory before printing any order. Checkomatic's ordering guide confirms this practice: "We verify your routing and account number against the Federal Reserve directory and confirm the bank name matches before anything prints, which catches the typos that wreck a first order." For more on the complete check ordering process, see our how to order business checks guide.


What Routing Numbers Are Used For

Routing number uses: routing numbers appear in every major US payment transaction type:

Routing Number for Direct Deposit

Routing number direct deposit: when setting up direct deposit payroll, you provide your bank's ACH routing number and account number to your employer's payroll department. The payroll system uses these to send your paycheck through the ACH network to your account on payday. The ACH routing number is typically (but not always) the same as the routing number on your checks. Confirm with your bank which routing number to use for direct deposit specifically. For the full guide on setting up direct deposit, see our voided check guide and our guide to cashing checks.


Routing Number for ACH Payments

Routing number ACH payment: automatic bill payments, mortgage autopay, utility drafts, insurance premiums, and any other recurring payment pulled from your checking account by a biller use your ACH routing number and account number. These transactions flow through the FedACH network, which uses ACH routing numbers specifically.


Routing Number for Wire Transfers

Routing number wire transfer: domestic wire transfers use the Fedwire system, which has its own routing number designation. For incoming wires, you provide the sender with your wire routing number and account number. The wire transfer settles in real time on the same business day (for Fed-hours wires) rather than in overnight batches like ACH. Wire routing numbers may differ from ACH routing numbers at the same bank.


Routing Number for Check Ordering

Routing number for personal check or business check ordering: when you order checks, you provide the routing number that should be pre-encoded in the MICR line at the bottom of each check sheet. This must be the paper check routing number for your specific account at your specific bank in your state. This is the routing number from the MICR line on existing checks, not the ACH or wire routing number.

If you order checks with the wrong routing number in the MICR line, the checks will be returned unpaid when deposited because the Federal Reserve cannot match the routing number to your bank. Checkomatic verifies routing numbers against the Federal Reserve directory before printing to prevent this error.


Routing Number for Direct Deposit Setup

Routing number for direct deposit: the most common practical use of a routing number in everyday banking is providing it to set up payroll direct deposit. Most employers ask for a routing number and account number, typically obtained from a voided check or a direct deposit authorization form.

The routing number to use for direct deposit depends on which number your bank designates for ACH transactions. For most banks, this is the same as the paper check routing number. For banks that have separate ACH and paper check routing numbers (common at large banks), use the ACH routing number for direct deposit, not the check routing number.

The safest approach: provide a voided check to your employer rather than writing the numbers on a form. The voided check's MICR line carries your check routing number. If your bank uses the same number for ACH, the voided check is perfect. If your bank uses a different ACH routing number, your online banking portal or a bank call will confirm the correct ACH number to provide on the direct deposit form alongside the account number from your check.

For the full guide on using a voided check for direct deposit setup including the deposit slip routing number warning, see our voided check guide.


Routing Number on Business Checks

Routing number for business check: the routing number on a business check functions identically to the routing number on a personal check. It is the leftmost 9-digit number in the MICR line, pre-encoded by the check manufacturer during production. When a vendor, employee, or contractor receives a check from your business and deposits it, the routing number in the MICR line tells the Federal Reserve which bank holds your business checking account.

For businesses that order checks from a direct manufacturer, providing the correct routing number at the time of ordering is critical. Checkomatic verifies every routing number against the Federal Reserve E-Payments Routing Directory before printing to confirm the bank name matches, catching any entry errors before the batch is printed.

When switching from bank-ordered to direct-ordered checks, use the routing number from your existing bank-issued checks as the authoritative source. Do not rely on a routing number found through a general web search, as large banks have multiple routing numbers and the one listed for your bank may apply to a different state than your account. The routing number from your existing checks is always the correct one for your specific account.

For the complete guide to ordering business checks, see our how to order business checks guide. You can also explore our full range of personal checks and manual business checks.


Checkomatic and Routing Numbers on Checks

Checkomatic is an in-house check manufacturer (in-house check manufacturer) that has produced ABA compliant check stock (ABA compliant) in Monroe, NY (Monroe NY) since 1997. Every check order requires the customer to submit their ABA routing number as part of the ordering information. Checkomatic verifies this routing number against the Federal Reserve E-Payments Routing Directory before production begins, confirming the bank name matches the submitted routing number. This pre-print verification step catches routing number entry errors before they result in a batch of unusable checks.

The routing number is pre-encoded in the MICR line of every check at manufacture using ANSI X9.100-20-compliant MICR toner. Customers with standard laser or inkjet printers do not need MICR capability; the routing number, account number, and check number are already encoded on the check stock when it arrives. QuickBooks and other accounting software only need to print the variable fields (payee, date, amount) , the MICR encoding is handled at the factory.

For QuickBooks-compatible checks with your routing number pre-encoded, see our QuickBooks checks. For the full business check range, see our business checks overview. CPSA certified (CPSA certified) security paper with six fraud deterrent features ships on every order. Free logo printing (free logo printing) on every business check order. Standard turnaround 3 to 5 business days from proof approval. Order at checkomatic.com.


The Short Version on ABA Routing Numbers

An ABA routing number is a 9-digit code created by the American Bankers Association in 1910 that identifies your bank in US payment systems. Find it in the MICR line at the bottom left of any check: it is the leftmost 9-digit number, bracketed by two transit symbols. The first two digits encode the Federal Reserve district. The 9th digit is a check digit calculated by the modulo-10 weighted sum formula (weights 3,7,1,3,7,1,3,7,1). Banks have multiple routing numbers: different numbers for different states, and different numbers for paper checks, ACH, and wire transfers. Never use the routing number from a deposit slip for electronic payment setup; deposit slips sometimes carry different routing numbers than checks. Verify any routing number free at the Federal Reserve E-Payments Routing Directory (frbservices.org). Use the routing number from your existing check's MICR line for check ordering and paper-check transactions.


Frequently Asked Questions


What is an ABA routing number?

ABA routing number definition: an ABA routing number is a 9-digit numeric code that identifies a specific US financial institution in payment processing systems. ABA stands for American Bankers Association, which created the routing number system in 1910. Routing number meaning: the code tells payment networks (FedACH, Fedwire, Federal Reserve check clearing) which bank should send or receive funds in a transaction. Also called a routing transit number RTN, ABA number, or bank routing number. Routing number 9 digits: always exactly 9 digits, never more, never fewer. Verified by a modulo-10 check digit calculation. Every US bank has at least one routing number; large banks have several, one per state or transaction type. The official registrar is LexisNexis Risk Solutions, designated by the ABA.


Where is the routing number on a check?

Routing number location on check: the routing number is the leftmost 9-digit number in the MICR line at the bottom of the check. Routing number MICR line: the MICR line runs along the very bottom edge of the check face and contains three fields printed in E-13B magnetic ink font. Routing number transit symbol MICR: the routing number is bracketed by two transit symbols (special MICR delimiter characters). Reading left to right: routing number in transit brackets, then account number in on-us field, then check number. Routing number account number check number MICR order is always in this sequence on a standard US check. The ABA confirms the routing number is the "left-most number, followed by your account number, and then by the number of the check."


Why does the same bank have multiple routing numbers?

Multiple routing numbers same bank occur for two reasons. First, routing number by state bank: large national banks have different routing numbers in different Federal Reserve districts. Routing number digits 1-2 Federal Reserve encode the district, so a bank's routing number varies by the state where the account was opened. How many routing numbers does a bank have: Chase has approximately 24, Bank of America has several per state. Second, wire routing number vs ACH routing number same bank: banks use different routing numbers for paper check clearing, ACH direct deposit, and Fedwire transfers, because each uses a separate Federal Reserve network. Wire vs ACH routing number is often the most consequential difference , providing the wrong routing number for the transaction type delays or fails the payment. The routing number on your check is the paper check routing number; confirm with your bank which number to use for ACH and wire specifically.


What is the difference between a routing number and an account number?

Routing number vs account number: a routing number identifies the bank; an account number identifies your specific account. Routing number 9 digits, same for all accounts at the same bank (or same regional routing group). Account numbers are unique per account, typically 8-12 digits. On the MICR line: routing number is leftmost (bracketed by transit symbols), account number is in the middle field. Together they form the complete address for electronic payments: routing number directs the payment network to the correct bank, account number directs the bank to the correct account. Routing numbers are not secret (banks publish them); account numbers are sensitive and should only be shared with trusted parties for legitimate payment purposes.


How do you verify an ABA routing number?

How to verify routing number, three methods. (1) Federal Reserve E-Payments Routing Directory (FedACH routing directory): free public tool at frbservices.org that lists every active ABA routing number with bank name, address, and supported payment types. Authoritative and updated daily. (2) ABA routing number check digit algorithm: multiply each of the 9 digits by weights 3,7,1,3,7,1,3,7,1 from left to right, sum the products, and confirm divisible by 10. Any number that fails this routing number modulo 10 weighted test is invalid. (3) Your bank's published routing number: search "[bank name] routing number [state]" and verify the published number matches your check's MICR line. ABA routing number lookup free: both the Federal Reserve directory and the check digit formula are free and require no account or subscription.

Aug 20, 2026

What Is Blank Check Stock and Who Needs It

Quick Answer: Blank check stock is check paper that arrives with no routing number, account number, or business name printed on it. Security features, perforations, and check format are built into the paper. Your accounting software , QuickBooks, Sage, Xero, or any compatible platform , prints all check details including the MICR line at the bottom when you run a payment batch. It is used by businesses that need one paper supply to cover multiple bank accounts, and by payroll companies printing checks across multiple client accounts.


What Is Blank Check Stock

Blank check stock is check paper that arrives with no bank account information on it. No routing number. No account number. No business name. No payee line. Just a security-grade sheet of paper with the correct perforations, the right check layout, and fraud-resistant features built into the fiber and coating of the paper itself.

Everything else , your business name, bank details, payee, amount, date, check number, and the MICR line at the bottom , gets printed by your accounting software when you run a payment batch. The paper provides the physical and security layer. The software provides all the data.

This is different from pre-printed business checks, which arrive with your routing number, account number, and business name already on every sheet. With pre-printed checks, your software only fills in the variable fields: payee, amount, date, and memo. With blank check stock, your software prints everything.

For the full range of blank check stock formats and ordering options, see blank check stock and blank check paper at Checkomatic.


How Blank Check Stock Works

What the Paper Does

Blank check stock arrives pre-configured with the physical structure of a check: the correct dimensions (8.5 by 11 inches for most formats), perforation lines that let you separate stubs cleanly, and security features embedded in the paper fiber and coating. The paper holds the anti-fraud layer. It cannot be photocopied successfully. It reacts visibly to chemical tampering. None of this is printed on , it is part of the paper manufacturing process.


What the Software Does

When you run a check print job in QuickBooks, Sage, Xero, or any compatible platform, the software sends a print command to your printer. That command positions every data field on the page according to the check format template: your business name and address in the upper left, the payee line, the dollar amount in numerals and words, the date, the check number in the upper right, and the MICR line at the very bottom. Your printer transfers all of this onto the blank sheet in one pass.

Blank check stock on top format from Checkomatic showing voucher laser check with two perforated stubs below for accounting software to print all payment details at run time including MICR line routing number and account number

Blank laser checks on top , the most popular blank check stock format for QuickBooks and payroll software.


The MICR Line

The MICR line is the row of numbers at the bottom of every check. It contains your routing number, account number, and check number in E13-B font , the standard used for magnetic ink character recognition across the US banking system. On pre-printed checks, this line comes on the paper before it reaches you, printed in certified magnetic ink by the manufacturer. On blank check stock, this line is either pre-printed by the manufacturer (Checkomatic's approach) or printed by your software at run time using MICR-compatible toner. Which applies depends on which type of blank stock you order , covered in detail in the MICR section below.


Who Needs Blank Check Stock

Blank check stock is not the right choice for every business. Pre-printed checks are simpler for single-account operations. Blank check stock serves specific needs that pre-printed checks cannot meet.


Payroll Companies and CPA Firms

A payroll company or CPA firm may process payroll for dozens or hundreds of client businesses, each with their own bank account. Pre-printed checks would require maintaining a separate stock for each client account. Blank check stock solves this: one stack of paper covers all client accounts. The software swaps out the bank details for each client when printing. One paper supply. Unlimited account coverage.


Businesses With Multiple Bank Accounts

A business that maintains separate checking accounts for payroll, operating expenses, and taxes needs different MICR data for checks drawn on each account. Pre-printed checks are tied to one account. Blank check stock works for all accounts from the same paper supply. Load the stack, select the account in your software, and the correct routing and account numbers print on each check automatically.


Property Management Companies

Property managers often process payments across multiple owner accounts and tenant accounts simultaneously. Each property or owner entity may have its own bank account. Blank check stock eliminates the need to stock and track separate pre-printed check supplies for each account.


High-Volume Accounts Payable Operations

At large quantities, blank check stock costs less per sheet than pre-printed checks. Businesses running high-volume accounts payable batches find blank stock more economical. The per-sheet savings compound significantly at volume, and the flexibility to cover multiple accounts from one supply adds further operational value.


Businesses Switching Banks or Adding Accounts

When banking details change , a new account, a bank switch, or a routing number change , pre-printed check stock becomes obsolete immediately. With blank check stock, a routing number change requires only a software update. The physical paper stays in use. Nothing is wasted.


Do You Need MICR Toner for Blank Check Stock

This is the question most businesses get wrong before ordering blank check stock. The answer depends on which type you order.


Type 1: Blank Stock With Pre-Printed MICR Line (Checkomatic)

Checkomatic's blank check stock ships with the MICR line already printed on the paper by the manufacturer in certified magnetic ink. Your routing number and account number are already on the sheet when it arrives. Your software prints only the variable data fields: payee, amount, date, check number, and business name. Your standard laser or inkjet printer handles this with standard toner. No MICR toner required for the MICR line.


Type 2: Fully Blank Stock With Software-Printed MICR Line

Fully blank stock has nothing pre-printed , not even the MICR line. Your software prints the complete check including the routing and account numbers in the MICR line. For this to work, your laser printer must be equipped with MICR-compatible toner cartridges. Inkjet printers cannot use MICR toner. Fully blank stock always requires a laser printer with MICR toner.


How to Confirm Before Ordering

  1. Call your bank and ask whether they process checks optically or magnetically. Most major US banks use optical processing as of 2026, which means standard laser or inkjet output is acceptable.
  2. Confirm which type of blank stock you are ordering. Checkomatic's blank check stock ships with the MICR line already on the paper , only standard toner needed for the variable fields.


Blank Check Stock vs Pre-Printed Checks

FactorBlank Check StockPre-Printed Checks
Bank details on paperNone , software prints at run timePre-printed by manufacturer
MICR toner neededDepends on type orderedNot needed , MICR already on paper
Accounts coveredUnlimited , software switches accountsOne account per supply
Setup complexityHigher , software must be configuredLower , load and print
Best forMulti-account businesses, CPAs, payroll companiesSingle-account businesses
When banking details changeUpdate software only , paper still usableOrder new check stock
Per-sheet cost at volumeLower at high quantitiesHigher due to custom pre-printing
Security featuresBuilt into paper , same levelBuilt into paper , same level

For a full guide to choosing between check types, see different types of business checks: what is best for your business.


The Four Blank Check Stock Formats

Blank check stock comes in four formats. Each corresponds to a specific accounting software print layout. Ordering the wrong format causes every field to print in the wrong position. Always confirm your software's format before ordering.


Blank Check on Top

The check area occupies the top third of an 8.5 by 11 inch sheet. Two perforated stubs fill the lower two-thirds. One stub goes to the payee. One stays with the payer as a record. This is the default format for QuickBooks and most payroll software. If you are unsure which format your software uses, this is almost definitely it.


Blank Check in Middle

The check sits in the center of the page. One stub appears above the check. One stub appears below. This layout is the default for Sage 50 (formerly Peachtree) and is required for businesses running that platform.

Blank check paper in middle format from Checkomatic showing laser check centered on page with perforated stubs above and below compatible with Sage 50 and Peachtree accounting software for accounts payable and payroll printing

Blank check paper in middle , the correct format for Sage 50 and Peachtree users.


Blank Check on Bottom

The check sits at the bottom of the sheet. Two stubs appear above it. This format is required for DacEasy, agFinance, agPayroll, Countryside Data, Sage MAS 90, and other platforms that output check data to the lower portion of the page.

Blank check stock on bottom format from Checkomatic showing laser check at bottom of page with two perforated stubs above required for DacEasy Sage MAS 90 agFinance and agPayroll accounting software for check printing

Blank check stock on bottom , required for DacEasy, Sage MAS 90, and similar platforms.


Blank 3-on-a-Page

Three checks per 8.5 by 11 inch sheet with no stubs. This format prints three times more checks per page than voucher format, making it the most paper-efficient option for high-volume accounts payable runs. It is not appropriate for payroll where employees need a physical pay stub.

Blank laser checks 3 on page format from Checkomatic showing three checks per sheet with no stubs for high volume accounts payable printing compatible with QuickBooks and major accounting software

Blank laser checks 3 on page , three checks per sheet for high-volume accounts payable runs.


Which Accounting Software Works With Blank Check Stock

Any accounting platform that includes check printing functionality can work with blank check stock, provided the stock format matches the software's configured print layout. The most commonly used platforms include:

  • QuickBooks Desktop and Online: Default is check-on-top (voucher) format. Also supports 3-on-a-page and wallet.
  • Sage 50 (Peachtree): Default is check-in-middle format.
  • Xero: Supports check printing with appropriate format templates.
  • Quicken: Compatible with standard blank check formats.
  • Deltek: Compatible with check-on-top format.
  • DacEasy and Sage MAS 90: Require check-on-bottom format.

Checkomatic has been formatting blank check stock for accounting software platforms for nearly three decades. If your platform is not listed, contact Checkomatic before ordering to confirm the correct format. Custom formatting is available for non-standard configurations.


Security Features in Blank Check Paper

Security in blank check stock is built into the paper itself , not the printing. Checkomatic's blank check stock includes the same six security features as pre-printed business checks, all at the base price with no upgrade fee.

  • Chemically sensitive paper: Reacts visibly when check washing solvents contact it, permanently staining the sheet.
  • Void pantograph: A hidden pattern that displays the word VOID when the check is photocopied or scanned.
  • Microprinting: Text under one point size along the signature line. Degrades to an unreadable blur on any photocopy.
  • UV fluorescent fibers: Embedded in the paper. Glow under ultraviolet light used by bank authentication equipment.
  • Heat-sensitive ink: Disappears when rubbed with a finger. Reappears when released.
  • Genuine watermark: Visible when held to light. Cannot be replicated on a standard printer or copied from a scan.


How to Choose the Right Blank Check Stock

Decision 1: Do You Actually Need Blank Stock?

If your business has one bank account and one accounting platform, pre-printed checks are simpler. Blank stock adds setup complexity that single-account businesses do not need. If you have multiple accounts, use payroll software for multiple clients, or switch banks regularly, blank stock is the right choice.


Decision 2: Which Format Does Your Software Use?

Open your accounting software and check the print settings. The format in the preview tells you exactly which blank stock format to order. Do not guess , a wrong format wastes the entire order.


Decision 3: Does Your Bank Require MICR Toner?

Call your bank before ordering. Ask whether they process checks optically or magnetically. Checkomatic's blank check stock ships with the MICR line pre-printed , only the variable data fields are printed by your software at run time, which standard toner handles.


Decision 4: What Quantity Do You Need?

Blank check stock is available in multiple quantity tiers with bulk discounts. For businesses printing hundreds of checks per week, ordering at a higher quantity tier reduces supply cost and reorder frequency.


Common Blank Check Stock Mistakes

Mistake 1: Ordering the Wrong Format

The most common mistake. If your software is set to check-in-middle and you order check-on-top blank stock, every field prints in the wrong position. Always confirm your software's format setting in print settings before ordering.


Mistake 2: Assuming MICR Toner Is Not Required Without Checking

Printing with standard toner at a bank that requires magnetic processing results in rejected checks. Two minutes on the phone with your bank before ordering prevents this entirely.


Mistake 3: Using 3-on-a-Page for Payroll

Ordering 3-on-a-page blank stock for payroll where employees need physical pay stubs creates a compliance problem. Use check-on-top (voucher) format for payroll. For the complete payroll check guide, see business checks for payroll: the complete employer guide.


Mistake 4: Not Testing Alignment First

Before running a full batch on blank check stock for the first time, print one test check on plain paper. Hold the plain paper against your blank stock and confirm every field aligns correctly before printing the full batch.


Mistake 5: Running Out Mid-Payroll

Order replacement stock when your supply reaches approximately 20 percent remaining. At that level, standard production (3 to 5 business days) arrives before you run out under normal printing volumes.


What Customers Say About Checkomatic

All reviews below are published on checkomatic.com and reproduced verbatim. Source: checkomatic.com/quickbooks-starter-pack-product, 4.5 stars from 166 verified reviews.

"Been with them for 15 years. Always reliable, always good quality, good service. What more can you ask for?"

ATV Inc. | ★★★★★ 5/5 | April 5, 2024 | Source: checkomatic.com/quickbooks-starter-pack-product

"First time ordering and I am super impressed with the quality of the checks. No issues with delivery. I will be ordering again!"

TClinton | ★★★★★ 5/5 | April 9, 2025 | Source: checkomatic.com/quickbooks-starter-pack-product

"We use CheckoMatic for all of our check needs! They have great prices and we receive our products in a timely manner!"

CG's Tax Service | ★★★★★ 5/5 | September 18, 2024 | Source: checkomatic.com/quickbooks-starter-pack-product

"I got 500 checks for less than half of what the bank wanted for 200!"

VVA Voucher Checks (Vietnam Veterans of America) | ★★★★★ 5/5 | July 6, 2024 | Source: checkomatic.com/quickbooks-starter-pack-product

"ASJ Wilson Construction has been a client of checkomatic for some years now and they've never disappointed this company. Thank you checkomatic for all that you do."

ASJ Wilson Construction | ★★★★★ 5/5 | June 6, 2024 | Source: checkomatic.com/quickbooks-starter-pack-product

"Affordable and efficient. My go-to business check printer."

Doe | ★★★★★ 5/5 | January 24, 2025 | Source: checkomatic.com/quickbooks-starter-pack-product


Why Choose Checkomatic for Blank Check Stock

All Four Formats Available

Check on top, check in middle, check on bottom, and 3-on-a-page blank check stock , all manufactured at Checkomatic's own facility in Monroe, NY since 1997. Every format available with bulk quantity pricing and six security features at base price.


MICR Line Pre-Printed on Every Order

Checkomatic's blank check stock ships with the MICR line already printed in certified magnetic toner and verified against the Federal Reserve E-Payments Routing Directory before production. Your standard laser or inkjet printer handles only the variable fields at run time.


Compatible With Over 500 Accounting Platforms

QuickBooks Desktop, QuickBooks Online, Sage 50, Xero, Quicken, Deltek, and hundreds of other platforms. Custom formatting available for non-standard configurations.


Six Security Features at Base Price

Chemically sensitive paper, microprinting, void pantograph, UV fluorescent fibers, heat-sensitive ink, and genuine watermark , all standard on every blank check stock order at no extra charge.


Fast Turnaround From Monroe NY

Standard production ships in 3 to 5 business days. Rush production available for urgent situations. Browse all formats at blank check stock and blank check paper.


Aug 19, 2026

What Is a Certified Check and How to Get One

Certified Check Definition

Certified check definition: a certified check is a personal check that has been verified and formally guaranteed by the bank on which it is drawn. The bank confirms two things when it certifies a check: that the account holder's signature on the check is authentic, and that sufficient funds exist in the account to cover the check amount. The bank then earmarks those funds, preventing the account holder from spending that money on anything else until the check is cashed, and stamps or signs the check to indicate certification.

The result is a payment instrument that carries both the account holder's identity as the payer and the bank's guarantee that the check will clear. A certified check is not the bank's own check (that is a cashier's check), but it has been elevated above a personal check by the bank's certification and the legal obligation it creates.

Certified checks are primarily used for large, trust-sensitive payments where the recipient needs assurance that the funds are real and available, but where the payer's identity (rather than the bank's identity) needs to appear as the payment source.


How Does a Certified Check Work

Certified check bank verification: when you present a personal check for certification, the bank's teller or banker follows a specific process. First, they verify your identity with government-issued photo ID. Second, they verify your signature on the check against your signature on file for the account. Third, they confirm that your account has sufficient available funds to cover the check amount. Fourth, they place a hold on (earmark) those exact funds in your account, separating them from your freely available balance so they cannot be spent or withdrawn before the check is presented.

Certified check funds reserved: the key distinction here is that the funds do not leave your account at the time of certification. They remain in your account but are no longer available to you. Citi's certified check guide confirms: "Even though the money remains in your account until the recipient deposits or cashes the check, certification ensures the funds are reserved. The check will not bounce as long as there are no other issues."

After the bank earmarks the funds, it signs the check (a bank officer's or teller's signature alongside the certification stamp) and adds a stamp, mark, or notation on the check face indicating it is certified. The check is then returned to you to deliver to the payee.

When the payee deposits or cashes the certified check, the earmarked funds transfer from your account to the payee. The bank's certification obligation is fulfilled.


The UCC 3-409 Legal Mechanism

Certified check UCC 3-409: the legal definition and effect of a certified check are established by Uniform Commercial Code Section 3-409(d), which states: "Certified check means a check accepted by the bank on which it is drawn. Acceptance may be made as stated in subsection (a) or by a writing on the check which indicates that the check is certified. The drawee of a check has no obligation to certify the check, and refusal to certify is not dishonor of the check."

Several points from this statutory language are worth understanding:

First, certification is legally equivalent to "acceptance" under the UCC. When a bank accepts a check by certifying it, the bank becomes primarily liable to pay the check when it is presented. This shifts the primary obligation from the account holder to the bank, making the certified check more reliable from the payee's perspective.

Second, the bank has no legal obligation to certify any check. Experian's guide notes: "Some banks and credit unions don't offer certified checks at all." A bank that declines to certify your check has not dishonored the check in the legal sense; it has simply exercised its right not to offer the service.

Third, certification can be made in multiple ways: either through the bank's formal acceptance process or through any writing on the check that indicates certification. The practical effect is the same: the bank becomes the obligated party for payment.


Who Signs a Certified Check

Certified check who signs: both the account holder and the bank sign a certified check. The account holder writes the check and signs it as the payer in the signature field, exactly as with any personal check. The bank then adds its own signature or certification mark. Experian confirms: "Your signature will also appear on the check, and you will be listed as the payer."

This two-signature structure is one of the primary distinctions between a certified check and a cashier's check. On a cashier's check, only a bank official signs; the account holder does not appear as the payer. On a certified check, the account holder is visibly the payer, with the bank's certification overlaid. This matters for business relationships and legal documentation where the identity of the paying party is relevant.

Certified check bank signature stamp: the bank's certification typically takes the form of a rubber stamp that reads "CERTIFIED" with the date and a bank official's initials or signature. Some banks use a more elaborate certification process with multiple bank signatures. The exact form varies by institution but must make clear that the check is certified.


Where the Funds Go After Certification

Certified check funds from whose account: the funds for a certified check come from the account holder's personal checking account, not from the bank's own funds. This is the technical accounting distinction between a certified check and a cashier's check.

With a certified check, the account holder's account shows the earmarked amount as unavailable but the balance still appears in the account (reduced by the earmarked amount in terms of available balance). The bank has not yet received the money; it holds a reservation on funds that remain technically the account holder's property until the check clears.

With a cashier's check, the bank immediately transfers the funds from the account holder's account to the bank's own account at the time of issuance. The bank then becomes the payer from its own funds. Investopedia confirms: "A certified check does not draw funds right away from an account holder's account; the money stays in their account until the check is cashed. A cashier's check, on the other hand, immediately withdraws the funds from an account and is then held by the bank until the payee cashes the check."


Certified Check vs Cashier's Check

Certified check vs cashier check difference: the three most practically important differences are who issues the check, where the funds are held, and which is more widely available.


Who Issues the Check

Certified check: issued (written) by the account holder, then verified and certified by the bank. The payer on the check is you. A cashier's check is issued by the bank itself, signed by a bank official. The payer on the check is the bank.


Where the Funds Are Held

Certified check: funds remain in the account holder's account, earmarked (reserved) so they cannot be spent. Cashier's check: funds are immediately transferred from the account holder's account to the bank's own account at issuance. From the payee's perspective, a cashier's check is marginally more secure because the funds are already held by the bank rather than still technically in an individual's account.


Availability and Cost

Certified check fee by bank: Capital One's comparison confirms "a financial institution charges from $10 to $15 for a cashier's check and $15 to $20 for a certified check." Bankrate's guide places certified check fees at $10-$20. On availability: "Where can you get it? Cashier's check: in person or online from your bank. Certified check: in person and only available at some banks."

The practical implication: if a payee requires "guaranteed funds" and does not specify which form, a cashier's check is usually easier to obtain, cheaper, and more widely recognized. Certified checks are a narrower product that not all banks offer.


Certified Check vs Money Order

Certified check vs money order difference: a money order and a certified check both provide a guaranteed-payment instrument, but they differ in source, amount limits, and issuer.

A money order is purchased with cash (or sometimes a debit card) from a post office, bank, grocery store, or money transfer company. The money order purchaser prepays the face value; the money order is then made out to a payee. Money orders have a purchase limit (typically $1,000 per USPS money order) and cost $1-$2. They are available from non-banking sources (USPS, Walmart, CVS).

A certified check is drawn on a personal checking account, can be for any amount within the account's available balance, costs $10-$20, and must be obtained from the bank where the account is held. Certified checks are appropriate for large amounts where the $1,000 money order limit would require multiple instruments.

When to use which: for payments under $1,000 where the payer does not have a bank account or does not want to share account information, a money order is practical. For large payments above $1,000 where the payer's identity needs to appear on the instrument, a certified check (or more commonly, a cashier's check) is appropriate.


Certified Check vs Personal Check

Certified check vs personal check: the primary differences are the bank's guarantee and the inability to bounce.

A personal check is a promise of payment drawn on the account holder's account. If the account has insufficient funds when the payee deposits it, the check bounces (returns as NSF) and the payee receives nothing. The payee has no assurance at the time of payment that the check will clear.

A certified check is a guaranteed promise. The bank has verified funds exist, earmarked them, and guaranteed payment. The certified check will not bounce due to insufficient funds. This guarantee is why certified checks are requested in transactions with unknown parties or for high-stakes payments.

The Checkomatic checks used for routine business payments are personal checks (drawn on business checking accounts). They are appropriate for vendor payments, payroll, and business-to-business transactions where the ongoing relationship between parties provides the trust foundation that certification provides for one-time or high-value transactions with unknown parties.

For more on how personal and business checks work, see our personal vs business checks guide and our advantages and disadvantages of personal checks guide.


Three-Way Comparison: Certified Check, Cashier's Check, Money Order

Here is the complete comparison of the three guaranteed payment instruments:

Certified check: Written by account holder, verified by bank, funds reserved in account holder's account, payer is the account holder, cost $10-$20, must have account at issuing bank, in-person only at most banks, no upper limit, stop payment nearly impossible.


Cashier's check: Written and issued by bank, signed by bank official, funds immediately transferred to bank's account, payer is the bank, cost $10-$15, usually requires account at issuing bank, available in person and sometimes online, no upper limit, stop payment possible only with 90-day wait and affidavit for lost instrument.


Money order: Purchased with cash or debit, issued by post office or retailer, prepaid funds held by issuer, payer is the purchaser, cost $1-$2, no bank account required, available at post offices, grocery stores, retailers, limit typically $1,000 per instrument, stop payment available with fee for lost money order.


Certified Check Fee at Major Banks

Certified check fee cost: fees vary by bank and account type. Bankrate's research on certified check fees:

  • Most banks charge $10-$20 per certified check


  • Some banks waive the fee for premium account tiers (private banking, premier, or relationship accounts)


  • Some credit unions charge as little as $3-$5 for members


  • Experian notes: "Certified checks typically cost between $3 and $10 each. Your bank or credit union may make them available for free to some or all customers."


  • Capital One's comparison places the average range at $15-$20 for certified checks


The fee is typically paid at the time of certification, separate from any check stock cost. The fee compensates the bank for the certification process (identity verification, fund verification, fund earmarking, and the bank's assumption of primary liability for payment).

To find the exact fee at your bank: call the branch or check your account fee schedule online before visiting. Fee structures change, and the amount you pay depends on your specific account type and relationship with the bank.


How to Get a Certified Check Step by Step

How to get a certified check step by step:


  1. Check availability at your bank. Call or check online to confirm your bank or credit union offers certified checks. Not all do, particularly online banks. If your bank does not offer certified checks, a cashier's check is the usual alternative.
  2. Gather required documents. You need a valid government-issued photo ID (driver's license, state ID, or passport) and your account information. Know the exact payee name and the exact dollar amount before going to the branch.
  3. Visit a branch in person. Certified checks are issued in person at most banks. You cannot request a certified check by phone or through an online banking portal at most institutions.
  4. Write the check. In some cases, you will write the personal check before going to the bank and bring it with you. In other cases, the bank will provide a blank check. Write the exact payee name and dollar amount. Sign the check in front of the bank representative.
  5. Present your ID and the check. The teller or banker verifies your identity against your account signature, confirms sufficient funds, and earmarks the amount in your account.
  6. Pay the certification fee. Fees typically range from $10-$20. Some account types receive fee waivers.
  7. Receive the certified check. The bank stamps and signs the check as certified. You take the certified check to deliver to the payee. Some banks will mail the certified check for an additional fee.


Bankrate's step-by-step guide confirms this sequence and adds one important note: "Verify check details before leaving the bank." Review the payee name, amount, date, and certification stamp before leaving. Errors on a certified check require the bank to issue a new one (at a new fee), and you cannot correct errors yourself once the bank has certified it.


Online Bank Certified Check Availability

Certified check not available online banks: this is one of the most commonly discovered practical limitations when someone needs a certified check quickly. Online banks (Ally, Marcus, Chime, Discover Bank, SoFi, and most other branchless institutions) generally do not offer certified checks because the certification process requires a bank employee to physically sign and stamp the check in person.

Experian's guide confirms: "Some banks and credit unions don't offer certified checks at all. If that's the case with your bank, you'll need to use a cashier's check instead."

If you bank exclusively with an online bank and need a certified check, your options are: (1) request a cashier's check instead, which some online banks offer by mail, (2) open a checking account at a traditional bank that offers the service, or (3) negotiate with the payee to accept an alternative form of guaranteed payment such as a wire transfer, cashier's check, or ACH payment.

The declining availability of certified checks even at traditional banks reflects the decreasing practical demand for the product. Many banks have simplified their suite of guaranteed payment instruments to cashier's checks only, treating certified checks as a legacy product. If you specifically need a certified check rather than a cashier's check, call ahead to confirm availability before making the trip to a branch.


Can You Stop Payment on a Certified Check

Certified check stop payment impossible: you cannot stop payment on a certified check using a routine stop payment order. This is one of the most important and least understood aspects of certified checks, and it distinguishes them from regular personal checks in a way that has significant practical implications.

With a regular personal check, you can call your bank and place a stop payment order under UCC 4-403, typically for a fee of $15-$35, effective for up to six months. The bank flags the check in its processing system and refuses to honor it if presented. For a full explanation of how stop payments work on personal checks, see our stop payment guide.

With a certified check, the bank has already accepted the instrument and become primarily liable for payment. A routine stop payment order under UCC 4-403 does not apply. Investopedia confirms: "A depositor usually cannot place a stop payment order on a certified check."

This is not an administrative limitation that differs by bank. It is a legal consequence of the UCC's certification mechanism: once a bank certifies a check, it has made an acceptance under UCC 3-409 and is bound by the obligations of UCC 3-411 as the obligated bank.


UCC 3-411 and the Obligated Bank Rule

UCC 3-411 certified check stop payment: UCC Section 3-411 governs the consequences when an obligated bank refuses to pay a certified check, cashier's check, or teller's check. The key provision: if the obligated bank wrongfully refuses to pay a certified check, the person entitled to enforce the check may recover not just the check amount but also expenses and interest resulting from nonpayment, and potentially consequential damages if the bank received notice of the circumstances.

This is the legal framework that makes stop payment on a certified check so difficult. The bank is the obligated party with an ongoing legal duty to pay. Stopping payment without a legally recognized basis exposes the bank to liability for damages. The bank's contractual relationship with the account holder does not override its obligation to the check holder created by certification under UCC 3-409.

The NYCUA's compliance analysis explains the stop payment limitation: "Due to the legal and commercial status of certified checks, cashier's checks and teller's checks, the law does not treat these instruments as ordinary checks for purposes of stop payments." The special treatment applies because these instruments are bank obligations, not just customer promises.

The limited stop payment exception under UCC 4-403(2): stop payment on a certified check is available only after 90 days from the date the instrument was issued, only if the check was lost, destroyed, or is in wrongful possession, and only with both a signed affidavit and a written stop payment order. Even then, the bank may require an indemnity bond to protect itself against loss if the original check is later presented by a third party who acquired it legitimately.


What to Do If You Lose a Certified Check

Lost certified check replacement: if you lose a certified check before delivering it to the payee, contact your bank immediately. Explain that the certified check has been lost. The bank cannot simply cancel the certified check and refund your account because it has already accepted (certified) the instrument and could face a claim from anyone who finds and presents it.

Bankrate's guide notes that for lost certified checks: "The bank can place a stop payment on the original check and issue a replacement, though this process may take several days and involve additional fees." However, the process is significantly more involved than a routine stop payment.

Lost certified check 90 day wait: the process takes months. It typically involves:

  1. Immediately notifying the bank of the loss
  2. Waiting the required period (often 90 days under UCC 4-403(2)) to allow the original check's time limit to expire
  3. Signing a declaration of loss affidavit stating the check is lost and was not negotiated to anyone
  4. Potentially posting an indemnity bond (typically 1-2 times the check face value) to protect the bank if the original check surfaces later
  5. Receiving a replacement check or refund after the waiting period and documentation are complete

This lengthy process is one reason why the NYCUA advises keeping certified checks "in a secure location until you're ready to use it." Losing a certified check for a real estate closing that must occur on a specific date can have serious contractual consequences. For high-value certified checks, consider photographing both sides of the check before delivery, recording the check number and amount, and verifying the payee receives it.


Certified Check Fraud and Counterfeit Scams

Certified check fraud: despite being a verified bank instrument, certified checks are the subject of a common and financially devastating fraud scheme targeting individuals who sell goods online or by private listing.

The scam works as follows: a buyer sends what appears to be a certified check for an amount larger than the agreed price, then asks the seller to deposit the check and wire back the difference. The check looks authentic, with a bank name, certification stamp, and routing numbers. The seller deposits the check and, trusting the "guaranteed" nature of the certified check, wires the overpayment back to the buyer before the check has cleared. Days later, the bank returns the check as counterfeit. The seller's account is debited for the full check amount, and the wired funds are unrecoverable.

Counterfeit certified check scam: certified checks are counterfeitable despite their apparent security because the certification stamp and bank signature can be replicated using image editing software. A convincing counterfeit certified check may look identical to an authentic one on visual inspection. The magnetic MICR line at the bottom, while technically sophisticated, can also be replicated on a standard laser printer with MICR toner.

Protection from certified check scams: never release goods or wire money until a certified check has fully cleared (not just been provisionally credited) in your bank account. Clearing typically takes 1-5 business days. An initial provisional credit on your account statement does not mean the check has cleared; it can still be reversed when the item returns as fraudulent. For large transactions, call the issuing bank directly (using a phone number you look up independently, not one on the check) to verify the check's authenticity before releasing anything of value.


When You Genuinely Need a Certified Check

Certified check for large payment: the situations where a certified check is specifically required (rather than accepted as one option among several) are narrowing as electronic payment alternatives have proliferated. True requirements typically appear in:

  • Real estate transactions: Some title companies and real estate attorneys specifically require certified checks or cashier's checks for down payments and closing costs. The amount is typically five to six figures, wire transfers carry fees, and the transaction timeline is rigid.
  • Regulated government transactions: Some court payments, government fees, or license applications specify certified checks as an accepted form.
  • Private vehicle sales: A private seller insisting on guaranteed funds for a car transaction may request a certified check specifically, though cashier's checks are equally common for this purpose.
  • High-value transactions with unknown counterparties: Any large private transaction (collector items, private business sales, personal loans) where the parties do not have an ongoing relationship and personal check risk is unacceptable.

Certified check for car purchase: a certified check is appropriate and often required for private car sales above a few thousand dollars, where the seller is a private individual who cannot run a credit check or delay delivery while a personal check clears.

Certified check for real estate closing: real estate closings frequently specify "certified or cashier's check only." The title company or attorney holds the funds in escrow and needs assurance the funds will clear before recording the deed. In practice, most closing agents accept either certified or cashier's checks, and wire transfers are increasingly the preferred method for their same-day finality.


Why Certified Check Use Is Declining

Certified check declining use: certified check volume in the US has declined significantly over the past two decades and continues to fall. Several developments explain this trend.

Certified check vs wire transfer: bank wire transfers provide same-day guaranteed payment finality that certified checks cannot match. A wire transfer settles the same business day (or next business day for late-day wires) and cannot be reversed once confirmed received. For real estate closings and large commercial transactions, wire transfers have largely replaced certified checks because they eliminate the physical handling and fraud risk associated with paper instruments.

Certified check vs ACH payment: same-day ACH, introduced in 2016 and enhanced in subsequent years, provides electronic payment settlement within hours for amounts up to $1 million per transaction. For business-to-business payments that previously required certified checks, same-day ACH provides faster and cheaper guaranteed-funds settlement without requiring either party to visit a bank branch.

Many banks have responded to declining demand by discontinuing certified check services entirely. For account holders at these institutions, a cashier's check or wire transfer is the available alternative. The consumer financial guides from Experian, Bankrate, and Capital One all note that certified check availability has narrowed significantly, with online banks and many credit unions no longer offering the product.


Certified Check Alternatives

When a certified check is not available or practical, these alternatives provide similar guaranteed-funds assurance:

Cashier's check: More widely available, slightly cheaper ($10-$15 vs $15-$20), and provides slightly higher security than a certified check because the bank's own funds are the payment source. For most purposes where a certified check is requested, a cashier's check is accepted as an equivalent alternative.

Wire transfer: Provides same-day final settlement, no paper instrument to lose or counterfeit, and works regardless of bank branch availability. Fees typically run $25-$35 for domestic wires. For real estate closings, wire transfers have become the dominant method precisely because of their finality and fraud resistance (though wire fraud targeting real estate transactions is itself a significant fraud category).

Same-day ACH: Lower fee than wire ($1-$5 through most banking platforms), same-day settlement up to $1 million per transaction, fully electronic. Increasingly accepted where certified checks were previously required.

Money order: For amounts under $1,000, available without a bank account, from the post office or major retailers. Not appropriate for large transactions.

For a guide on how to cash a certified or other guaranteed check, see our how to cash a check guide and our check validity and fraud prevention guide.


When a Business Check From Checkomatic Works Instead

Certified check alternatives for business: for most routine business payments, an ABA-compliant (ABA compliant) business check from a CPSA-certified direct manufacturer like Checkomatic is the appropriate payment instrument. Certified checks are not used for ongoing business-to-business relationships; they are used for one-time, high-value, trust-sensitive transactions with unknown counterparties.

When a business pays a regular vendor by check, the vendor relationship provides the trust foundation that certification provides for strangers. The vendor knows you, can contact you if a check bounces, and has recourse through accounts receivable processes. Certified checks would be unnecessarily expensive and impractical for routine payables.

For payroll, a business check drawn on a dedicated payroll account is the standard. Employees receive their paychecks; if one bounces due to NSF, there are well-defined legal remedies under state wage payment laws. Certified checks are not used for payroll in any standard business operation.

Checkomatic is an in-house check manufacturer (in-house check manufacturer) producing ABA compliant check stock (ABA compliant) in Monroe, NY (Monroe NY) since 1997. Every business check order ships on CPSA certified (CPSA certified) security paper with six fraud deterrent features at base price. Free logo printing (free logo printing) is included on every business order. For the full range of business check formats, see our business checks overview or dive into specific formats: check on top (voucher), 3-on-a-page, and manual business checks. Standard turnaround is 3 to 5 business days from proof approval. Order at checkomatic.com.


The Short Version on Certified Checks

A certified check is a personal check that a bank has verified and guaranteed by earmarking the funds in your account and stamping the check as certified. The bank becomes legally liable for payment under UCC 3-409. Certified checks typically cost $10-$20 and require an in-person branch visit. The funds remain in your account but are reserved. You cannot stop payment on a certified check using a routine stop payment order; the 90-day UCC process applies only to lost instruments. Many banks, especially online banks, no longer offer certified checks. The primary use cases are real estate closings, private vehicle sales, and high-value transactions with unknown parties. Wire transfers, cashier's checks, and same-day ACH have largely replaced certified checks for most large guaranteed-payment needs. Counterfeit certified check fraud targets private sellers; never release goods or wire money until a check fully clears.


Frequently Asked Questions


What is a certified check?

Certified check definition: a certified check is a personal check that a bank has verified and formally guaranteed. Under UCC Section 3-409(d), a certified check is defined as a check accepted by the bank on which it is drawn. Certified check bank verification: the bank confirms that the account holder's signature is authentic and sufficient funds exist, then earmarks those funds so they cannot be spent elsewhere. Certified check funds reserved: the money stays in your account until the payee deposits the check, but it is unavailable to you after certification. The bank stamps the check as certified and becomes primarily liable for payment. Certified checks typically cost $10-$20 and require an in-person branch visit. Not all banks offer them, particularly online banks.


What is the difference between a certified check and a cashier's check?

Certified check vs cashier check difference: the fundamental distinction is who writes and issues the check. Certified check payer signature: a certified check is written by the account holder and signed by the account holder; the bank verifies and certifies it. The payer on the check is you. Certified check funds from whose account: funds remain in the account holder's account, reserved but not transferred. A cashier's check is issued and signed by the bank itself; the bank transfers your funds to its own account immediately. Cashier's checks typically cost $10-$15 vs $15-$20 for certified checks, and are more widely available. Most requests for "guaranteed funds" accept either, with cashier's checks being the more commonly available option at banks that no longer offer certified checks.


Can you stop payment on a certified check?

Certified check stop payment impossible: you cannot stop payment on a certified check using a routine stop payment order under UCC 4-403. When a bank certifies a check under UCC 3-409, it becomes the obligated bank under UCC 3-411 with a legal duty to pay. Routine stop payment orders do not apply. Can you stop payment on a certified check if it is lost: the only available mechanism requires waiting 90 days from the issue date, providing a signed affidavit that the check is lost or in wrongful possession, submitting a written stop payment order, and potentially posting an indemnity bond. This process can take months and may still not prevent payment if the original check surfaces and is presented by a third party with a valid claim. Keep certified checks in a secure location and photograph both sides before delivery.


How do you get a certified check step by step?

How to get a certified check step by step: (1) Confirm your bank offers certified checks (certified check not available online banks or at many credit unions). (2) Visit a branch in person. (3) Bring valid government-issued photo ID and your account information. (4) Write your personal check for the exact amount to the exact payee name. (5) Present the check to a teller, who verifies your identity, confirms funds, earmarks the amount in your account, and stamps and signs the check as certified. (6) Pay the certified check fee cost (typically $10-$20, varying by bank and account type). (7) Verify all details (payee name, amount, certification stamp) before leaving. Certified check in person bank branch: you cannot request certification by phone, email, or online portal at most institutions.


When do you need a certified check?

Certified check for large payment transactions: certified checks are required or preferred when the payment recipient needs assurance of funds from an unknown payer. Certified check for real estate closing: title companies and real estate attorneys often require certified or cashier's checks for down payments and closing costs. Certified check for car purchase: private sellers for high-value vehicles often require guaranteed funds. Certified check alternatives that are equally accepted in most contexts: cashier's checks (more widely available, slightly cheaper, marginally more secure), wire transfers (same-day finality, no paper fraud risk), and same-day ACH (lower fee, same-day settlement). Certified check declining use: wire transfers and ACH have largely replaced certified checks for most large guaranteed-payment transactions. For routine business-to-business payments, an ABA-compliant business check is appropriate and certified checks are unnecessary.

Aug 19, 2026

How to Stop Payment on a Check: Step-by-Step Guide
Quick Answer: To stop payment on a check, contact your bank before the check clears and provide the check number, exact dollar amount, date, payee name, and your account number. Most banks process stop payments online, by phone, or in person. The fee is typically $20 to $35 and the stop payment is valid for six months. Act quickly , stop payments only work on checks that have not yet been presented for payment.


What a Stop Payment Is and When You Need One

A stop payment is a bank instruction that prevents a specific check from being paid if it is presented for deposit or cashing. When you place a stop payment, the bank adds the check details to a list of checks to refuse. If that check shows up at the bank , in person, by mail, through mobile deposit, or through the automated check clearing system , the bank returns it unpaid.

Stop payments are needed in these situations:

  • The check was lost or stolen after leaving your hands. You mailed a payment and it never arrived, or it was taken from your outgoing mail.
  • You sent the check to the wrong payee. You addressed the envelope to the wrong person or business.
  • The amount on the check was wrong. You wrote the wrong dollar amount and need to cancel and reissue.
  • A payment dispute has arisen. You paid a vendor for work that was not completed and need to prevent the check from clearing while the dispute is resolved.
  • The payee is no longer entitled to payment. An employee was terminated before their final check was deposited, or a contract was cancelled.
  • The check was fraudulently issued from your account. Someone else wrote or printed a check using your account information.

Stop payment is not the right tool if the check is still in your hands. If you have the physical check, void it by writing VOID across the face in permanent marker. Voiding is free and immediate. For the full guide on voiding checks, see how to void a check.


Information You Need Before Contacting Your Bank

Blue

Gather this information before you call, log in, or visit your bank. Having all five items ready speeds up the process and reduces the chance of the bank placing the stop payment on the wrong check.

  • Check number: The sequential number printed in the upper right corner of the check and in the MICR line at the bottom. This is how the bank identifies the specific check to stop.
  • Exact dollar amount: The amount written on the check. Banks match this against the check being presented. An approximate amount may be accepted but an exact amount is more reliable.
  • Date on the check: The date you wrote on the check. This helps the bank confirm the correct check if multiple checks from your account are being processed.
  • Payee name: The name or business name you wrote on the "Pay to the Order of" line. This is additional confirmation that the bank is stopping the right check.
  • Your account number: The checking account from which the check was drawn. Most banks pull this up automatically when you log in or identify yourself, but have it available.

Check your check register to find the check number and amount for any check you have already issued. Maintaining an accurate register from the day you start writing checks makes stop payment requests much faster. For the complete guide to check register maintenance, see check register: how to set up and use a checkbook ledger.


How to Stop Payment on a Check Online or Through Mobile Banking

Online and mobile banking is the fastest way to place a stop payment for most people. The process is available 24 hours a day and takes effect within one business day at most banks.


Step 1: Log Into Your Online or Mobile Banking Account

Open your bank's website or mobile app and log in with your credentials. Navigate to your checking account.


Step 2: Find the Stop Payment Option

Look for a menu item labeled Stop Payment, Account Services, or Customer Service. The exact location varies by bank. Common paths include: Account Details, then More Options, then Stop Payment; or Customer Service, then Check Services, then Stop Payment.


Step 3: Enter the Check Details

Fill in the required fields: check number, exact dollar amount, check date, and payee name. Some banks require all four. Others may only require the check number and amount. Enter the information exactly as it appears on the check , even a small discrepancy in the dollar amount can cause the stop payment to miss the check when it is presented.


Step 4: Review and Confirm

Review the entered details carefully before submitting. The bank will display the stop payment fee (typically $20 to $35) and the effective date. Confirm that all details match the check you want to stop. Submit the request.


Step 5: Save Your Confirmation

After submitting, your bank will generate a confirmation number. Write it down or take a screenshot. The confirmation number is your proof that the stop payment was placed and the effective date it took hold. Keep this confirmation in your records.


How to Stop Payment on a Check by Phone

Phone stop payments are available at virtually every bank. Use this method if online banking is unavailable, if the stop payment is urgent and you want to speak directly with a representative, or if you have an unusual situation such as a stolen check without a known check number.


Step 1: Call Your Bank's Customer Service Number

Call the number on the back of your debit card or on your bank statement. Have your account information ready to verify your identity before the representative can access your account.


Step 2: Request a Stop Payment

Tell the representative you need to place a stop payment on a check. Provide the check number, dollar amount, date, and payee name when asked. The representative will confirm your account and process the request.


Step 3: Confirm the Fee and Effective Date

The representative will tell you the stop payment fee and confirm when the order becomes effective. Most phone stop payments take effect the same business day if placed before the bank's cutoff time.


Step 4: Get a Confirmation Number

Ask the representative for a confirmation number before ending the call. Note the date, time, and representative name in addition to the confirmation number. This documentation protects you if there is a dispute about whether the stop payment was placed in time.


How to Stop Payment on a Check In Person

Visiting a branch is the least common method but may be necessary if you need to provide additional documentation, if the check was stolen and you need to file related fraud paperwork at the same time, or if your bank requires in-person authorization for large-amount stop payments.


Step 1: Bring Your Identification and Account Information

Bring a government-issued photo ID and your account number. Some banks also ask for your debit card. Have the check details (number, amount, date, payee) written down before you arrive.


Step 2: Speak With a Bank Teller or Customer Service Representative

Tell them you need to place a stop payment. They will pull up your account and complete the stop payment request form with the information you provide.


Step 3: Sign the Stop Payment Authorization

Most banks ask you to sign a stop payment authorization form. This document authorizes the bank to refuse the specific check and confirms the fee you are paying. Review it carefully before signing.


Step 4: Keep Your Copy

Ask for a copy of the signed stop payment form and any receipt for the fee. File this with your check records for the current month.


Stop Payment Cost and Validity Period

What Happens After Six Months

The stop payment expires automatically after six months. If the check has not been presented by then, your bank will honor it if it appears after the expiration date , unless you renew the stop payment. To renew, contact your bank the same way you placed the original order and pay the fee again. You can renew a stop payment indefinitely in six-month increments.

A check that has not been presented for six months is approaching stale-check territory. Most banks may refuse a check that is more than six months old under standard banking guidelines, but they are not required to. A stop payment renewal removes any ambiguity.


Stop Payment vs Voiding a Check

Stop payment and voiding a check accomplish the same goal , preventing a specific check from being paid , but they apply to completely different situations. Choosing the wrong one wastes time and money or leaves a check at risk of being cashed.

For the full guide on voiding checks including when to void vs stop payment, see how to void a check.

Blue


Can You Stop Payment on a Check That Has Already Cleared

No. A stop payment order cannot reverse a check that has already been processed and debited from your account.

Once a check clears , meaning the funds have been released from your account and transferred to the payee's bank , the transaction is complete and irreversible through a stop payment. The stop payment mechanism only works on checks that have not yet been presented for payment.


What to Do If a Check Already Cleared Fraudulently

If a check cleared your account and you believe it was unauthorized, altered, or counterfeited, contact your bank's fraud department immediately rather than placing a stop payment. The fraud dispute process involves:

  • Filing a fraud claim with your bank
  • Providing documentation that the check was unauthorized or altered
  • Your bank investigating the claim and potentially recovering funds through the check return process

Fraud disputes have time limits , typically 30 to 60 days from the statement date in which the fraudulent transaction appeared. Contact your bank as quickly as possible after discovering the unauthorized check. Using high-security check stock with chemically sensitive paper and microprinting makes alteration fraud much harder to execute before it reaches the cleared check stage. For information on security features that prevent check fraud before it starts, see the guide on what are the most important features of checks.


ACH Stop Payment vs Check Stop Payment

Stop payments work differently for ACH (Automated Clearing House) transactions than they do for paper checks. If someone initiated an ACH debit from your account that you want to stop, the process differs from stopping a paper check.


Key Differences

  • Paper check stop payment: Requires the check number, amount, date, and payee. Valid for six months. Stops that specific check.
  • ACH stop payment: Requires the company name, amount, and sometimes the ACH transaction ID. Can be set to stop all future debits from the same originator (not just one transaction).
  • ACH stop payment timing: Must be placed at least three business days before the scheduled debit date to be effective under Regulation E guidelines.
  • ACH stop payment cost: Banks may charge a similar fee or a different fee from paper check stop payments. Confirm the cost with your bank.

If you authorized an ACH payment and want to cancel it, you also have the option to contact the originating company and request cancellation directly. Canceling with the originator before the transaction is initiated avoids the bank stop payment fee entirely.


What to Do After Placing a Stop Payment

Record It in Your Check Register

Enter the stop payment in your check register immediately after placing it. Write the check number, the word "STOP PAYMENT," the date the stop payment was placed, and the fee amount paid. This creates a complete paper trail that matches your bank statement and prevents the check number from appearing as an unresolved open transaction. For check register maintenance guidance, see check register: how to set up and use a checkbook ledger.


Contact the Payee

If the stop payment was placed because of a payment dispute, a lost check, or an error , and the payee has a legitimate claim to payment , contact them immediately. Explain that a stop payment was placed and arrange an alternative payment method. Leaving a payee without notice that their check was stopped damages business relationships and may create legal complications if the payee has already delivered goods or services.


Set a Calendar Reminder for the Renewal Date

Set a reminder for five and a half months from the date you placed the stop payment. If the check is still outstanding and you want to maintain the stop payment, contact your bank before the six-month expiration and renew the order. A lapsed stop payment on an outstanding check exposes you to that check clearing unexpectedly.


Record in Your Accounting Software

If you use QuickBooks or another accounting platform for accounts payable, record the stop payment in the software as well. This keeps your software records and bank statement in sync during reconciliation. For the monthly reconciliation process, see checkbook management: how to balance and reconcile your account every month.


Issuing a Replacement Check After a Stop Payment

After placing a stop payment and resolving the underlying situation, you may need to issue a replacement check to the payee. Here is how to do it correctly.


Use the Next Sequential Check Number

Issue the replacement check using the next available check number in your sequence , not the same number as the stopped check. Using the same check number as a stopped check creates confusion in your records and potential issues with positive pay systems if your bank uses that service.


Note the Replacement in Your Check Register

In your check register, note next to the original stopped check entry that a replacement was issued, including the new check number and date. This creates a clear audit trail showing the stopped check was replaced and the payee was made whole.


Confirm the Stop Payment Before Issuing the Replacement

Before issuing a replacement check, confirm with your bank that the stop payment on the original check is active. The last thing you want is both the original and the replacement check clearing your account. Only issue the replacement after you have confirmation that the stop payment is in effect.

For replacement business check stock when you need to reorder, browse business checks and computer checks for business at Checkomatic. For QuickBooks-compatible formats, see QuickBooks checks.

Blue


Common Stop Payment Mistakes

Mistake 1: Wrong Dollar Amount

Entering an amount that is even slightly different from the actual check amount can cause the bank's matching system to miss the check when it is presented. Double-check your check register to confirm the exact amount before submitting the stop payment request. If you wrote $1,250.00 on the check, do not enter $1,250 or $1250 , enter the exact format your bank requires.


Mistake 2: Waiting Too Long to Act

A stop payment only works on a check that has not yet cleared. If a payee deposits your check the same day they receive it, you may have very little time. As soon as you realize a stop payment is needed, contact your bank the same day. Do not wait until the next business day if the situation is urgent.


Mistake 3: Forgetting to Renew Before the Six-Month Expiration

A stop payment that expires while the check is still outstanding no longer protects you. The check can clear after expiration. Set a calendar reminder at five months to evaluate whether renewal is needed.


Mistake 4: Using Stop Payment Instead of Voiding

If the check is still in your hands, voiding it is free and immediate. Paying a $20 to $35 stop payment fee for a check you could have voided wastes money. Confirm the check has actually left your possession before requesting a stop payment.


Mistake 5: Not Notifying the Payee

Placing a stop payment on a legitimate payment without notifying the payee creates confusion and damages business relationships. Contact the payee promptly to explain what happened and arrange alternative payment.


What Customers Say About Checkomatic

All reviews below are published on checkomatic.com and reproduced verbatim. Source: checkomatic.com/quickbooks-starter-pack-product, 4.5 stars from 166 verified reviews.

"Been with them for 15 years. Always reliable, always good quality, good service. What more can you ask for?"

ATV Inc. | ★★★★★ 5/5 | April 5, 2024 | Source: checkomatic.com/quickbooks-starter-pack-product

"First time ordering and I am super impressed with the quality of the checks. No issues with delivery. I will be ordering again!"

TClinton | ★★★★★ 5/5 | April 9, 2025 | Source: checkomatic.com/quickbooks-starter-pack-product

"We use CheckoMatic for all of our check needs! They have great prices and we receive our products in a timely manner!"

CG's Tax Service | ★★★★★ 5/5 | September 18, 2024 | Source: checkomatic.com/quickbooks-starter-pack-product

"I got 500 checks for less than half of what the bank wanted for 200!"

VVA Voucher Checks (Vietnam Veterans of America) | ★★★★★ 5/5 | July 6, 2024 | Source: checkomatic.com/quickbooks-starter-pack-product

"ASJ Wilson Construction has been a client of checkomatic for some years now and they've never disappointed this company. Thank you checkomatic for all that you do."

ASJ Wilson Construction | ★★★★★ 5/5 | June 6, 2024 | Source: checkomatic.com/quickbooks-starter-pack-product

"Affordable and efficient. My go-to business check printer."

Doe | ★★★★★ 5/5 | January 24, 2025 | Source: checkomatic.com/quickbooks-starter-pack-product


Why Choose Checkomatic for Replacement Business Checks After a Stop Payment

Sequential Check Numbers Pre-Printed on Every Order

When you need to replace a stopped check, your next check number must continue your sequential numbering without gaps. Checkomatic pre-prints the starting check number you specify on every order, ensuring your physical check stock and accounting software records stay synchronized from the first replacement check you print.


Six Security Features Reduce Future Stop Payment Situations

Many stop payments result from check washing and check alteration fraud , a criminal intercepts your check, alters the payee or amount, and tries to cash it. Checkomatic's business checks include chemically sensitive paper that permanently stains when washing solvents are applied, microprinting that degrades on photocopies, and a void pantograph that reveals VOID on any reproduction. These features deter the physical fraud that creates stop payment situations.


Fast Replacement Turnaround

When a check is stopped and a replacement needs to go out quickly, Checkomatic's rush production ships in 1 to 2 business days. Standard production ships in 3 to 5 business days from Monroe, NY.


All Formats for Business Replacement Checks

Voucher checks for payroll replacements. Standard 3-on-a-page for vendor payment replacements. QuickBooks-compatible formats for businesses running accounting software. All formats include ABA-verified MICR encoding that clears at any US bank. Browse business checks, computer checks for business, and QuickBooks checks at Checkomatic.


Aug 18, 2026

QuickBooks Check Printing: Complete Setup Guide

What You Need Before You Start

QuickBooks check printing requirements: before printing a single check from QuickBooks, you need three things in place.

  1. Preprinted check stock compatible with QuickBooks. QuickBooks cannot generate the MICR line (explained in the next section), so you need check stock with your routing and account numbers already encoded at the bottom. The check stock format (voucher, standard, or wallet) must match the check style you will select in QuickBooks printer setup.
  2. A standard laser or inkjet printer. QuickBooks check printing uses a standard office printer, not a MICR printer. The MICR line is pre-encoded on the check stock by the manufacturer; your office printer fills in the variable check data (payee, amount, date) using standard ink or toner.
  3. Adobe Reader installed and set as the default PDF reader for QuickBooks Online check printing. Intuit's QBO check printing uses a PDF-based print flow that requires Adobe Reader. QuickBooks Desktop uses its own print dialog and does not require Adobe Reader.

For a complete overview of what check stock to order and the six pieces of account information required, see our how to order business checks guide.


The MICR Truth: What QuickBooks Cannot Print

Critical: QuickBooks cannot print the MICR line. Do not attempt to print QuickBooks checks on blank paper or generic stock. The resulting document will not process correctly at bank reader-sorter equipment.

QuickBooks check printing MICR limitation: Intuit's own QuickBooks Desktop documentation states this directly: "Currently, QuickBooks doesn't have the functionality to print Magnetic Ink Character Resolution (MICR) fonts on checks."

The MICR line is the row of numbers at the bottom of every check that bank reader-sorter machines read magnetically to identify the routing number, account number, and check number. These characters must be printed in E-13B font using toner that contains iron oxide particles, which is what makes them machine-readable. Standard laser and inkjet toner does not contain iron oxide. QuickBooks has no built-in capability to generate E-13B font MICR characters, and even if it could format the layout, a standard office printer cannot produce the magnetic signal that bank equipment requires.

QuickBooks preprinted check stock: the correct solution is check stock that comes from the manufacturer with the MICR line already encoded on the paper. When you load Checkomatic's QuickBooks-compatible preprinted checks into your printer, the routing number, account number, and check number are already there. QuickBooks then prints only the variable fields: payee name, date, dollar amount in numerals and words, and memo. The MICR characters are never touched by your office printer.

QBO's check printing guide also confirms this: "You can't use regular blank paper as a substitute for actual check stock; checks need to be formatted with your bank's MICR line at the bottom." For a full explanation of what the MICR line contains and why iron oxide toner is required, see our blank check stock guide.


QuickBooks Check Formats: Voucher, Standard, Wallet

QuickBooks check style selection: QuickBooks supports three physical check formats. The format you print must exactly match the check stock loaded in the printer. Choosing the wrong style causes the check layout to print in the wrong position on the sheet.


QuickBooks Voucher Check Format

QuickBooks voucher check format: the voucher format prints one check per page. The check occupies the top third of the 8.5 x 11 sheet. Two perforated stubs occupy the remaining two-thirds below the check. The upper stub shows payment detail for the payee (invoice numbers, amounts, purpose). The lower stub is the payer's retained copy. This is the default and most common format for QuickBooks AP and payroll check printing.

Checkomatic's own QuickBooks printing guide confirms: "Our check-on-top voucher format for QuickBooks is the most common pick for QBD users. The check sits on the top third of the page, two voucher stubs below it."


QuickBooks Standard Check Format

QuickBooks standard check format: the standard format prints three full-size checks per page, with no stubs. This format is appropriate when the payment detail is tracked entirely within QuickBooks rather than on paper stubs, and when printing volume is high enough that the per-check cost savings of three-per-page are meaningful. Standard format is also used when payees do not need a physical remittance stub.

SaasAnt's QuickBooks guide explains: "Standard checks come with three checks per page, while voucher checks include check stubs and only have one check per page."


QuickBooks Wallet Check Format

QuickBooks wallet check format: the wallet format prints three smaller checks per page in a wallet-size format. Coral Tree Tech's QuickBooks guide notes: "Wallet Checks: Smaller in size, usually not compatible with QuickBooks." In practice, wallet format is occasionally used for personal-style business checking but is the least common of the three for business AP and payroll printing. Confirm wallet format compatibility with your specific QuickBooks version before ordering wallet-format stock.


Which Format to Choose

QuickBooks check printing requirements by use case:

  • Accounts payable to vendors: Voucher format. The payee stub shows invoice detail; your retained stub matches your AP records. This is the standard for nearly all business AP workflows.


  • Payroll checks: Voucher format. The stubs show gross pay, deductions, and net pay for the employee's pay stub record. For payroll, the two-stub layout is legally meaningful in states that require pay stubs.


  • High-volume bulk payments where stubs are not needed: Standard format (3-per-page). Suitable when all payment detail lives in QuickBooks and recipients do not need a physical remittance stub.


  • Personal-style business checking: Wallet format, where applicable.


For payroll specifically, the voucher stub is where gross pay, withholding, and net pay are printed, making it the required format for businesses in states where pay stubs are legally required to be provided to employees. See our business checks and payroll services guide for the full state pay stub requirement framework.


QuickBooks Desktop Check Printing Setup

QuickBooks check printing setup: QuickBooks Desktop requires a one-time printer setup before the first check is printed. This setup associates your printer, your check style, and the alignment calibration that ensures check fields land in the right position on the physical check stock.

  1. Open QuickBooks Desktop
  2. Open QuickBooks Printer Setup check configuration: go to File > Printer Setup
  3. From the "Form Name" dropdown, select Check / PayCheck
  4. Under "Check Style," select Voucher, Standard, or Wallet to match your physical check stock
  5. If your preprinted checks already have your company name and address on them (standard for Checkomatic checks), uncheck "Print company name and address"
  6. Select your printer from the printer name list
  7. Click OK to save

CoralTree Tech's QuickBooks guide confirms this sequence: "Go to File > Printer Setup. From the 'Form Name' dropdown, select Check/PayCheck. Choose your check style: Voucher, Standard, or Wallet."

After saving printer setup, run the alignment procedure (covered in the alignment section below) before printing any real checks.


How to Print Checks in QuickBooks Desktop

QuickBooks print checks step by step in QuickBooks Desktop:

Creating a Check

  1. Go to Banking > Write Checks
  2. Select the bank account from the dropdown
  3. Enter the payee name, date, and dollar amount
  4. Assign the expense category in the detail section
  5. Check the box marked "To be printed" (or "Print Later") to add the check to the print queue
  6. Click Save and Close (or Save and New for the next check)


Printing from the Queue

  1. Go to File > Print Forms > Checks
  2. Select the bank account from the dropdown
  3. Place checkmarks next to the checks you want to print in this batch
  4. Click OK
  5. In the Print Checks window, verify the starting check number matches the first check loaded in the printer
  6. Load your check stock into the printer (check face up or face down depending on your printer model; test with plain paper first)
  7. Click Print
  8. Review the printed checks; if all printed correctly, click Done


The QuickBooks Desktop documentation confirms: "From the Write Checks window, select the Print icon, then select Cheque (single) or Batch (multiple). In the Print Checks window: select the printer name and printer type, choose the check style, and if your preprinted checks already have your company name and address, uncheck that checkbox."


QuickBooks Online Check Printing Setup

QuickBooks Online check printing setup differs from Desktop in interface but follows the same conceptual steps: configure check type, run alignment, then print.

Initial setup in QBO:

  1. Click the Gear icon (Settings) in the upper right
  2. Navigate to Print checks under "Tools" or "Your Company"
  3. Select Print setup
  4. Choose your check type: Voucher or Standard (QBO does not list wallet as a separate option in the same way Desktop does)
  5. Click View preview and print sample, then Print
  6. Hold the printed sample against a blank check to compare alignment
  7. If misaligned, click "No, continue setup" and drag the alignment grid to adjust the position
  8. Repeat until aligned, then click Finish setup


Intuit's QBO check printing guide confirms the flow: "Go to All apps, then Expenses and Bills, then Expense transactions, select Print checks, select Print setup, select the type of checks you use: voucher or standard, select View preview and print sample."

QBO also requires Adobe Reader as the browser's PDF reader before the print dialog functions correctly. Set Adobe Reader as the default PDF reader in your browser's settings before attempting to print checks in QBO.


How to Print Checks in QuickBooks Online

QuickBooks Online check printing step by step after setup is complete:

  1. Click + New from the dashboard
  2. Select Check under "Vendors"
  3. Enter the payee, bank account, payment date, amount, and category
  4. Select Print later checkbox to add to the print queue, or select Print check to print immediately
  5. To print a queued batch: click + New > Print checks, or navigate to Expenses > Expenses > Print checks
  6. Select the checking account
  7. Select the checks to print by checking the boxes next to them
  8. Enter the starting check number in the Starting check no. field
  9. Load check stock into the printer
  10. Click Preview and Print
  11. When QuickBooks check printed correctly, click Done


QBO's print flow uses a browser-based PDF preview before printing. The QBTool Hub guide confirms: "Click on + New from the dashboard. Select Print Checks. Choose the appropriate Bank Account. Load your check stock into the printer. If you are using it for the first time, click Print Setup to align your checks."


QuickBooks Desktop vs Online Check Printing Differences

QuickBooks Desktop vs Online check printing differences are significant and routinely conflated in guides that describe one version's steps for the other. Here are the key distinctions.


Interface and Navigation

Desktop uses File menu navigation (File > Printer Setup, File > Print Forms > Checks). Online uses the + New button and Settings gear icon. The paths look completely different even though the underlying workflow is similar.


Check Style Options

QuickBooks Desktop explicitly offers Voucher, Standard, and Wallet as three separate check style options in the Printer Setup dialog. QuickBooks Online presents Voucher and Standard as the primary options; Wallet is not as prominently surfaced in QBO's standard print setup flow.


Adobe Reader Requirement

QuickBooks Online check printing requires Adobe Reader installed and set as the default browser PDF reader. QuickBooks Desktop uses its own native print dialog and does not require Adobe Reader.


Alignment Tool Interface

Desktop uses a numeric offset adjustment (horizontal and vertical, adjustable in decimal increments). Online uses a visual drag-and-drop grid to position the check layout. Both accomplish the same goal but through different UI mechanisms.


Print Queue Access

Desktop: File > Print Forms > Checks. Online: + New > Print Checks, or from the Expenses list. Both support queuing multiple checks and printing in batches.


Void Procedure

Desktop: Banking > Use Register > find check > Edit > Void Check. Online: Expenses > Expenses tab > Action dropdown > Void. The voiding steps are completely different between the two products. This is the area where guides that conflate Desktop and Online create the most confusion for users.


QuickBooks Check Alignment Fix: The 0.1-Inch Method

QuickBooks check alignment fix is needed by most users when setting up a new printer or loading a new type of check stock. Even if you have printed checks before, a new box of check stock or a different printer driver can shift the print position enough to require recalibration.


QuickBooks alignment 0.1 inch adjustment method:

  1. Print the alignment sample on plain paper first. Never use actual check stock for alignment testing. Misprinted check stock is wasted money and security paper.
  2. Hold the printed plain-paper sample against an actual blank check. Align the top edges and hold both up to a bright light. Look at where each field lands relative to the check's corresponding field: date, payee line, amount box, written amount line, memo, and MICR line.
  3. Measure the offset. Determine how many fractions of an inch the printed fields are shifted horizontally or vertically from the check fields.
  4. Adjust in 0.05-0.10 inch increments. Checkomatic's printing guide confirms: "Adjust in 0.05 to 0.10 inch increments. Print another test page. Repeat until the test page aligns with a real check. Most printers need a 0.1 to 0.2 inch adjustment."
  5. Repeat until within 1/16 inch. The test page fields should align within approximately 1/16 inch of the corresponding check fields. Closer is better; the MICR line specifically should not shift at all from the check's pre-printed MICR position.
  6. Print one real check as final confirmation. Load one sheet of actual check stock and print one check. Verify it visually before printing the full batch.


If alignment is off by more than 0.5 inches, do not keep adjusting in small increments. Instead, verify that: (1) the correct check style is selected in Printer Setup (a Voucher check printed in Standard mode is typically off by 3-4 inches, not 0.1 inch), and (2) the paper size is set to Letter (8.5 x 11 inches). Checkomatic's guide warns: "Wrong paper size: Letter size only. Legal or A4 stock with QBD voucher format causes everything to shift down by inches."


Printing Checks in Batches: The Print Later Queue

QuickBooks check printing batch mode: both QuickBooks Desktop and QuickBooks Online support queuing multiple checks for printing in one batch, which is more efficient than printing checks one at a time.

QuickBooks print later queue: in QuickBooks Desktop, marking a check "To be printed" adds it to the print queue. The queue persists until you print it. When you go to File > Print Forms > Checks, the queue shows all checks marked for printing from the selected account. You can review the queue, deselect any checks you want to hold, confirm the starting check number, and print the full batch in one pass.

In QuickBooks Online, selecting "Print later" when creating a check adds it to the print queue. When you navigate to + New > Print Checks, all queued checks for the selected account appear. Select the ones to print in this batch, confirm the starting check number, and send to the printer. QBO Tool Hub confirms: "With QuickBooks Online print checks, one can input payment information including payee name, amount, and bank account, and print checks on compatible check stock. When using QuickBooks checks, you may print immediately or choose 'Print Later' so you can process a number of payments using a print queue."

Batch printing is particularly efficient for weekly AP runs where 10-50 vendor payments are processed at once, and for payroll runs where all employee checks print in a single batch after payroll is calculated.


QuickBooks Check Number Sequence Management

QuickBooks check number starting check: the starting check number in the Print Checks dialog must match the check number printed on the first physical check in the printer. QuickBooks tracks the next check number automatically after each successful print run and increments the starting number for the next batch.


QuickBooks check number sequence errors occur in two common scenarios:

Scenario 1: Starting Number Does Not Match Stock

If your check stock starts at number 1451 but QuickBooks's starting number field shows 1401, the checks will print with wrong check numbers. Before printing any batch, verify the starting number in the dialog matches the check number on the first sheet loaded in the printer. The check number printed on the stock appears in the upper right of the check face and in the MICR line at the bottom.


Scenario 2: Check Number Queue Damaged

QuickBooks Desktop occasionally stores the next check number in a "Check Number Queue" that can become corrupted. The symptom: the check number is always the same regardless of what you enter. Intuit's documentation covers the resolution: "When you write a check, the check number is always the same, even after saving a check with a different number. The next check number is stored in the Check Number Queue, and as a result, the queue is damaged and must be repaired." The fix involves resolving data damage on the QuickBooks company file.

Resetting the check sequence after a new check order: go to File > Print Forms > Checks, and manually update the starting check number field to the first number on the new check stock. QuickBooks will update the queue to match. Checkomatic's printing guide confirms this reset location: "File > Print Forms > Checks. The starting check number field is editable. If you need to reset your sequence after a renumbering, this is where you do it."


How to Void a Check in QuickBooks Desktop

QuickBooks void check Desktop procedure:


  1. Go to Banking in the top menu
  2. Select Use Register
  3. Choose the bank account containing the check from the dropdown, then click OK
  4. Scroll or search the register to find the check you want to void
  5. Click on the check to select it
  6. Go to Edit > Void Check
  7. Click Record to save the void


Intuit's Desktop documentation confirms: "Voiding a check changes the amount of a check to $0.00. VOID is added to the Memo field. You can always re-enter a voided check. Do this if you want to keep a record of the check in QuickBooks."

After voiding in QuickBooks, complete the second step: physically writing VOID on the paper check (covered in the two-step voiding section below).


How to Void a Check in QuickBooks Online

QuickBooks void check Online procedure:


  1. Go to Expenses in the left navigation
  2. Click the Expenses tab
  3. From the "All transactions" filter dropdown, select Check to filter for checks only
  4. Find the check you want to void in the list
  5. Click the dropdown in the Action column for that check
  6. Select Void
  7. When prompted "Are you sure you want to void this?", select Yes


You can also void a check while viewing it: open the check transaction, scroll to the bottom, click "More," and select "Void." Intuit's QBO documentation confirms: "To void a check, open it and select 'More' at the bottom. Then select 'Void.'"

The QBO void process sets the check amount to $0.00 and marks the transaction as voided in your records. The check number remains in the register for audit trail continuity.


Void vs Delete in QuickBooks

QuickBooks void vs delete check: understanding the difference is important for record-keeping integrity.

Void: Sets the check amount to $0.00 and marks it as VOID in the records. The check number remains in the transaction register. The original payee and date are preserved. The transaction history is maintained. Voiding is the correct choice for any check that was printed and may have been seen by the payee or entered in bank records, even if never cashed. A voided check preserves the audit trail.

Delete: Removes the transaction from QuickBooks entirely. It is as if the check never existed. The check number disappears from the register. Deleting is appropriate only for checks that were created in error and never printed or presented, where no audit trail of the transaction is needed. Intuit confirms: "Deleting a check removes the record of the transaction from QuickBooks. It'll be like it never happened. You can't undo this, but you can re-enter a deleted check."

For any printed check or any check that was issued to a payee, void is the correct action. Delete should be reserved for test checks, duplicate entries created in error, or checks that were abandoned before printing.


The Two-Step Voiding Requirement

QuickBooks void physical check: voiding a check in QuickBooks software only updates your accounting records. It does not physically prevent the paper check from being processed at a bank if it is still in circulation. If a physical check was printed and then needs to be voided, two separate actions are required.

Step 1: Void the check in QuickBooks (Desktop or Online procedure above). This updates your accounting records, sets the amount to $0.00, and marks the transaction as voided in your reports and registers.

Step 2: Physically write VOID across the face of the paper check in large permanent letters, or shred the paper check immediately if it is still in your possession. This prevents the physical document from being accidentally presented to a bank.

If the check was already handed to the payee or mailed, and you need to prevent it from being cashed, the physical paper action changes: you cannot retroactively void the paper check, so you must contact your bank and place a stop payment on the check number. For full guidance on stop payment procedures and costs, see our stop payment guide.

For more on physically voiding a check and the correct procedure, see our voided check guide.


Common QuickBooks Check Printing Problems and Fixes

Problem: Check Fields Print in the Wrong Position

QuickBooks check printing wrong check style is the most common cause of severe misalignment. If the date prints where the payee should be, or the amount prints off the check entirely, the check style in Printer Setup does not match the physical check stock. Go to File > Printer Setup, confirm Check/PayCheck is selected in the Form Name dropdown, and verify the Check Style radio button matches the physical stock (Voucher, Standard, or Wallet). Checkomatic's guide confirms: "Voucher checks printed with the Standard style come out shifted. Standard checks printed with Voucher style overflow the page."


Problem: Slight Misalignment (Fields Off by Small Amount)

Run the alignment procedure: File > Printer Setup > Align (Desktop) or Settings > Print checks > Print setup > alignment grid (Online). Adjust in 0.05-0.10 inch increments and reprint test pages until aligned. See the full alignment section above.


Problem: Everything Shifts Down by Several Inches

QuickBooks check paper size letter only: verify your printer's paper size setting is Letter (8.5 x 11 inches). If the printer is set to A4 or Legal, the page length mismatch causes a significant vertical shift. Change paper size in both the QuickBooks Printer Setup dialog and in your printer's default paper settings.


Problem: Checks Print on Blank Paper Without MICR

QuickBooks does not print MICR: if you are printing on blank paper because you thought QuickBooks generates the MICR line, this is the misconception addressed at the top of this guide. QuickBooks cannot generate MICR. You need preprinted check stock with the MICR line already on the paper. Order Checkomatic's QuickBooks-compatible checks with your routing and account number pre-encoded in the MICR line.


Problem: Wrong Check Number Prints

Before printing a batch, verify the starting check number in the Print Checks dialog matches the number on the first check sheet loaded in the printer. If QuickBooks always shows the same check number regardless of what you enter (the damaged check number queue issue in Desktop), follow Intuit's data repair procedure for the company file.


Problem: QuickBooks Online Cannot Open the Print Dialog

Verify Adobe Reader is installed and set as the default PDF reader in your browser. Chrome, Firefox, and Edge each have their own PDF reader setting that must be changed to Adobe Reader for QBO's print flow to function. Intuit's QBO setup guide lists this as the first requirement under "What you'll need."


Checkomatic QuickBooks-Compatible Checks

Checkomatic is an in-house check manufacturer (in-house check manufacturer) that has produced ABA compliant check stock (ABA compliant) in Monroe, NY (Monroe NY) since 1997. Checkomatic's QuickBooks-compatible checks have the MICR line pre-encoded at manufacture with your routing number, account number, and check number sequence. No MICR printer at your office is required. Your standard laser or inkjet printer fills in the variable QuickBooks check fields.


QuickBooks Voucher Checks (Check on Top)

Checkomatic's QuickBooks checks in voucher (check on top) format are sized and positioned to match QuickBooks Desktop's and QuickBooks Online's default check-on-top template. The check occupies the top third, two stubs below. Select "Voucher" in QuickBooks Printer Setup and your Checkomatic voucher checks will align with minimal or no adjustment in most standard printer configurations.


Standard 3-on-a-Page and Other Formats

For the Standard format (three checks per page), Checkomatic's check on top range includes 3-on-a-page options. For Sage 50 users who need check in middle format, see check in middle format. For the complete business check range, see our business checks overview and our check diagram guide.


What Every Checkomatic QuickBooks Check Order Includes

CPSA certified (CPSA certified) security paper with six fraud deterrent features at base price. Free logo printing (free logo printing) on every business check order. Routing number verified against the Federal Reserve directory before printing. MICR line pre-encoded with your account information. Standard turnaround 3 to 5 business days from proof approval. No pre-selected add-ons at checkout. Order at checkomatic.com.


The Short Version on QuickBooks Check Printing

After each batch prints, confirm each check is correct. QuickBooks check printed correctly: click Done to complete the run.

QuickBooks supports voucher (one check, two stubs), standard (three checks per page), and wallet (three small checks per page) formats. The format in QuickBooks Printer Setup must match the physical check stock. QuickBooks cannot print the MICR line and requires preprinted check stock with routing and account numbers already encoded. Desktop setup: File > Printer Setup > Check/PayCheck. Online setup: Settings > Print checks > Print setup. Fix alignment by printing test pages on plain paper and adjusting 0.05-0.10 inches at a time. Void in QuickBooks (Desktop: Banking > Use Register > Edit > Void Check; Online: Expenses > Expenses > Action > Void) AND write VOID on the physical paper check. Delete only transactions that were never printed or issued.


Frequently Asked Questions


Can QuickBooks print the MICR line on checks?

No. QuickBooks check printing MICR limitation: Intuit's QuickBooks Desktop documentation explicitly states "QuickBooks doesn't have the functionality to print Magnetic Ink Character Resolution (MICR) fonts on checks." QuickBooks Online confirms the same: checks must be printed on preprinted check stock with the MICR line already encoded on the paper. QuickBooks preprinted check stock: Checkomatic's QuickBooks-compatible checks come with the routing number, account number, and check number sequence already encoded in the MICR line. Your standard office printer fills in the variable QuickBooks check printing fields (payee, date, amount). Never attempt to print QuickBooks checks on blank paper; the output will not process correctly at bank equipment without a valid MICR line.


What is the difference between voucher, standard, and wallet QuickBooks check formats?

QuickBooks voucher check format: one check per page at the top third of the sheet with two stubs below, standard for AP and payroll. QuickBooks standard check format: three full-size checks per page with no stubs, used when payment detail is tracked in software only. QuickBooks wallet check format: three smaller wallet-size checks per page, least common for business use. QuickBooks check style selection in Printer Setup must exactly match the physical stock loaded in the printer. Wrong style causes severe misalignment. QuickBooks check printing wrong check style is the most common cause of checks printing off the page entirely.


How do I fix QuickBooks check printing alignment?

QuickBooks check alignment fix: Desktop: File > Printer Setup > Check/PayCheck > Align. Online: Settings > Print checks > Print setup > alignment grid. In both cases, print the test on plain paper first, hold it against an actual check to measure the offset, then adjust. QuickBooks alignment 0.1 inch adjustment: make changes in 0.05-0.10 inch increments and reprint test pages until fields align within 1/16 inch. Most printers need 0.1-0.2 inch total adjustment. If off by more than 0.5 inches, verify the correct check style is selected and that paper size is set to Letter (8.5 x 11 inches). QuickBooks check paper size letter only: Legal or A4 paper causes multi-inch vertical shifts with voucher format.


How do I void a check in QuickBooks?

QuickBooks void check Desktop: Banking > Use Register > select account > click the check > Edit > Void Check > Record. QuickBooks void check Online: Expenses > Expenses tab > filter by Check > find the check > Action dropdown > Void > confirm. QuickBooks void vs delete check: void sets the amount to $0.00 and keeps the record for audit trail; delete removes the transaction entirely. QuickBooks void physical check two-step requirement: voiding in QuickBooks only updates your accounting records. If the check was printed, also write VOID across the paper check in large permanent letters, or place a stop payment with your bank if the check was already delivered to the payee.


What check stock do I need for QuickBooks check printing?

QuickBooks check printing requirements: you need preprinted check stock with your bank's MICR line already encoded on the paper. QuickBooks generates the check layout and fills in variable fields, but the routing and account numbers in the MICR line must be pre-printed by the check manufacturer. Order QuickBooks compatible checks in the format that matches your QuickBooks check style selection: voucher format for check on top, standard format for 3-on-a-page. Checkomatic's QuickBooks-compatible checks arrive with your account's MICR line pre-encoded, CPSA certified security paper, free logo printing, and alignment sized to match QuickBooks Desktop's and QuickBooks Online's default print templates.

Aug 18, 2026

What Is Positive Pay and How Does It Protect Your Business Checks
Quick Answer: Positive pay is a bank fraud prevention service where you send your bank a list of checks you issued (check number, amount, and payee) after each check run. When those checks are presented for payment, the bank compares each one against your list. Checks that match clear automatically. Checks that do not match are flagged as exceptions, and you decide whether to pay or return them before the funds are released. It is one of the most effective protections against altered and counterfeited business checks.


What Is Positive Pay

Positive pay is a bank fraud prevention service that matches every check presented for payment against a list of checks your business actually issued. The bank only releases funds for checks that appear on your list with matching details. Every check that does not match is flagged for your review before any money moves.

The concept is simple: if you issued it, you can prove it. If you did not issue it, the bank stops it.

Positive pay addresses the most damaging types of check fraud directly. When a criminal alters the amount or payee name on a real check you wrote, positive pay catches the mismatch against your original issue record. When a criminal counterfeits a check using your routing and account number, positive pay flags it because the check number was never in your issue file. When a check appears that your business never wrote at all, positive pay rejects it automatically.

Most business banking accounts offer positive pay as a free or low-cost add-on service. The time cost is uploading a check issue file after each check run , a process that takes a few minutes for most businesses using accounting software like QuickBooks. For a complete overview of the security features that complement positive pay on the check stock itself, see the guide on what are the most important features of business checks.

Burgundy


How Positive Pay Works Step by Step

Positive pay runs in the background of every check your business issues. Here is the complete process from issuance to clearance.


Step 1: Issue Checks From Your Business Account

You write checks or print them through your accounting software. Each check carries a unique sequential check number pre-printed on the stock. Your accounting software records the check number, payee name, and dollar amount for every check in the batch.


Step 2: Transmit Your Check Issue File to the Bank

After issuing checks, you upload a check issue file to your bank. This file contains one record per check: the check number, dollar amount, and payee name. Most banks accept this file through their online business banking portal. Some accept it via secure file transfer. Some accounting platforms including QuickBooks can generate and transmit this file directly. The issue file must be uploaded before the checks you issued can be presented for payment , typically by the end of the same business day you issue checks, or by the bank's stated cutoff time.


Step 3: Your Check Reaches the Payee

The payee receives your check by mail or in person, endorses it, and deposits it at their bank. This step is identical to a standard check transaction.


Step 4: The Check Is Presented to Your Bank

The payee's bank sends the check through the check clearing system. Your bank receives the presented check with the check number, dollar amount, and payee name from the MICR line and check face.


Step 5: Your Bank Matches the Check Against Your Issue File

This is where positive pay does its work. Your bank's automated system compares the presented check against your issue file. It checks three data points: the check number, the dollar amount, and (if your bank offers payee positive pay) the payee name. If all three match an entry in your file, the check clears automatically. If any field does not match, or if the check number does not appear in your file at all, the bank creates an exception.

Timing matters: Your issue file must reach your bank before the checks you issued are presented for payment. Most businesses upload the issue file the same day they issue checks. If you mail a batch of checks today, upload the issue file today. Checks typically take one to three business days to reach the payee and be deposited, giving you a comfortable window , but only if you upload promptly.


Three Types of Positive Pay

Not all positive pay services work the same way. Banks offer three variations, and understanding which your bank offers determines how you set it up and how much protection you get.


Standard Positive Pay

The most common form. You proactively transmit a check issue file to the bank after each check run. The bank compares presented checks against your file by check number and dollar amount. Any mismatch or unknown check number becomes an exception you must resolve. Standard positive pay is the most automated and lowest-maintenance form once set up, because the daily review only covers exceptions rather than every check.


Reverse Positive Pay

In reverse positive pay, the bank sends you a daily report of all checks presented for payment against your account. You review the list and flag any checks you did not issue or any amounts that are incorrect. The bank then returns flagged checks and pays the rest.

Reverse positive pay places more of the review burden on your team because you review every presented check rather than just exceptions. It is simpler to set up because you do not maintain an issue file. It is appropriate for smaller businesses with lower check volumes or for businesses whose banking setup does not support standard issue file transmission.


Payee Positive Pay

An enhanced version of standard positive pay that adds payee name matching to the check number and amount verification. In standard positive pay, a criminal who alters only the payee name on a real check while keeping the correct amount and check number may pass the match. Payee positive pay catches this scenario by comparing the payee name on the presented check against the payee name in your issue file.

Payee positive pay requires that your issue file include the payee name for every check and that the name on the check face matches your file exactly. This is more demanding to maintain , a payee name with a minor spelling difference between your records and the check face can generate false exceptions. It offers the highest level of protection against payee name fraud when maintained correctly.


What Fraud Positive Pay Prevents

Positive pay targets three specific fraud scenarios that cause significant financial losses for businesses every year.


Altered Checks

A criminal intercepts a legitimate check you issued, changes the payee name or dollar amount, and deposits the modified check. Standard positive pay catches amount alterations because the presented amount does not match your issue file. Payee positive pay also catches payee name alterations. Without positive pay, altered checks can clear before the fraud is discovered, and recovery depends on your bank's fraud investigation process and timing.

Check washing is a particularly common form of alteration fraud. A criminal uses chemical solvents to erase the ink on a real check and rewrites a new payee and amount. Positive pay catches this because the rewritten amount differs from your issue file record. For a full guide on how check washing works and how security-featured check stock resists it, see how QuickBooks checks prevent check washing.

Blue

Counterfeited Checks

A criminal creates a fake check using your business name, routing number, and account number , information visible on any check you write. The counterfeited check has a check number your business never assigned. Positive pay catches this because the check number does not appear in your issue file. The bank flags it as an exception immediately.


Checks Your Business Never Issued

A check appears for payment that your business simply never wrote. This can happen through account information theft, internal fraud, or mistaken routing. Any check number not in your issue file is automatically flagged as an exception regardless of whether the amount and payee look plausible.


How Positive Pay Handles Exceptions

An exception is any check presented for payment that does not match an entry in your issue file. When an exception occurs, your bank notifies you , typically by email or through a banking portal alert , and gives you a decision deadline.


The Exception Decision

You have two choices for each exception: pay or return. If you choose to pay, the bank releases the funds and the check clears. If you choose to return, the bank sends the check back unpaid. Most banks give you until a stated cutoff time on the same business day to make the decision , often 10 AM or 12 PM Eastern. If you do not respond by the cutoff, the bank applies its default decision, which is either pay or return depending on how you configured the service at setup.

Set your default decision carefully: When you enroll in positive pay, your bank will ask for your default exception decision: pay or return. Setting "pay" as your default means unresolved exceptions clear automatically, which defeats much of the protection. Setting "return" as your default means unresolved exceptions are rejected, which protects you but may return legitimate checks if your team misses a deadline. Most businesses with active accounts payable operations set "return" as default and establish a clear internal process for reviewing exceptions daily.


Legitimate Exceptions

Not every exception is fraud. Exceptions also happen when: you forgot to upload the issue file for a check batch, you issued a replacement check with a corrected amount but uploaded the original amount, you made a data entry error in the issue file, or the payee name in your file does not exactly match the name on the check face (in payee positive pay). A well-run positive pay process minimizes legitimate exceptions through consistent issue file uploads and accurate data entry.


How to Set Up Positive Pay With Your Bank

Setting up positive pay involves four steps. The exact process varies by bank, but the sequence is consistent.


Step 1: Contact Your Bank

Call or log into your business banking portal and ask about positive pay for your checking account. Confirm which type is available (standard, reverse, or payee), what the cost is (many banks offer it free), and what file format they require for issue file uploads.


Step 2: Confirm the Issue File Format

Your bank will specify the exact file format they accept for check issue data. Common formats include CSV, fixed-width text, or BAI2. Your accounting software must be able to export check issue data in that format. QuickBooks can export check data that most banks accept with minor formatting. If your software cannot generate the required format automatically, your bank's treasury management team can often provide a spreadsheet template you can fill in manually.


Step 3: Verify Your Check Number Sequence

Positive pay relies on sequential, unique check numbers. Before enrolling, confirm that your current check stock has a clear, consistent sequential numbering starting point, and that your accounting software and physical check supply are synchronized. Any gap or duplication in check numbers creates exceptions from the first day of enrollment. For help confirming your current check number sequence, see the guide on maintaining an accurate check register.


Step 4: Establish Your Internal Upload Process

Positive pay only works if someone uploads the issue file consistently and on time. Establish a clear internal process: who uploads the issue file, when (same day as check issuance), and what happens if that person is unavailable. A missed upload means legitimate checks become exceptions, creating unnecessary work and potential payment delays.


What Check Stock Positive Pay Requires

Positive pay works by reading the MICR line at the bottom of each presented check. The bank's automated system extracts the check number, routing number, and account number from this line and uses the check number to look up your issue file entry. For positive pay to work accurately, your check stock must meet these requirements.

Blue


ABA-Compliant MICR Encoding

The routing number in your MICR line must be ABA-compliant and verified against the Federal Reserve E-Payments Routing Directory. An incorrect routing number causes checks to misroute through the clearing system before they even reach your bank's positive pay matching step. Checkomatic verifies every routing number against the Federal Reserve directory before production begins on every order.


Correct Sequential Check Numbers

Every check in your positive pay issue file is identified by its check number. The check number pre-printed on each check must match the check number your accounting software assigns to that payment. Pre-printed check stock from Checkomatic ships with sequential check numbers that sync with QuickBooks and other accounting platforms so your software check number and physical check number stay aligned automatically.


Consistent MICR Line Positioning

Bank reader-sorter machines read MICR lines at a specific position on the check. Off-center or incorrectly positioned MICR fields create read errors that generate false exceptions in your positive pay system. All Checkomatic business checks are manufactured to ABA specification for MICR line position, ensuring reliable automated reading at every bank.


Security Features That Complement Positive Pay

Positive pay is a banking layer of protection. The check stock itself is a physical layer. Using security-featured check stock alongside positive pay gives you two independent lines of defense. If a criminal attempts to alter a check, the chemically sensitive paper resists washing, the microprinting degrades on photocopies, and the void pantograph appears if the check is scanned. If the altered check still reaches the bank, positive pay catches the data mismatch. Both layers working together significantly reduce the probability of a successful fraud attempt.

For all business check formats compatible with positive pay and accounting software, see business checks and QuickBooks checks at Checkomatic.


Who Needs Positive Pay

Positive pay is beneficial for any business that writes checks, but it is particularly important for businesses in these situations.


Businesses That Mail Checks Regularly

Every check that goes into outgoing mail is a potential target. Checks stolen from mailboxes are a primary source of altered check fraud. Positive pay catches alterations when the modified check is presented, providing a second line of defense after the check leaves your hands.


High-Value Accounts Payable Operations

A $50,000 vendor payment that gets altered to $500,000 is a catastrophic loss. High-value payments deserve the extra verification layer that positive pay provides. At larger payment amounts, the cost of a single fraud incident far exceeds years of positive pay maintenance time.


Construction, Property Management, and Nonprofits

These industries see elevated check fraud rates because they typically write large numbers of checks to a diverse set of payees, making it harder to spot an unauthorized check before it clears. Positive pay automates the verification that would otherwise require manual review of every cleared check.


Businesses That Have Experienced Check Fraud Before

A business that has experienced check fraud once is at higher risk of being targeted again. Positive pay removes the vulnerability by making every check traceable to a specific issued record.


Businesses Using Payroll Checks

Payroll checks are particularly attractive fraud targets because they are issued on a predictable schedule, often for similar amounts, and employees receive them directly , making it easier for a criminal to study the check format. Positive pay verifies every payroll check number and amount against your payroll issue file. For the complete guide to payroll check security, see business checks for payroll.


Common Positive Pay Mistakes

Mistake 1: Not Uploading the Issue File on the Same Day

If you issue checks on Monday but do not upload the issue file until Wednesday, checks mailed Monday may have already been deposited and presented for payment. The bank flags them as exceptions because they are not yet in your file. Legitimate checks get held up while you confirm them. Always upload the issue file the same day you issue checks.


Mistake 2: Setting the Default Exception Decision to "Pay"

If your team misses an exception deadline and your default is "pay," the exception clears automatically , including fraudulent checks. Set your default to "return" and establish a process to review exceptions every morning before your bank's cutoff time.


Mistake 3: Inconsistent Check Numbering

Reusing check numbers, skipping numbers, or allowing your software check number and physical check number to fall out of sync creates constant false exceptions. Every check in every batch must have a unique sequential number that matches between your issue file and the physical check. Maintain your check register carefully to track every check number used. See the full guide to check register maintenance.


Mistake 4: Not Enrolling in Payee Positive Pay

Standard positive pay matches check number and amount but not payee name. A criminal who alters only the payee name while keeping the correct amount and check number passes standard positive pay. If your bank offers payee positive pay, the additional protection is worth the extra effort of maintaining accurate payee names in your issue file.


Mistake 5: Using Check Stock With Non-Sequential Numbers

Ordering check stock that does not continue your existing sequential numbering creates immediate confusion in your positive pay system. Always order replacement check stock that picks up your sequential numbering exactly where your current supply ends. For guidance on maintaining check number continuity across reorders, see how to reorder business checks online.


What Customers Say About Checkomatic

All reviews below are published on checkomatic.com and reproduced verbatim. Source: checkomatic.com/quickbooks-starter-pack-product, 4.5 stars from 166 verified reviews.

"Been with them for 15 years. Always reliable, always good quality, good service. What more can you ask for?"

ATV Inc. | ★★★★★ 5/5 | April 5, 2024 | Source: checkomatic.com/quickbooks-starter-pack-product

"ASJ Wilson Construction has been a client of checkomatic for some years now and they've never disappointed this company. Thank you checkomatic for all that you do."

ASJ Wilson Construction | ★★★★★ 5/5 | June 6, 2024 | Source: checkomatic.com/quickbooks-starter-pack-product

"We use CheckoMatic for all of our check needs! They have great prices and we receive our products in a timely manner!"

CG's Tax Service | ★★★★★ 5/5 | September 18, 2024 | Source: checkomatic.com/quickbooks-starter-pack-product

"First time ordering and I am super impressed with the quality of the checks. No issues with delivery. I will be ordering again!"

TClinton | ★★★★★ 5/5 | April 9, 2025 | Source: checkomatic.com/quickbooks-starter-pack-product

"I got 500 checks for less than half of what the bank wanted for 200!"

VVA Voucher Checks (Vietnam Veterans of America) | ★★★★★ 5/5 | July 6, 2024 | Source: checkomatic.com/quickbooks-starter-pack-product

"Affordable and efficient. My go-to business check printer."

Doe | ★★★★★ 5/5 | January 24, 2025 | Source: checkomatic.com/quickbooks-starter-pack-product


Why Choose Checkomatic for Positive Pay Compatible Business Checks

ABA-Verified MICR on Every Order

Every routing number is verified against the Federal Reserve E-Payments Routing Directory before production begins. Correct MICR encoding is the foundation of positive pay accuracy. Incorrect routing numbers cause misrouting and failed matching before positive pay even runs. Checkomatic's manufacturing process eliminates this risk on every order.


Pre-Printed Sequential Check Numbers

Every Checkomatic business check ships with sequential check numbers pre-printed in the correct MICR field position. Your accounting software check number and physical check number stay synchronized, minimizing the legitimate exceptions that waste your team's time during positive pay reviews.


Formatted to Match Your Accounting Software

Checkomatic business checks are pre-calibrated to match QuickBooks, Sage, MYOB, Xero, and over 500 other accounting platforms. This matters for positive pay because your software generates both the physical check and the issue file data. When both use the same check number sequence and formatting, your positive pay data is accurate from the first batch. Browse all formats at computer checks for business.


Six Security Features Standard on Every Check

Positive pay catches data mismatches. Security-featured check stock resists physical tampering before mismatches occur. Checkomatic includes chemically sensitive paper, microprinting, void pantograph, UV fluorescent fibers, heat-sensitive ink, and genuine watermark on every business check order at the base price. No security upgrade fee. Two independent fraud defense layers on every check you issue.


In-House Manufacturing Since 1997

All checks manufactured at Checkomatic's own facility in Monroe, NY. No third-party printers. Consistent quality and specification compliance on every order. Standard production ships in 3 to 5 business days. For the complete range, see business checks and QuickBooks checks.


Accepted by the world’s leading banks

Bank of America logo
Capital One logo
Citibank logo
Wells Fargo logo
TD Bank logo
Chase bank logo
;